By Logan Kilpatrick
Julia is a high-level, dynamic, and open-source programming language. It's designed to be as easy to use as Python while remaining as performant as C or C++.
Many early use cases for Julia were in the scientific domains where massive computational processing was and still is required. But as the language has continued to grow, more and more use cases are gaining steam (hint: web development).
If you are totally new to Julia and want to get a handle on the syntax before you dive into creating your first web application, check out this article on freeCodeCamp.
It goes over the basics, how to install Julia, steps to install packages, and much more!
We will focus this tutorial on all the necessary steps to build your first web application in Julia from the ground up. So let's begin by checking out the Genie website: https://genieframework.com.
What is Genie.jl? 🧐
Genie is a modern and highly productive web framework written in Julia. In the project's own words:
Genie is a full-stack web framework that provides a streamlined and efficient workflow for developing modern web applications. It builds on Julia's strengths (high-level, high-performance, dynamic, JIT-compiled), exposing a rich API and a powerful toolset for productive web development.
Genie is very similar to the Django Project in that Genie is more than a single framework. Instead, it is an entire ecosystem with extensions and the like.
But why do we need Genie? The simple answer is that as Julia continues to grow in popularity, more and more developers are looking to leverage Julia across their entire stack. Genie provides the ability to deploy websites with Julia code running on the server-side so you can do things like deploy machine learning models as part of your Genie app.
Before we dive into getting started with Genie, you might want to check out a live deployed Genie app to get a sense of what is possible: https://pkgs.genieframework.com.
This project is a community resource where you can query the number of package downloads during a certain time frame for a specific package. Type in "genie" to see the number of daily downloads.
You might also be interested in learning more about other GUI and web development frameworks in Julia. To learn more broadly about the ecosystem, check out this article.
How to Install Genie ⤵️
To get Genie installed, all we need to do is open the Julia REPL and type ] add Genie . This will take care of everything you need. If everything works, you should be able to do:
julia> using Genie
without any issues. You are now all set to begin trying out Genie.
How to Map URLs to Julia Functions 🗺
A core part of the Genie framework is the idea of a router. Routers take the user action of visiting a specific URL and associate it with a Julia function being called.
Let's look at a simple example of this. In the REPL, type the following:
julia> using Genie, Genie.Router

julia> route("/hello") do
           "Hello freeCodeCamp"
       end
[GET] /hello => #5 | :get_hello
In this example, we defined the "/hello" URL to return the text "Hello freeCodeCamp". We can verify that this works by starting the server:
julia> up() # start server
┌ Info:
└ Web Server starting at http://127.0.0.1:8000
Genie.AppServer.ServersCollection(Task (runnable) @0x000000011c5c5bb0, nothing)
Now that the server is up and running, we can visit http://127.0.0.1:8000 in our browser. You will notice we get a 404 page, which is expected since the only route we defined was "/hello". So let's add that to the URL and see what we get:
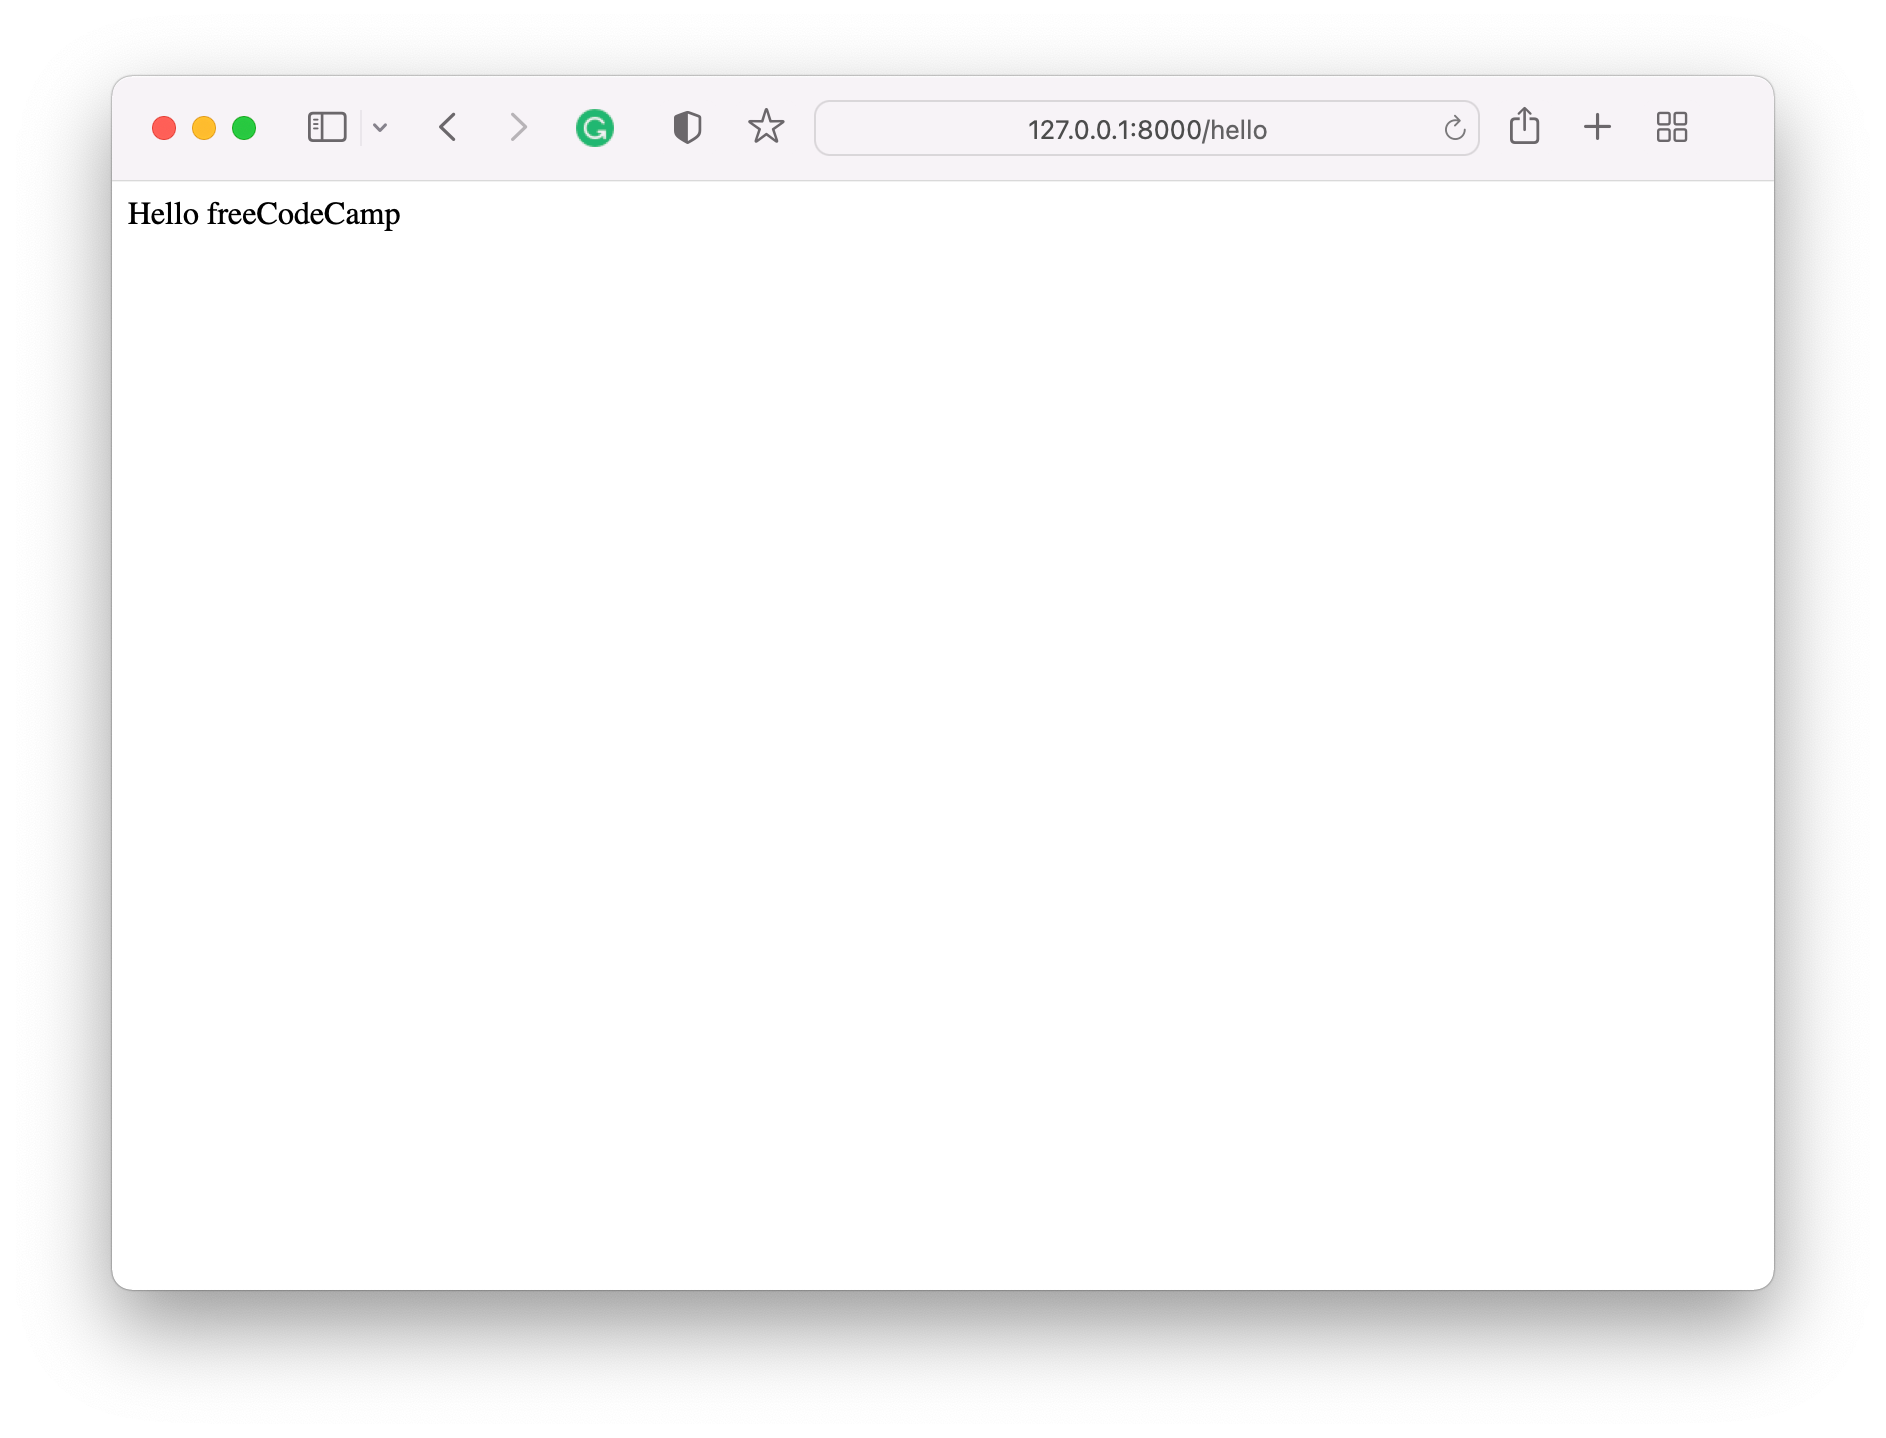
And there we go! Our first step towards building a fully functional web application is complete. We can also confirm that the page is loading correctly by checking the REPL which shows this:
julia> ┌ Error: GET / 404
└ @ Genie.Router ~/.julia/packages/Genie/UxbVJ/src/Router.jl:163
┌ Error: GET /favicon.ico 404
└ @ Genie.Router ~/.julia/packages/Genie/UxbVJ/src/Router.jl:163
[ Info: GET /hello 200
We see the first attempt where the result was a 404 and on the 2nd attempt where we successfully got the response (the 200 message means everything is okay).
Now that we have a basic example working, let's now try and build on this with some more depth.
To do this, we will create a new file. I will be using VS Code but you are welcome to use any IDE you find useful. Before we look at the next piece of code, we need to make sure we shut down the server by typing down() into the REPL.
Okay, onto the next example:
using Genie, Genie.Router
using Genie.Renderer, Genie.Renderer.Html, Genie.Renderer.Json

route("/") do
    html("Hey freeCodeCamp")
end

route("/hello.html") do
  html("Hello freeCodeCamp (in html)")
end

route("/hello.json") do
  json("Hi freeCodeCamp (in json)")
end

route("/hello.txt") do
   respond("Hiya freeCodeCamp (in txt format)", :text)
end

# Launch the server on a specific port, 8002
# Run the task asynchronously
up(8002, async = true)
A lot is going on in this example, so let's walk through what is taking place.
We start by loading in the packages we want. Then, we define 4 different routes. The first one is the index route. So when the user visits http://127.0.0.1:8002 they will see "Hey freeCodeCamp". The routes after the index highlight that each route can give a custom output. In some cases, it can be HTML, in others, it could be JSON or plain text.
The last line of this example showcases the server launching code. As the comment states, we can set the specific port number and choose if we want the routes to run asynchronously or not. We have now successfully created our first Genie Script!
How to Create a Basic Web Service 🕸
Now that we have gotten our hands dirty with the basics, we will now begin to get closer to building a fully-fledged web application.
Before we go all the way there, we are going to take the first step which is creating a basic web service. To do so, we will go into the REPL and switch our current directory to one which is easily accessible. I will use my desktop in this tutorial:
shell> cd Desktop
/Users/logankilpatrick/Desktop
To enter shell mode which is shown above, simply type a ";" into the REPL. Now that we have our active directory set to the desktop in my case, we will use the handy generator function to create the service:
julia> Genie.newapp_webservice("freeCodeCampApp")

[ Info: Done! New app created at /Users/logankilpatrick/Desktop/freeCodeCampApp
[ Info: Changing active directory to /Users/logankilpatrick/Desktop/freeCodeCampApp
    /var/folders/tc/519vfm453fj_x5bmd8pwx9480000gn/T/jl_bO1R8h/FreeCodeCampApp/Project.toml
[ Info: Project.toml has been generated
[ Info: Installing app dependencies
...
The newapp_webservice is a very helpful function that automatically creates all the pieces we need for our first web service. Now that we have a project created, we need to open it up in an IDE (in my case, VS Code). You should see the following if you open up the correct folder:
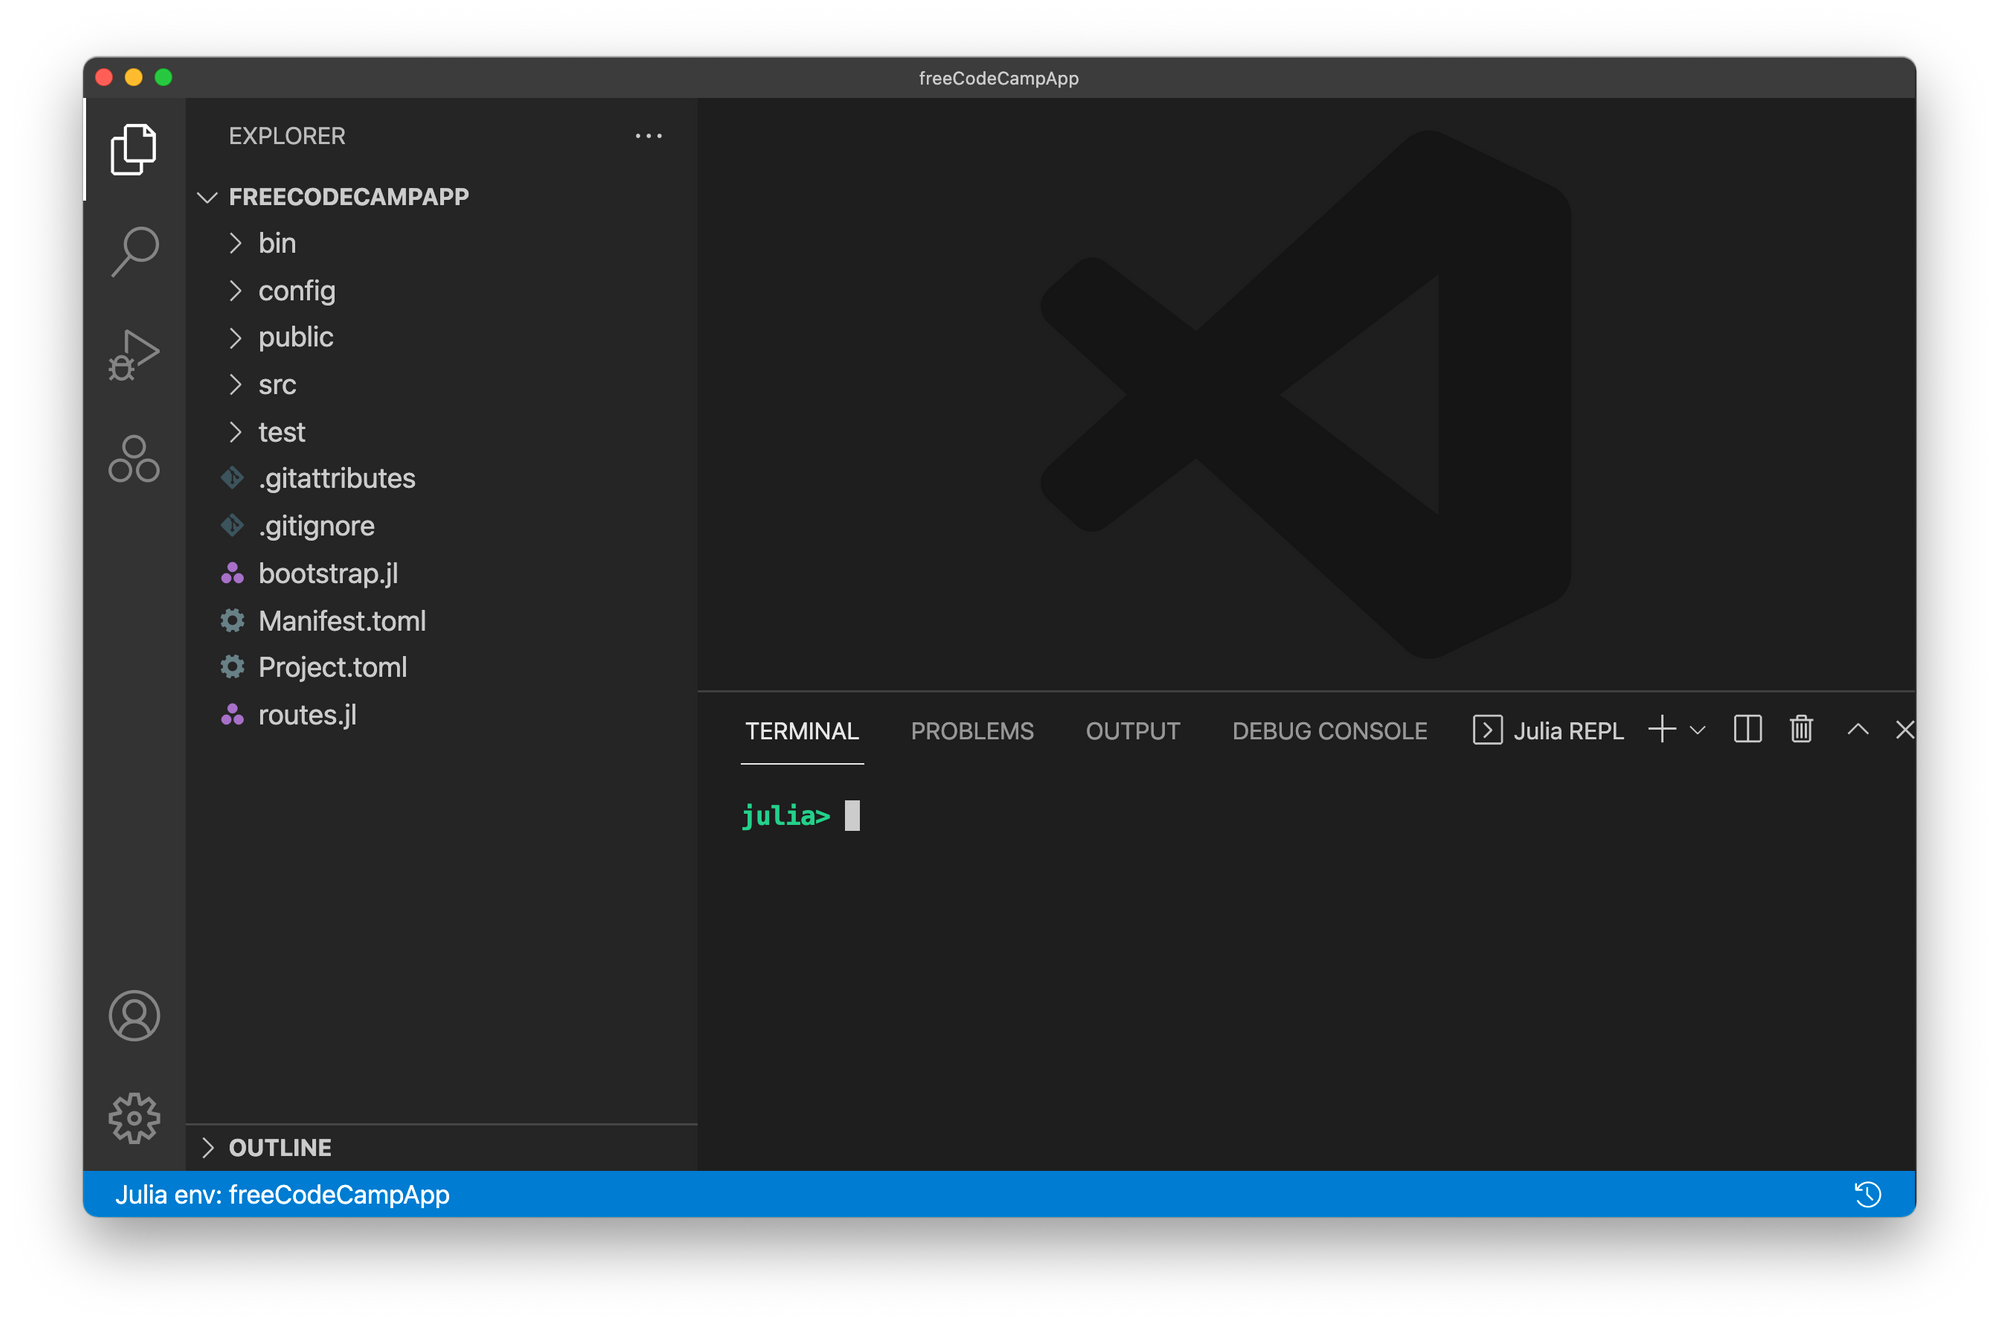
There are a lot of files created for us automatically. The main one we will look at is routes.jl which is used to create routes as we did in the section above.
The function we called to generate these folders automatically starts the server, so let's take a quick look at the existing landing page by visiting http://127.0.0.1:8000:
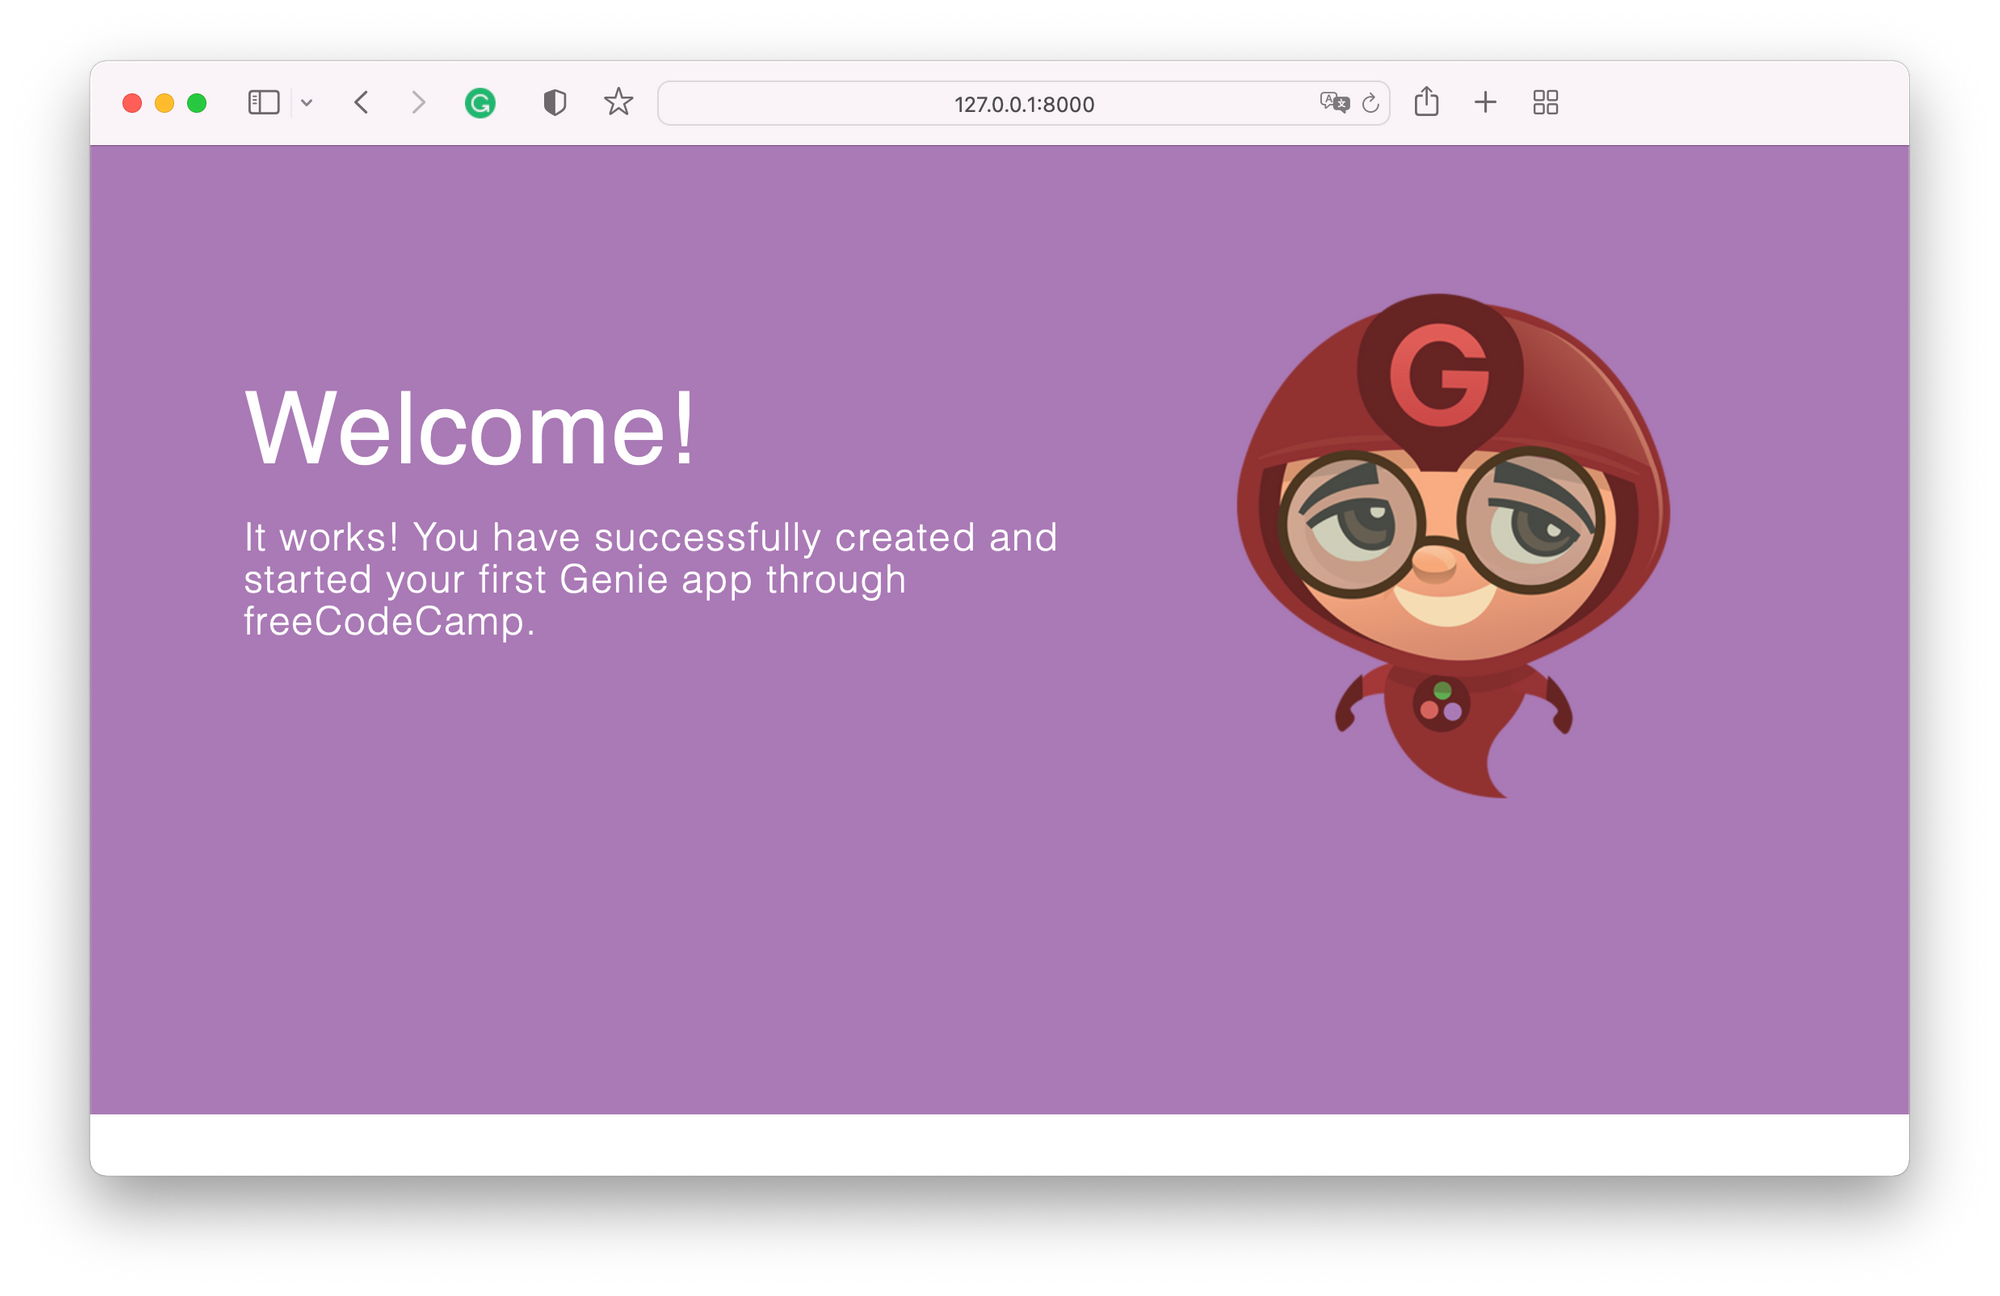
As you might notice, my page looks a little different than yours might because I went in and edited the welcome.html page found in the public folder.
As you can see in routes.jl, when the user visits the main URL /, we route them to the welcome page. We can add in additional routes as we did in the section above and expand this. You are welcome to pause here and play around. We already have a pretty robust website setup.
If you take a peek into some of the other folders like config/env, you will see details around setting the port, host URL, and other relevant parameters. Again, feel free to play around there but we will not go into all the detail of those files in this tutorial.
Before we dive into the next topic, let's take a look at a few more of the files generated for our basic web service:
- The public folder has all of the front end files (HTML and CSS)
- The
srcfolder has the entry point to the web service (in my casefreeCodeCampApp.jl) - bin contains some additional dependencies we will again ignore
- Manifest.toml and Project.toml are the key Julia files that allow us to maintain our Julia dependencies. When you created the web service, the script automatically activated your current project environment (which is the app we just created). You can verify this by typing "]" into the REPL which will show the active space in blue:
This just means that if we try to add a package, it will add it to the project and manifest file specifically for this project, instead of the globally shared one.
How to Create a Fully Functioning Web App With a Database 💽
Now that we have explored the basics, we are going to dive into a full-on web app. Again, Genie provides some nice functions to get us started. Before we create it, we will need to navigate back to the desktop:
shell> pwd
/Users/logankilpatrick/Desktop/freeCodeCampApp

shell> cd ..
/Users/logankilpatrick/Desktop

shell>
Remember, you can type ; to enter the shell mode and backspace to exit the shell mode. Now, let's create the app:
julia> Genie.newapp_mvc(Genie.newapp_mvc("freeCodeCampMVC"))
   Resolving package versions...
   ...
You will be prompted to choose a database backend. For this example, we will use SQLite:
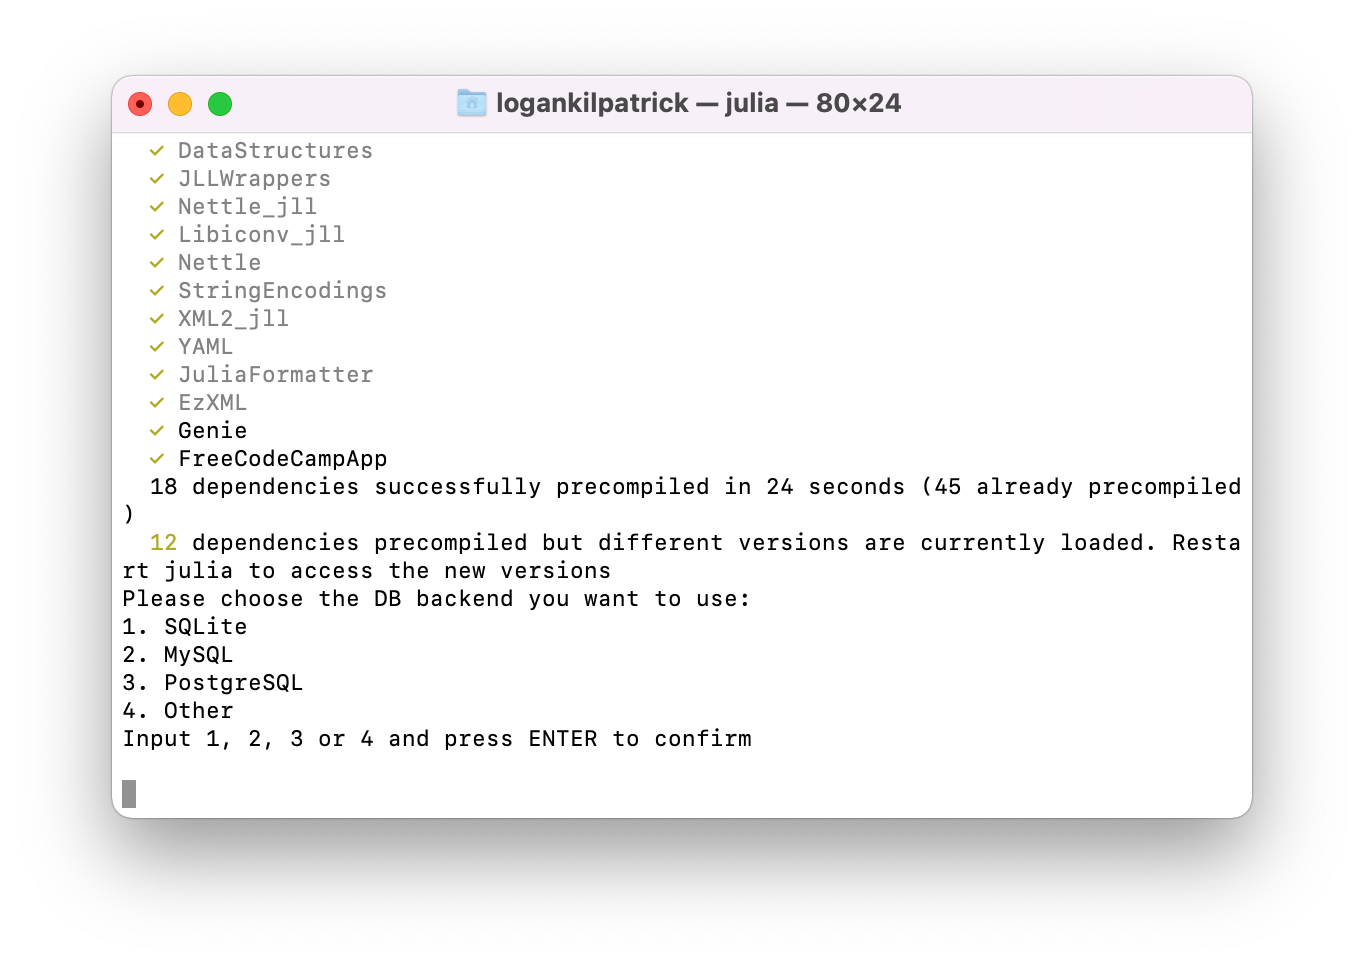
If you want to use a different database backend, feel free to do so as well. But note that you will need to create the database file automatically. Genie only creates an SQLite file for you.
We now have a MVC app created. But you might be asking yourself, what is an MVC?
The Model-View-Controller paradigm is very common across application development. In the interest of not getting into the weeds on it, I will refer you to this post where you can read about the details. From our perspective as developers, there is not much impact.
Just like we did when we created the last project, we need to open it in the IDE again:
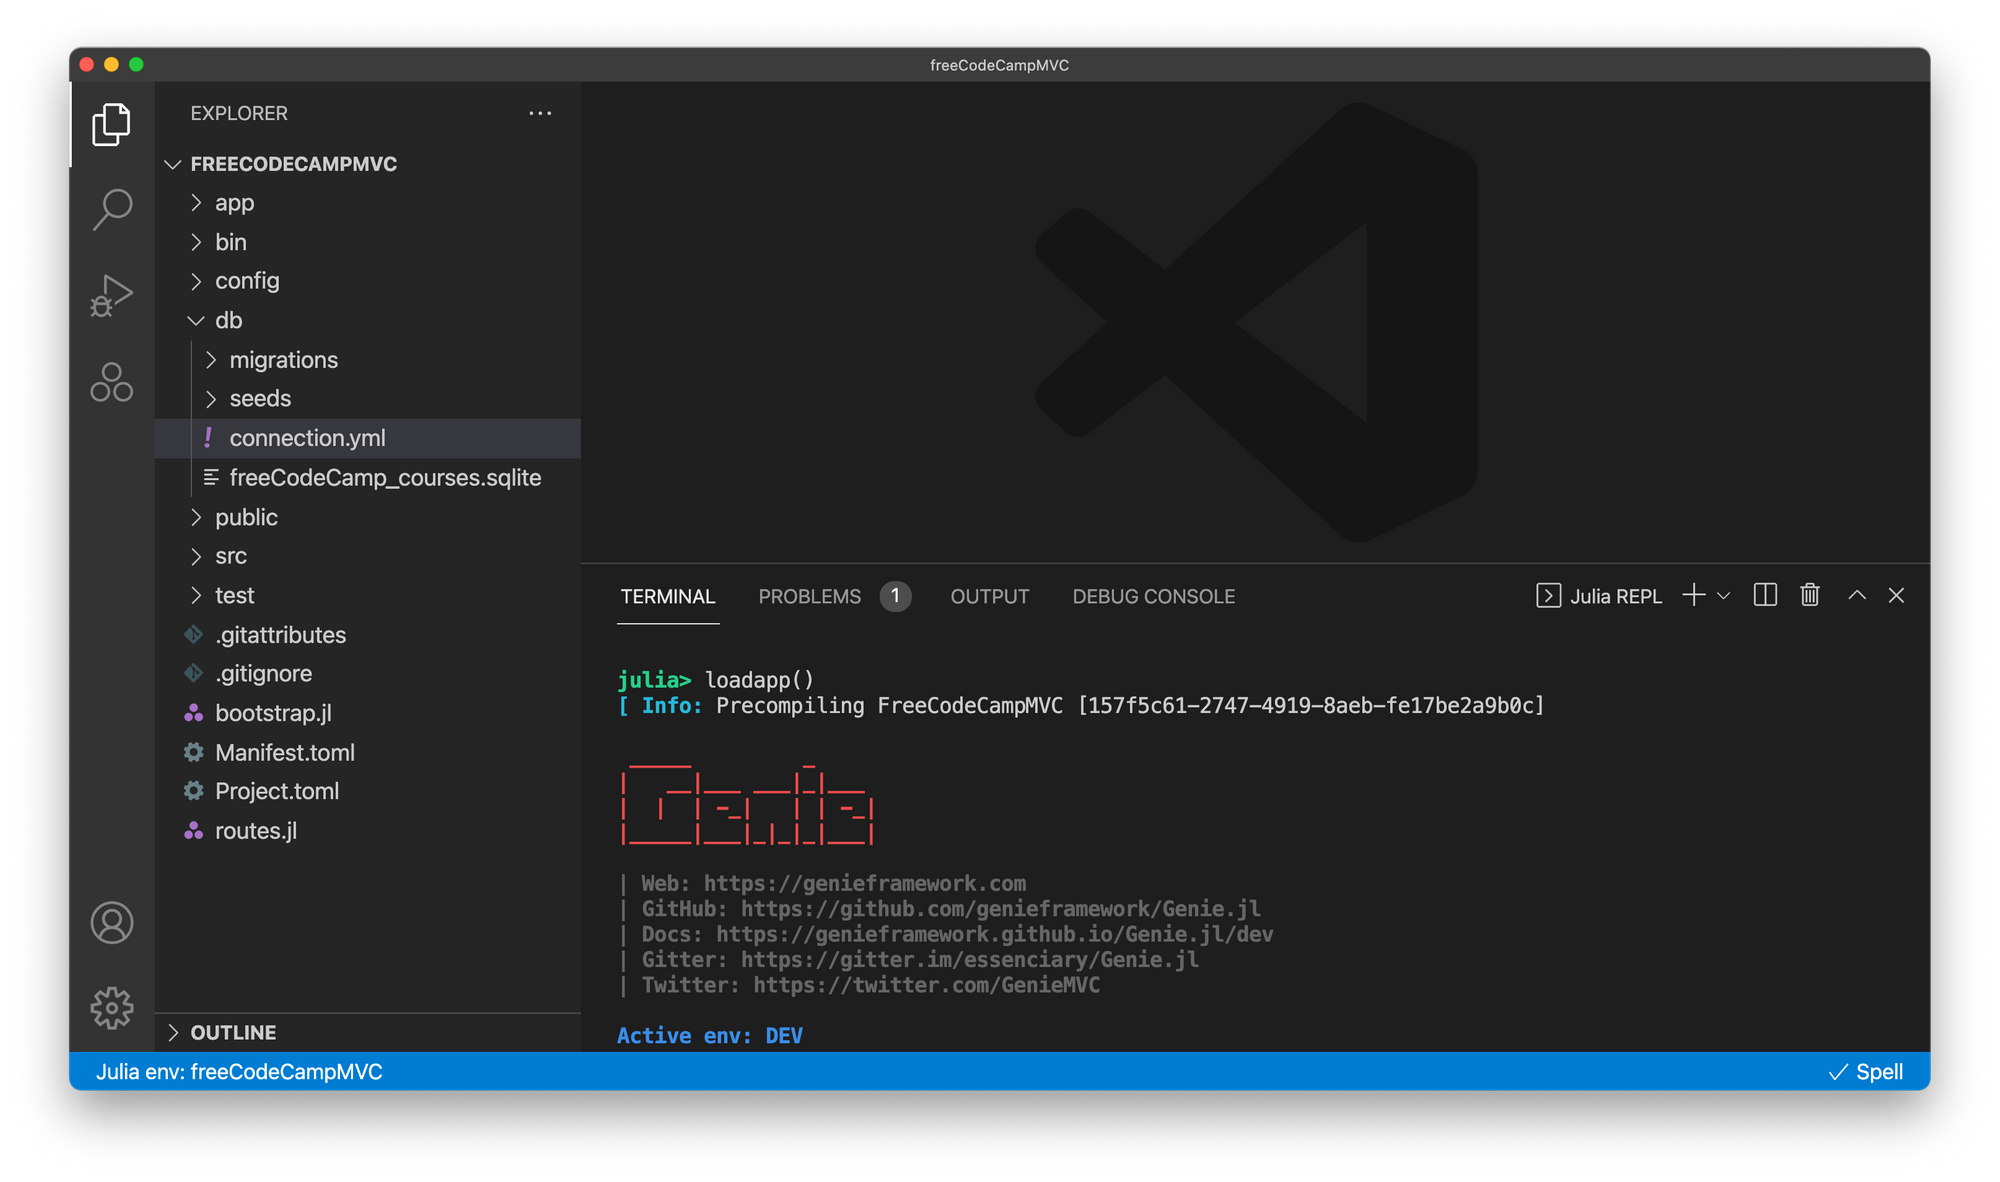
Again, we will see much of the same stuff as before with the new addition of the app folder which will contain a lot of critical code. We can see what the new project looks like by typing:
julia> loadapp()

julia> up()
and then navigating too: http://127.0.0.1:8000.
Next up, we will need to connect our database to the web app we created. To do this, head to db/connection.yml and edit the following section:
env: ENV["GENIE_ENV"]

dev:
  adapter: SQLite
  database: db/freeCodeCamp_courses.sqlite
You can leave the rest of the fields blank for now. Then, we need to run:
julia> include(joinpath("config", "initializers", "searchlight.jl"))
which will load the database configuration. Next up, we will continue to configure the database such that we can save data from our app into persistent storage.
We begin this process by creating a new resource:
julia> Genie.newresource("course")
Once we have defined a resource, the next step is to go and edit the database migrations table which can be found at db/migrations/2022020115190055_create_table_courses.jl in my case.
By default, the table is already populated with some placeholder text based on the last few commands we ran. It should look something like this:
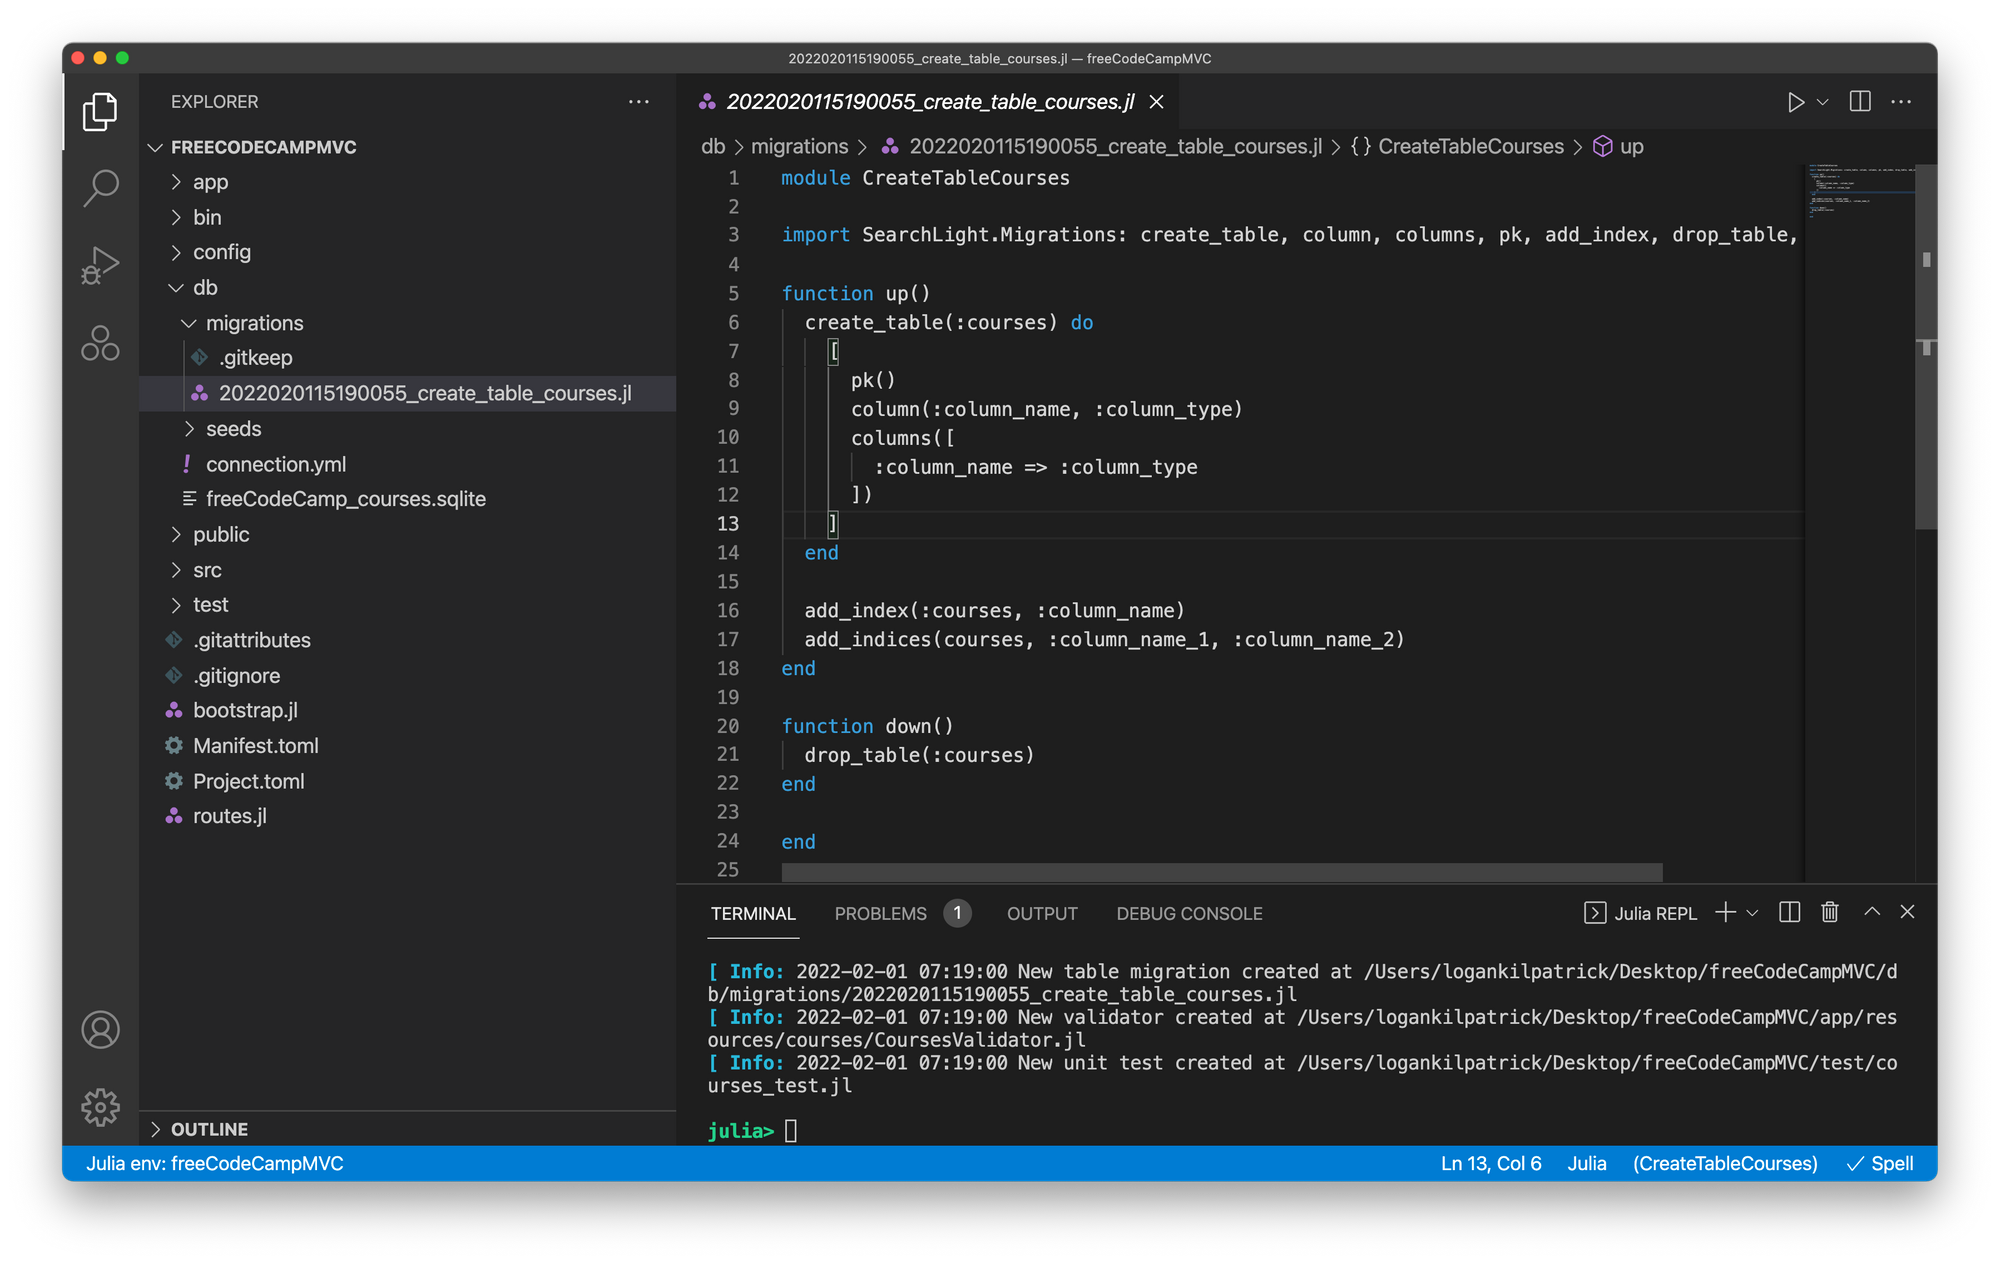
We will edit the file to match the specific scheme we want. This will be entirely dependent on the application itself. Since I am making courses on this site, I will enter all of the course details as follows:
module CreateTableCourses

import SearchLight.Migrations: create_table, column, columns, pk, add_index, drop_table, add_indices

function up()
  create_table(:courses) do
    [
      pk()
      column(:title, :string, limit = 200)
      column(:authors, :string, limit = 250)
      column(:year, :integer, limit = 4)
      column(:rating, :string, limit = 10)
      column(:categories, :string, limit = 100)
      column(:description, :string, limit = 1_000)
      column(:cost, :float, limit = 1000)
    ]
  end

  add_index(:courses, :title)
  add_index(:courses, :authors)
  add_index(:courses, :categories)
  add_index(:courses, :description)

end

function down()
  drop_table(:courses)
end

end
Again, these are arbitrary and can be whatever you want them to be.
It is worth noting that adding the index is optional. The reason you would add it is that it speeds up the queries, but there are other tradeoffs and you can't actually load all the columns as indexes. You can read more about some of these tradeoffs here and here.
Now that we have the database table updated, we need to propagate these updates. To do so, we will use SearchLight.jl which functions as our app's migration system:
julia> using SearchLight

julia> SearchLight.Migration.create_migrations_table()
┌ Info: 2022-02-01 07:37:11 CREATE TABLE `schema_migrations` (
│       `version` varchar(30) NOT NULL DEFAULT '',
│       PRIMARY KEY (`version`)
└     )
[ Info: 2022-02-01 07:37:11 Created table schema_migrations

julia> SearchLight.Migration.status()
[ Info: 2022-02-01 07:37:20 SELECT version FROM schema_migrations ORDER BY version DESC
|   | Module name & status                     |
|   | File name                                |
|---|------------------------------------------|
|   |                 CreateTableCourses: DOWN |
| 1 | 2022020115190055_create_table_courses.jl |

julia> SearchLight.Migration.last_up()
[ Info: 2022-02-01 07:37:29 SELECT version FROM schema_migrations ORDER BY version DESC
[ Info: 2022-02-01 07:37:29 CREATE TABLE courses (id INTEGER PRIMARY KEY , title TEXT  , authors TEXT  , year INTEGER (4) , rating TEXT  , categories TEXT  , description TEXT  , cost FLOAT (1000) )
[ Info: 2022-02-01 07:37:29 CREATE  INDEX courses__idx_title ON courses (title)
[ Info: 2022-02-01 07:37:29 CREATE  INDEX courses__idx_authors ON courses (authors)
[ Info: 2022-02-01 07:37:29 CREATE  INDEX courses__idx_categories ON courses (categories)
[ Info: 2022-02-01 07:37:29 CREATE  INDEX courses__idx_description ON courses (description)
[ Info: 2022-02-01 07:37:29 INSERT INTO schema_migrations VALUES ('2022020115190055')
[ Info: 2022-02-01 07:37:29 Executed migration CreateTableCourses up
We have now successfully completed the migrations. If you were to make a change to the schema, you would need to re-run the commands above for those database changes to take effect.
The last step in this process is to define our model. This will allow us to create objects in Julia code and then save them to the database we just defined. We need to navigate to app/resources/courses/Courses.jl or the equivalent path to make these final updates:
module Courses

import SearchLight: AbstractModel, DbId
import Base: @kwdef

export Course

@kwdef mutable struct Course <: AbstractModel
  id::DbId = DbId()
  title::String = ""
  authors::String = ""
  year::Int = 0
  rating::String = ""
  categories::String = ""
  description::String = ""
  cost::Float64 = 0.0
end

end
Again, this should be the same as the content you previously defined. To make sure this worked, we can do:
julia> using Courses
[ Info: 2022-02-01 07:43:51 Precompiling Courses [top-level]
and then try creating a course via:
julia> c = Course(title = "Web dev with Genie.jl", authors="Logan Kilpatrick")
Course
| KEY                 | VALUE                 |
|---------------------|-----------------------|
| authors::String     | Logan Kilpatrick      |
| categories::String  |                       |
| cost::Float64       | 0.0                   |
| description::String |                       |
| id::DbId            | NULL                  |
| rating::String      |                       |
| title::String       | Web dev with Genie.jl |
| year::Int64         | 0                     |
We have successfully created our first object! But it is not saved to the database right away. We can verify this by doing:
julia> ispersisted(c)
false
so we need to run:
julia> save(c)
[ Info: 2022-02-01 07:47:04 INSERT  INTO courses ("title", "authors", "year", "rating", "categories", "description", "cost") VALUES ('Web dev with Genie.jl', 'Logan Kilpatrick', 0, '', '', '', 0.0)
[ Info: 2022-02-01 07:47:04 ; SELECT CASE WHEN last_insert_rowid() = 0 THEN -1 ELSE last_insert_rowid() END AS LAST_INSERT_ID
true
and now the course is saved! But to really test this out, we need the user to be able to create a course. Let's head back to routes.jl and enable that:
using Genie, Genie.Router, Genie.Renderer.Html, Genie.Requests
using Courses
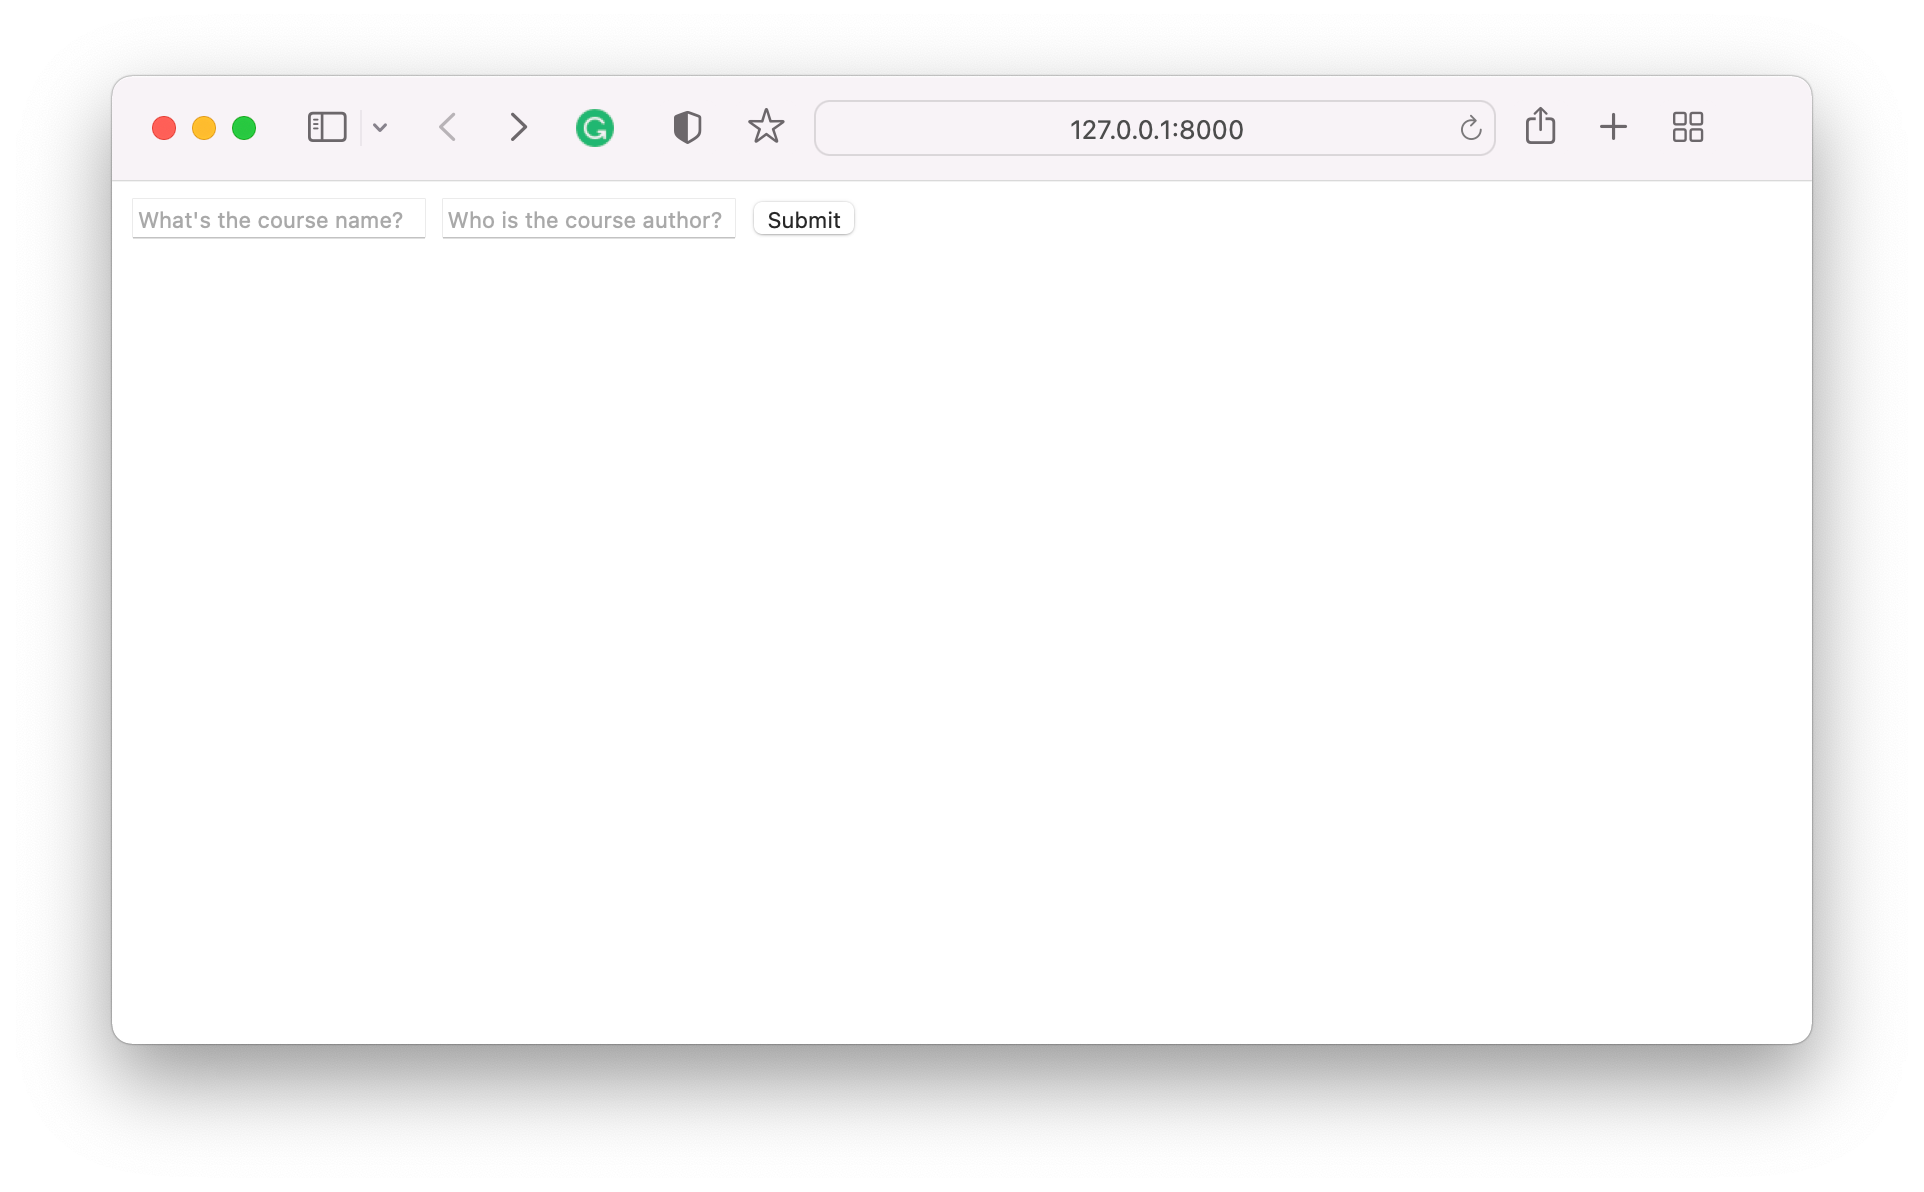
form = """
<form action="/" method="POST" enctype="multipart/form-data">
<input type="text" name="name" value="" placeholder="What's the course name?" />
<input type="text" name="author" value="" placeholder="Who is the course author?" />
<input type="submit" value="Submit" />
</form>
"""
route("/") do
html(form)
end
route("/", method = POST) do
c = Course(title=postpayload(:name, "Placeholder"), authors=postpayload(:author, "Placeholder"))
save(c)
"Course titled $(c.title) created successfully!"
end
We started by defining a simple HTML form (nothing new or exciting here), then, we made it so the default route / renders the HTML form. Lastly, we create another route for the / URL, but specifically for the POST method. Inside that route, we create a new course by pulling the info we want from the form out of the payload via postpayload.
You can try this by navigating back to: http://127.0.0.1:8000
You can try and enter some of the details and then press submit. To make sure the submissions worked, you can do:
julia> all(Course)
[ Info: 2022-02-01 08:10:19 SELECT "courses"."id" AS "courses_id", "courses"."title" AS "courses_title", "courses"."authors" AS "courses_authors", "courses"."year" AS "courses_year", "courses"."rating" AS "courses_rating", "courses"."categories" AS "courses_categories", "courses"."description" AS "courses_description", "courses"."cost" AS "courses_cost" FROM "courses" ORDER BY courses.id ASC
┌ Warning: 2022-02-01 08:10:19 Unsupported SQLite declared type INTEGER (4), falling back to Int64 type
└ @ SQLite ~/.julia/packages/SQLite/aDggE/src/SQLite.jl:416
┌ Warning: 2022-02-01 08:10:19 Unsupported SQLite declared type FLOAT (1000), falling back to Float64 type
└ @ SQLite ~/.julia/packages/SQLite/aDggE/src/SQLite.jl:416
3-element Vector{Course}:
 Course
| KEY                 | VALUE                 |
|---------------------|-----------------------|
| authors::String     | Logan Kilpatrick      |
| categories::String  |                       |
| cost::Float64       | 0.0                   |
| description::String |                       |
| id::DbId            | 1                     |
| rating::String      |                       |
| title::String       | Web dev with Genie.jl |
| year::Int64         | 0                     |

 Course
| KEY                 | VALUE       |
|---------------------|-------------|
| authors::String     | Logan K     |
| categories::String  |             |
| cost::Float64       | 0.0         |
| description::String |             |
| id::DbId            | 2           |
| rating::String      |             |
| title::String       | Test course |
| year::Int64         | 0           |
which should show that the entries were saved in the database.
Wrapping up 🎁
Wow, that was a lot. We covered a tremendous amount of ground in this single tutorial.
With that said, there is even more to learn about Genie. I highly suggest checking out the docs here, which has lots more tutorials on topics like REST API's, Authentication, and much more.
Getting help with Genie.jl 🚨
If you run into issues with this tutorial or when using Genie, please post a question on Stack Overflow with the genie.jl and julia tag or on the Julia Discourse. After that, feel free to tweet the link to the question at me and I will do my best to help: https://twitter.com/OfficialLoganK.