

CI/CD has changed the way IT teams release new software versions.
In this tutorial I'll share my experience with Azure Static Web Apps – Azure's PaaS solution. I'll show you how you can take advantage of its flexibility to deploy an Angular App just by pushing your code to a Git repository.
There’s a lot of literature about CI/CD on the web, and in this article, I want to focus on Azure Web Apps to show you how it can dramatically simplify your workflow.
If you want to know more about CI/CD, Atlassian’s blog has some good info. And here's a helpful in-depth and project-based guide on the subject.
What do we need for this project?
During this tutorial, we'll use the following technologies and tools:
- A GitHub account
- Node.js (you can download it here)
- Npm (Node.js package manager. Included with Node installation.)
- Angular CLI (a command-line interface tool to create, develop and maintain your Angular app. You can download it here.)
- Azure account (you can start for free by creating your account here. Once your free trial expires, have a look at the costs you are incurring. Cloud technologies are very powerful and can make your life easier. But they can be expansive if not well managed.)
If you want to follow along with me during this article and replicate what I’m building, you need to be all set with these tools.
What We'll Build Here – the Big Picture
Let’s see how to create our Angular App and deploy it with Azure Web App. We'll create our Angular app locally and push it to a GitHub repository we specifically create for this project.
The repository will have two branches: “main” and “develop”. We'll create a static web app on Azure and connect it to the “main” branch of the repository.
Back to your machine, edit the code and push it to the “develop” branch. Then you merge the “develop” branch with the “main” one and see the new version of your app online.
Just to be clearer, I think a quick list will help us recap every single step:
- You'll create your Angular app locally with Angular CLI
- You'll push it to a GitHub repository
- You’ll create a static web app on Azure and connect it to the “main” branch of the project’s repository
- You’ll create a “develop” repository
- You’ll edit the app code locally and push it to the “develop” repository
- You’ll create a pull request on your GitHub project from “develop” to “main” and merge it
- You’ll check if the new app version is available on the web app
Step 1 – Create the Angular App Locally
First, let's create a specific directory on your computer and move into it. I’m on Mac, so I'll open my terminal and type:
mkdir angular_azure
cd angular azure
Once there, create your new Angular app called “angular_app”:
ng new angular_app
Angular CLI asks you a few questions:

We want to add Angular router and we also want to use CSS for styling the app. Once you receive positive feedback from Angular CLI, start your app locally to see if everything is working fine:
ng serve —-open
The option “--open” tells Angular CLI that you want to open the application with your default browser. This means that you don’t need to copy and paste the URL into your browser’s address bar. So, this is what you should see:

Looks like everything is working fine. You can stop the application (Ctrl + C) and move to the next step
Step 2 – Push the Angular App to Your GitHub Repository
You should have created a new repository on your GitHub account dedicated to this project. I called mine “angular-app-with-azure”. If you don’t know how to create a new repository, you can read more about that here.
Once the repository is ready, push your Angular app from your machine to your repository. If you don’t add a README file when creating your repo, you should see the instructions on how to push your code directly on your repository page. However, I'll repeat these instructions also here:
git init
git add .
git commit -m "first commit"
git branch -M main
git remote add origin https://github.com/<REPO>.git
git push -u origin main
Once you run these commands successfully, you should see something like this:

Let’s go ahead now.
Step 3 – Time to Switch to Azure
Now you'll create a brand new Azure Static Web App and connect it to your repository. First of all, enter the Azure portal here, and go to your Resource Group. Then you'll see this:
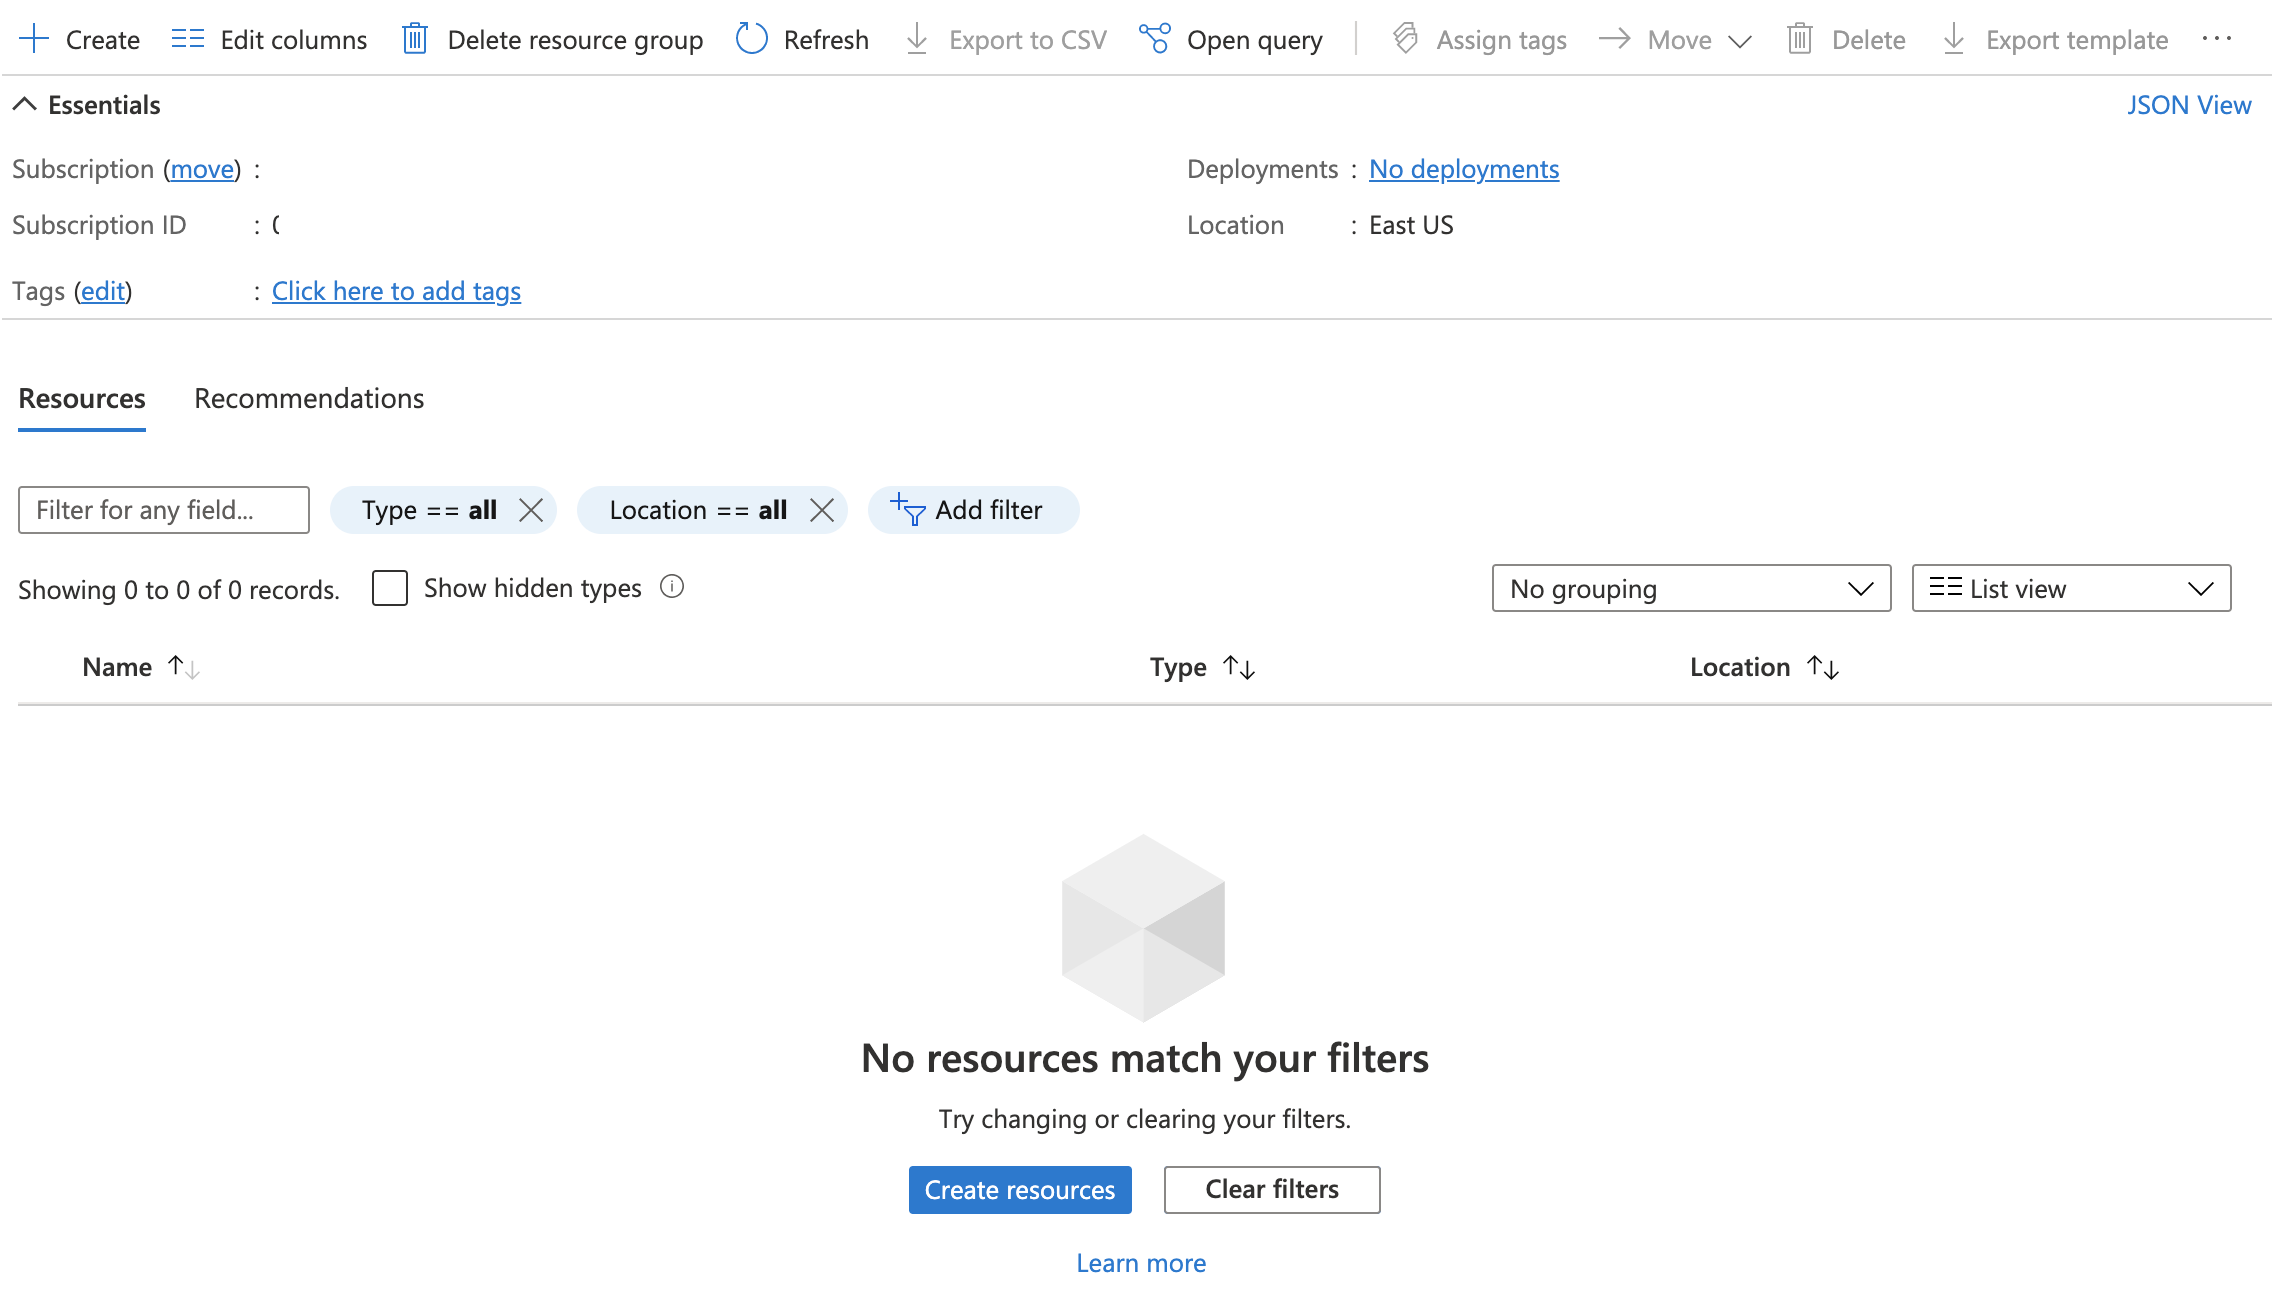
Hit “create” and you'll see the list of resources available on Azure. Filter resources by “Static Web App” and select it.

Then move to Azure’s wizard to create the resource. Let’s see how you should fill it out.
First of all, choose the subscription and resource group. Then go with the Static Web App details: choose the name – “angular-app” – and stick with the Free plan. Then select your region – mine is “Central US”.

Then go ahead with a few more pieces of information:
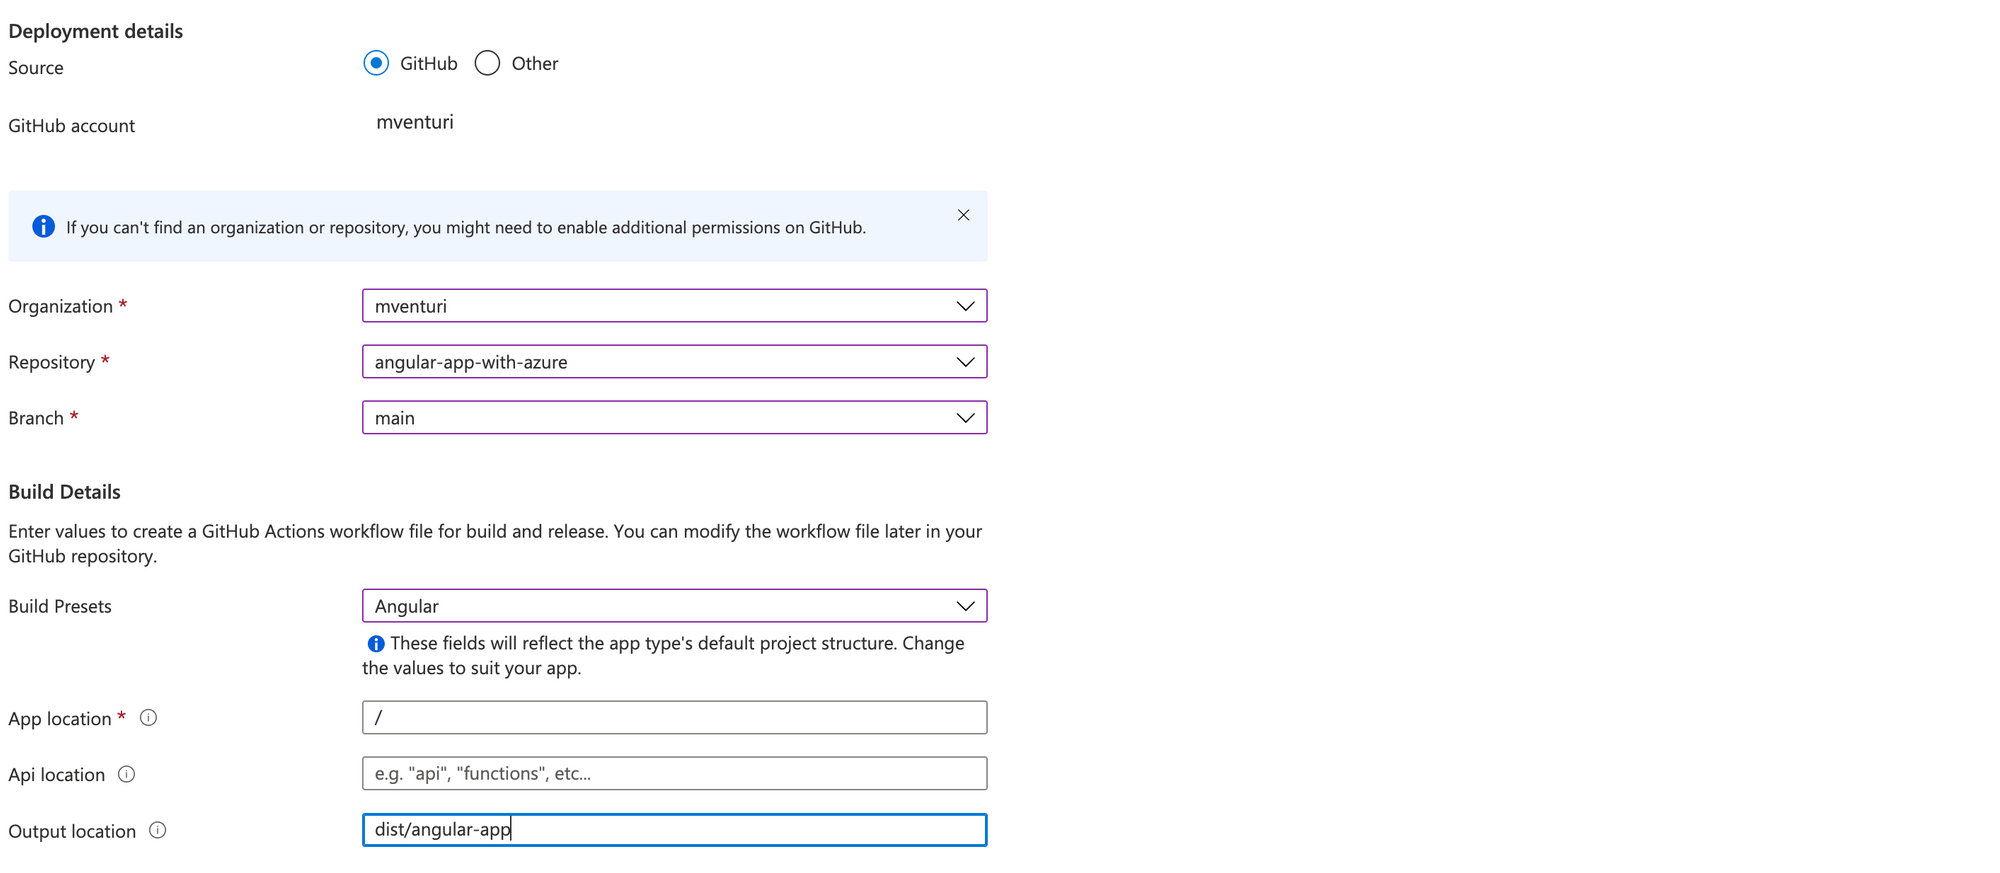
You can synch your GitHub account in the “Deployment Details” section, and then specify the Organization, Repository, and branch you'll get your codebase from.
As I said at the beginning of this tutorial, I choose the “main” branch as the production one.
Now let’s focus on the “Build Details”. You'll choose “Angular” as “Build Presets”, and specify that the App is located at the root directory on “App Location”.
Then you'll type the path of the output location (“dist” directory plus name-of-project directory. In my case, it's “dist/angular-app”. This is where Angular CLI locates the build of your project. I spent a lot of time looking for this info and I think it’s good to share it with you).
So, now you're ready to create your Static Web App. Hit “create” and see what happens. This is the overview of my app:

Next, hit the “URL” link and this is what you should see:

Step 4 – Create a New Branch
So now you'll go back to your codebase locally and create your “develop” branch and check it out:
git checkout -b develop
Then go to:
src/app/app.component.html
Edit the code like this:
<p>Pushed to develop</p>
<router-outlet></router-outlet>
And then push the new branch to the remote repository:
git push origin develop
Step 5 – Time to Merge
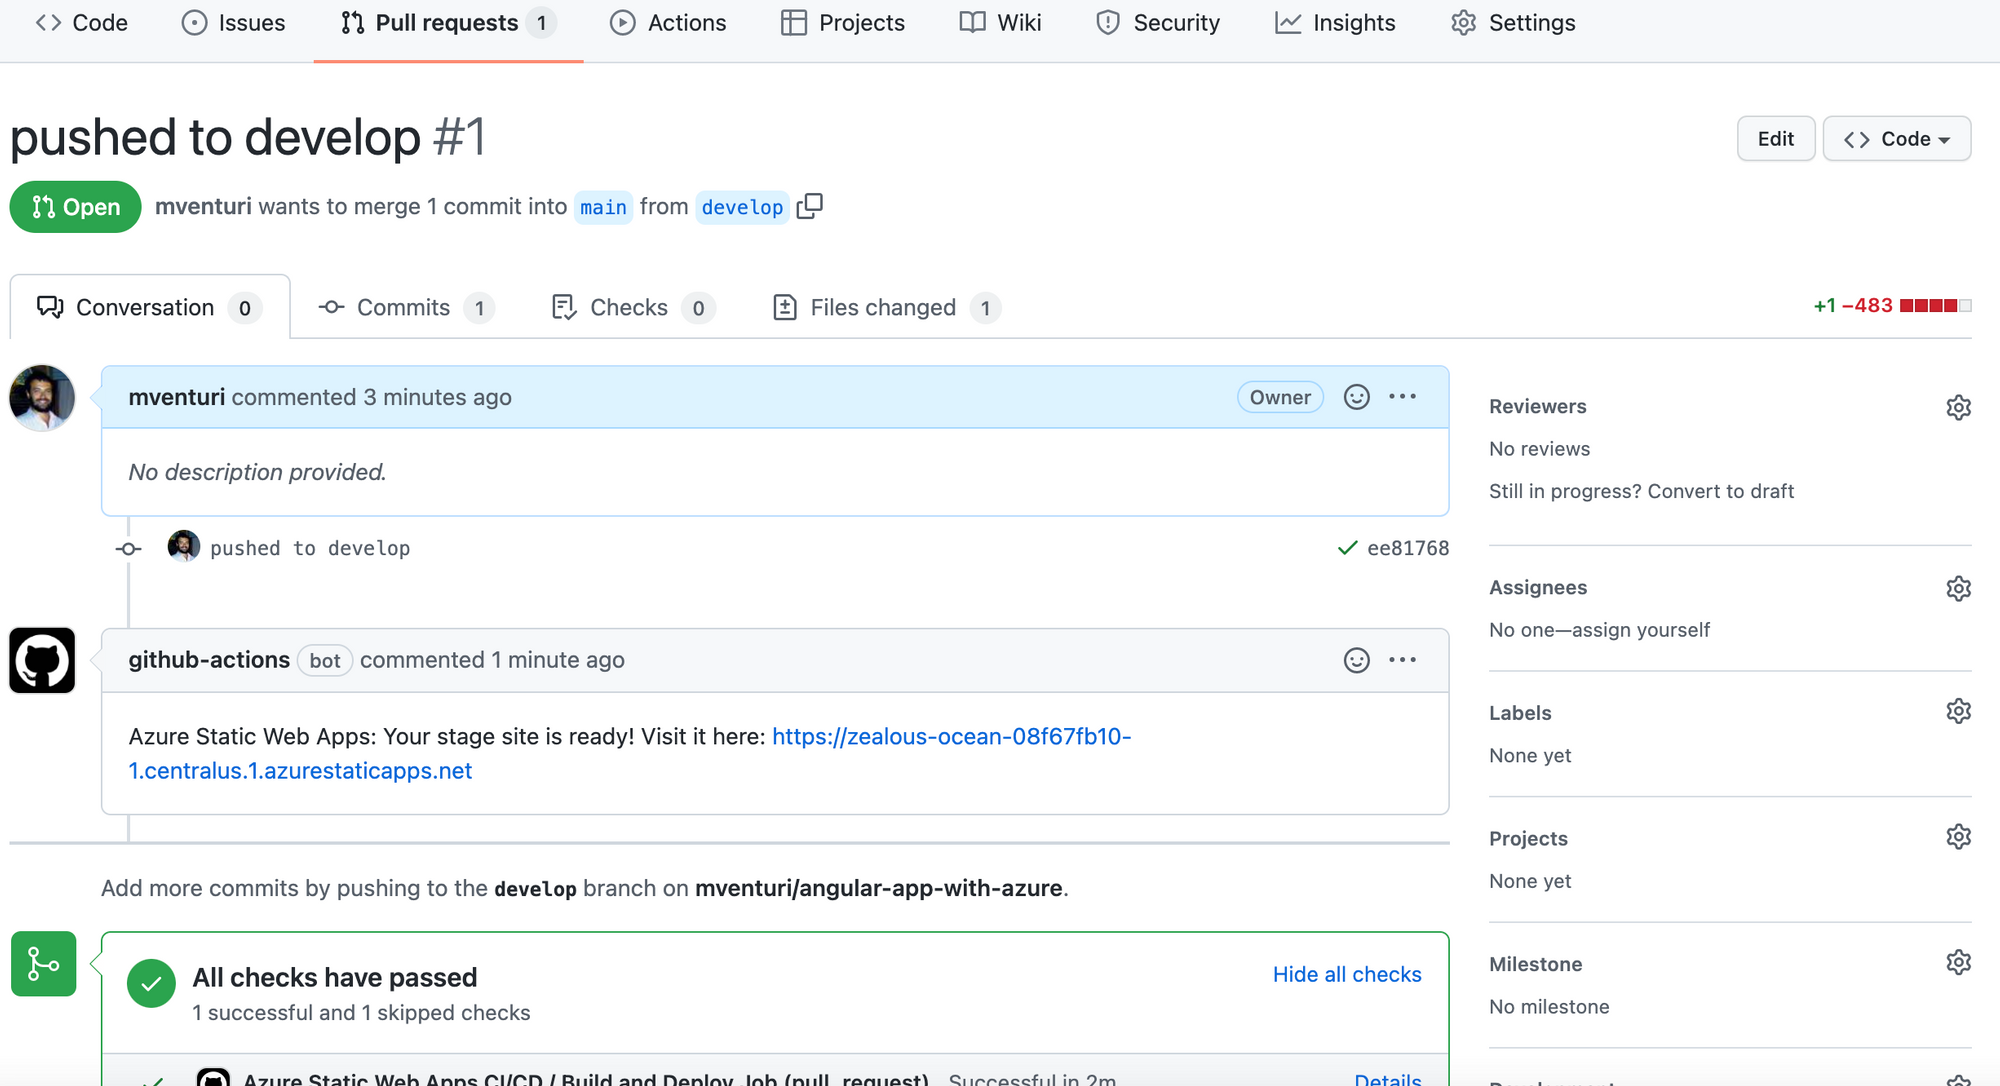
Your angular App is still online with the old version. You need to merge your "develop" branch to "main" to see the changes online.
Create a pull request on GitHub and merge it. This is what you should see at the end:
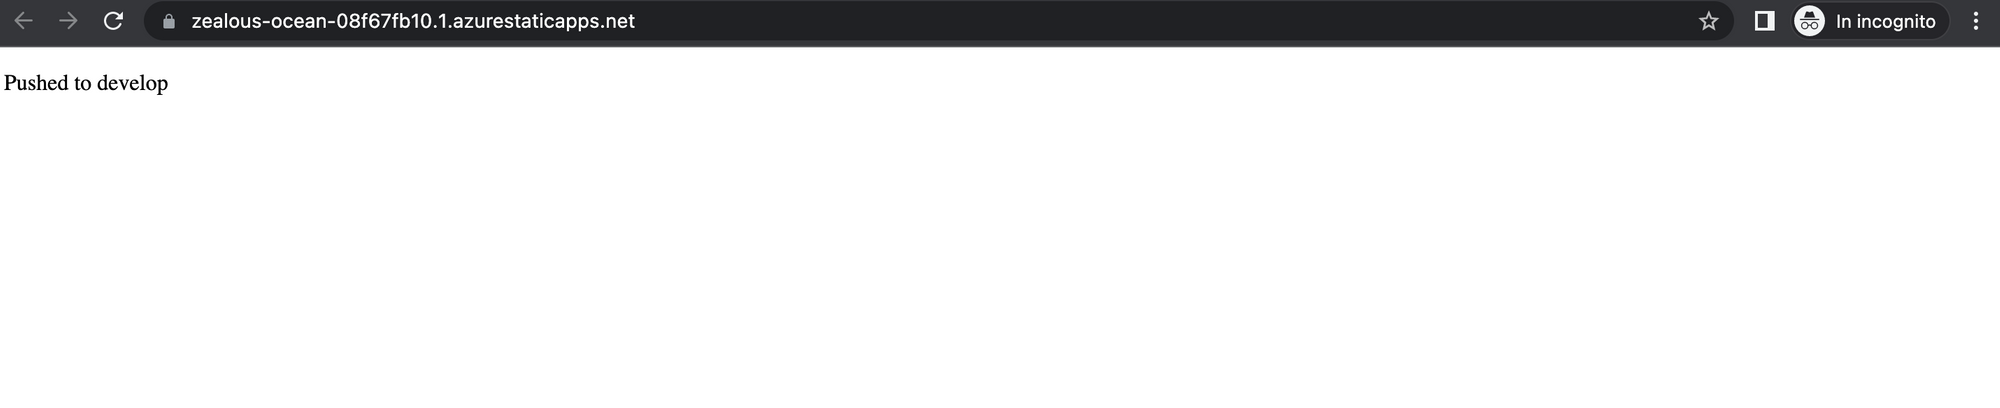
Wait a couple of minutes and then you'll see the new version of your app online:
A Quick Recap and Useful Resources
I hope this tutorial showed you how you can easily deploy your code to a production environment with CI/CD and Azure Static Web App.
While practicing with these technologies, I found a lot of interesting content on the web about them. I thought it would be good for you to have all of them in one place:
- What is Git? A beginner's guide to Git version control
- How to use Git and Git Workflows – a practical guide
- GitHub Actions docs
- Angular docs
- My repo on GitHub
And don't forget... Keep learning, and keep coding!